 IM
IM
This article introduces IM application integration in the Zadig system, using IM capabilities for notifications and approvals. Currently supports Feishu, DingTalk, and WeChat Work integration.
# Feishu
Used for "Manual Approval" and "Notification" tasks in workflows.
Follow these steps to configure Feishu notifications and approvals:
- Create and publish an application on the Feishu Developer Platform
- Configure application credentials in Zadig
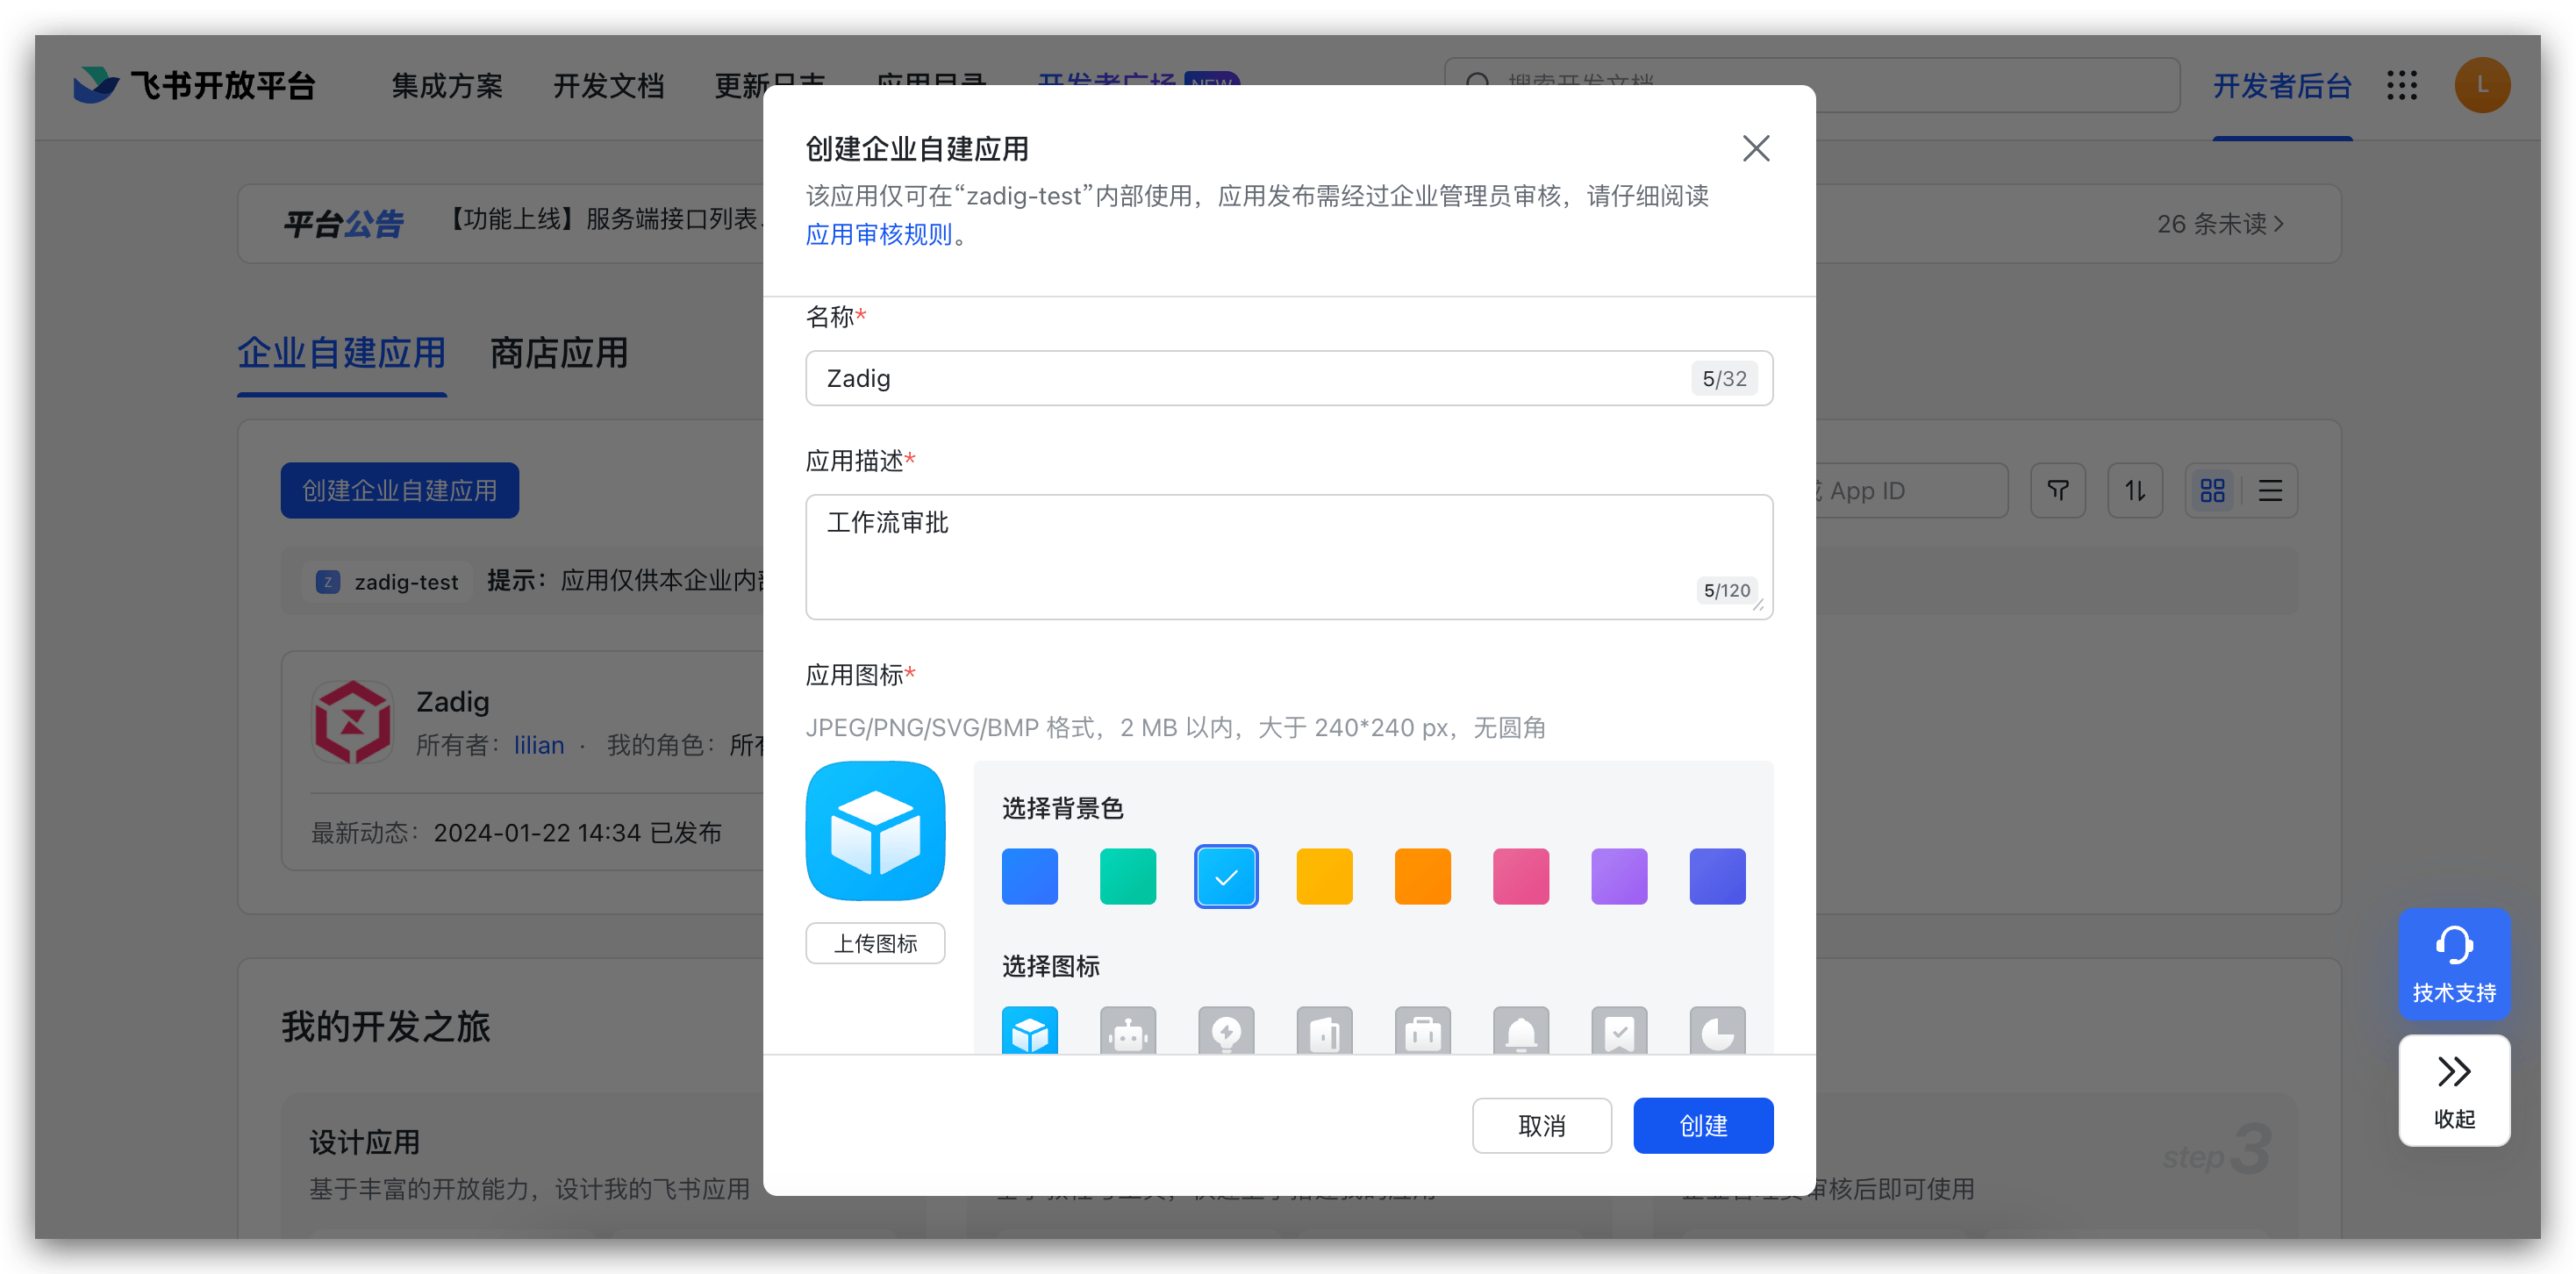
# Step 1: Create a Feishu App
- Visit the Feishu Developer Platform(opens new window) and create an "enterprise self-built application" as shown below.
- In
Permission Management-Data Permission, set the address book permission scope, and inAPI Permission, enable the permissions required for the approval application as shown below.
Zadig workflows support Feishu approvals, and available approvers are related to the address book scope specified here.
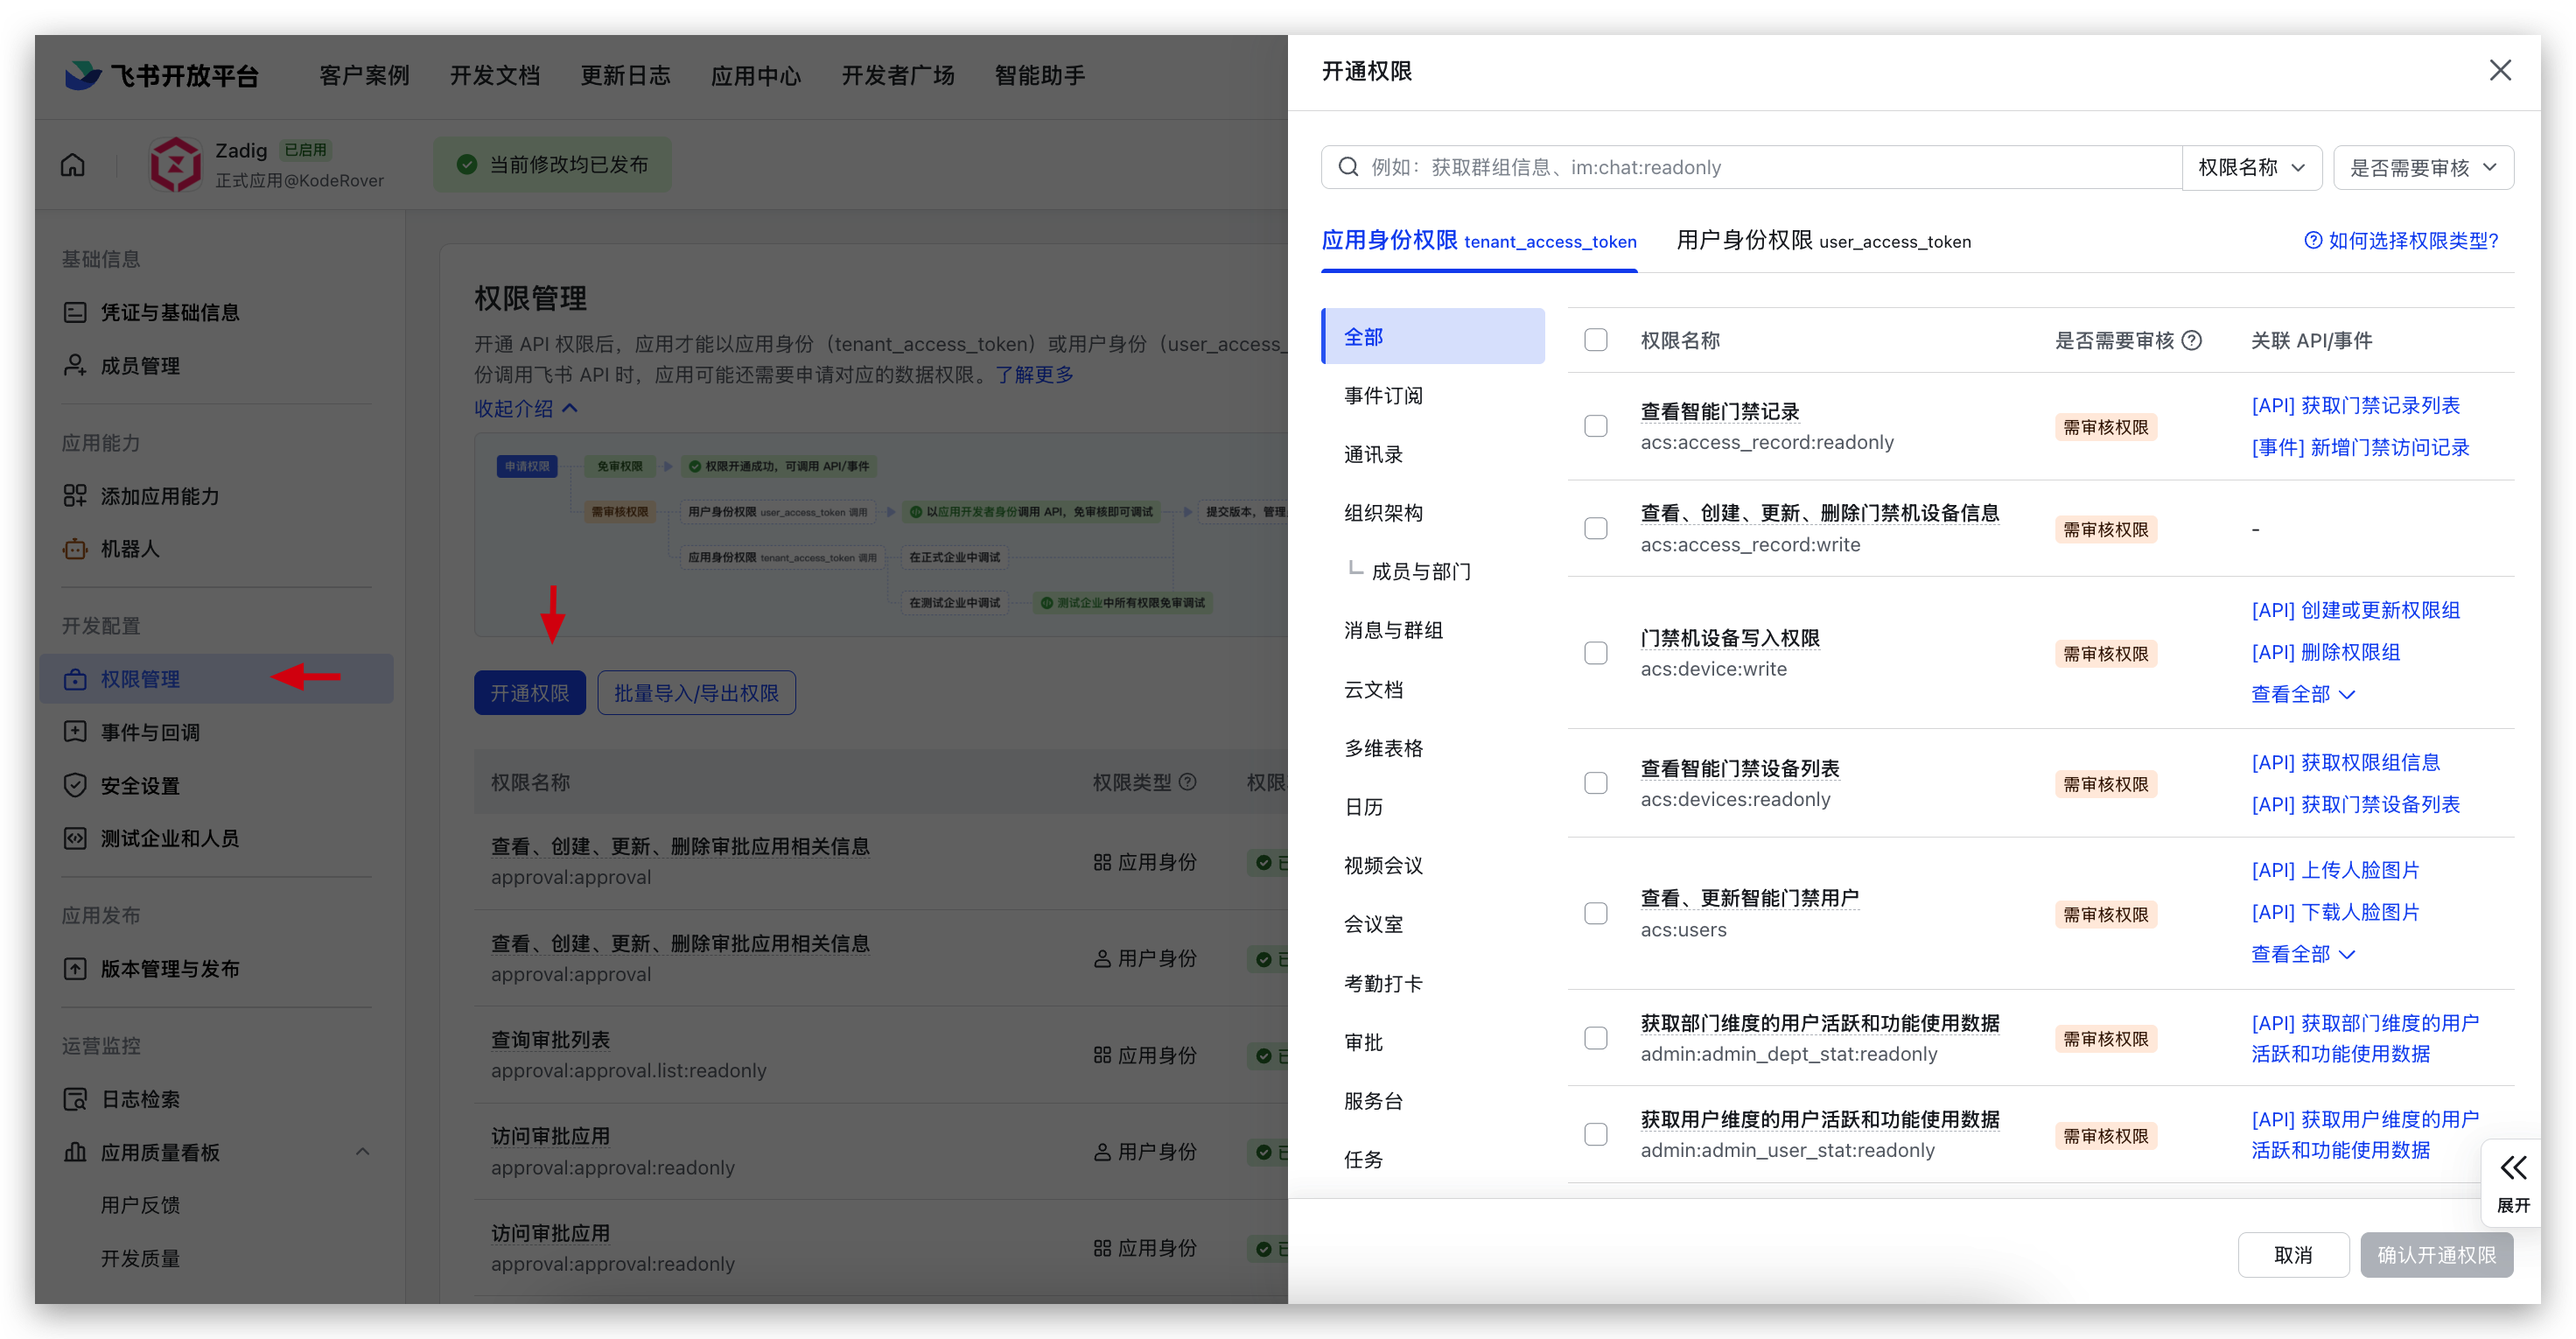
Approval requires these permissions:
approval:approvalapproval:approval.list:readonlyapproval:approval:readonlycontact:user.id:readonlycontact:contact.base:readonlycontact:user.employee_id:readonlycontact:user.base:readonlycontact:department.base:readonlycontact:group:readonly
Notification requires these permissions:
im:chatim:chat:readim:chat:readonlyim:messageim:message:send_as_botim:message:send_multi_deptscontact:user.id:readonlycontact:contact.base:readonlycontact:user.employee_id:readonlycontact:user.base:readonly
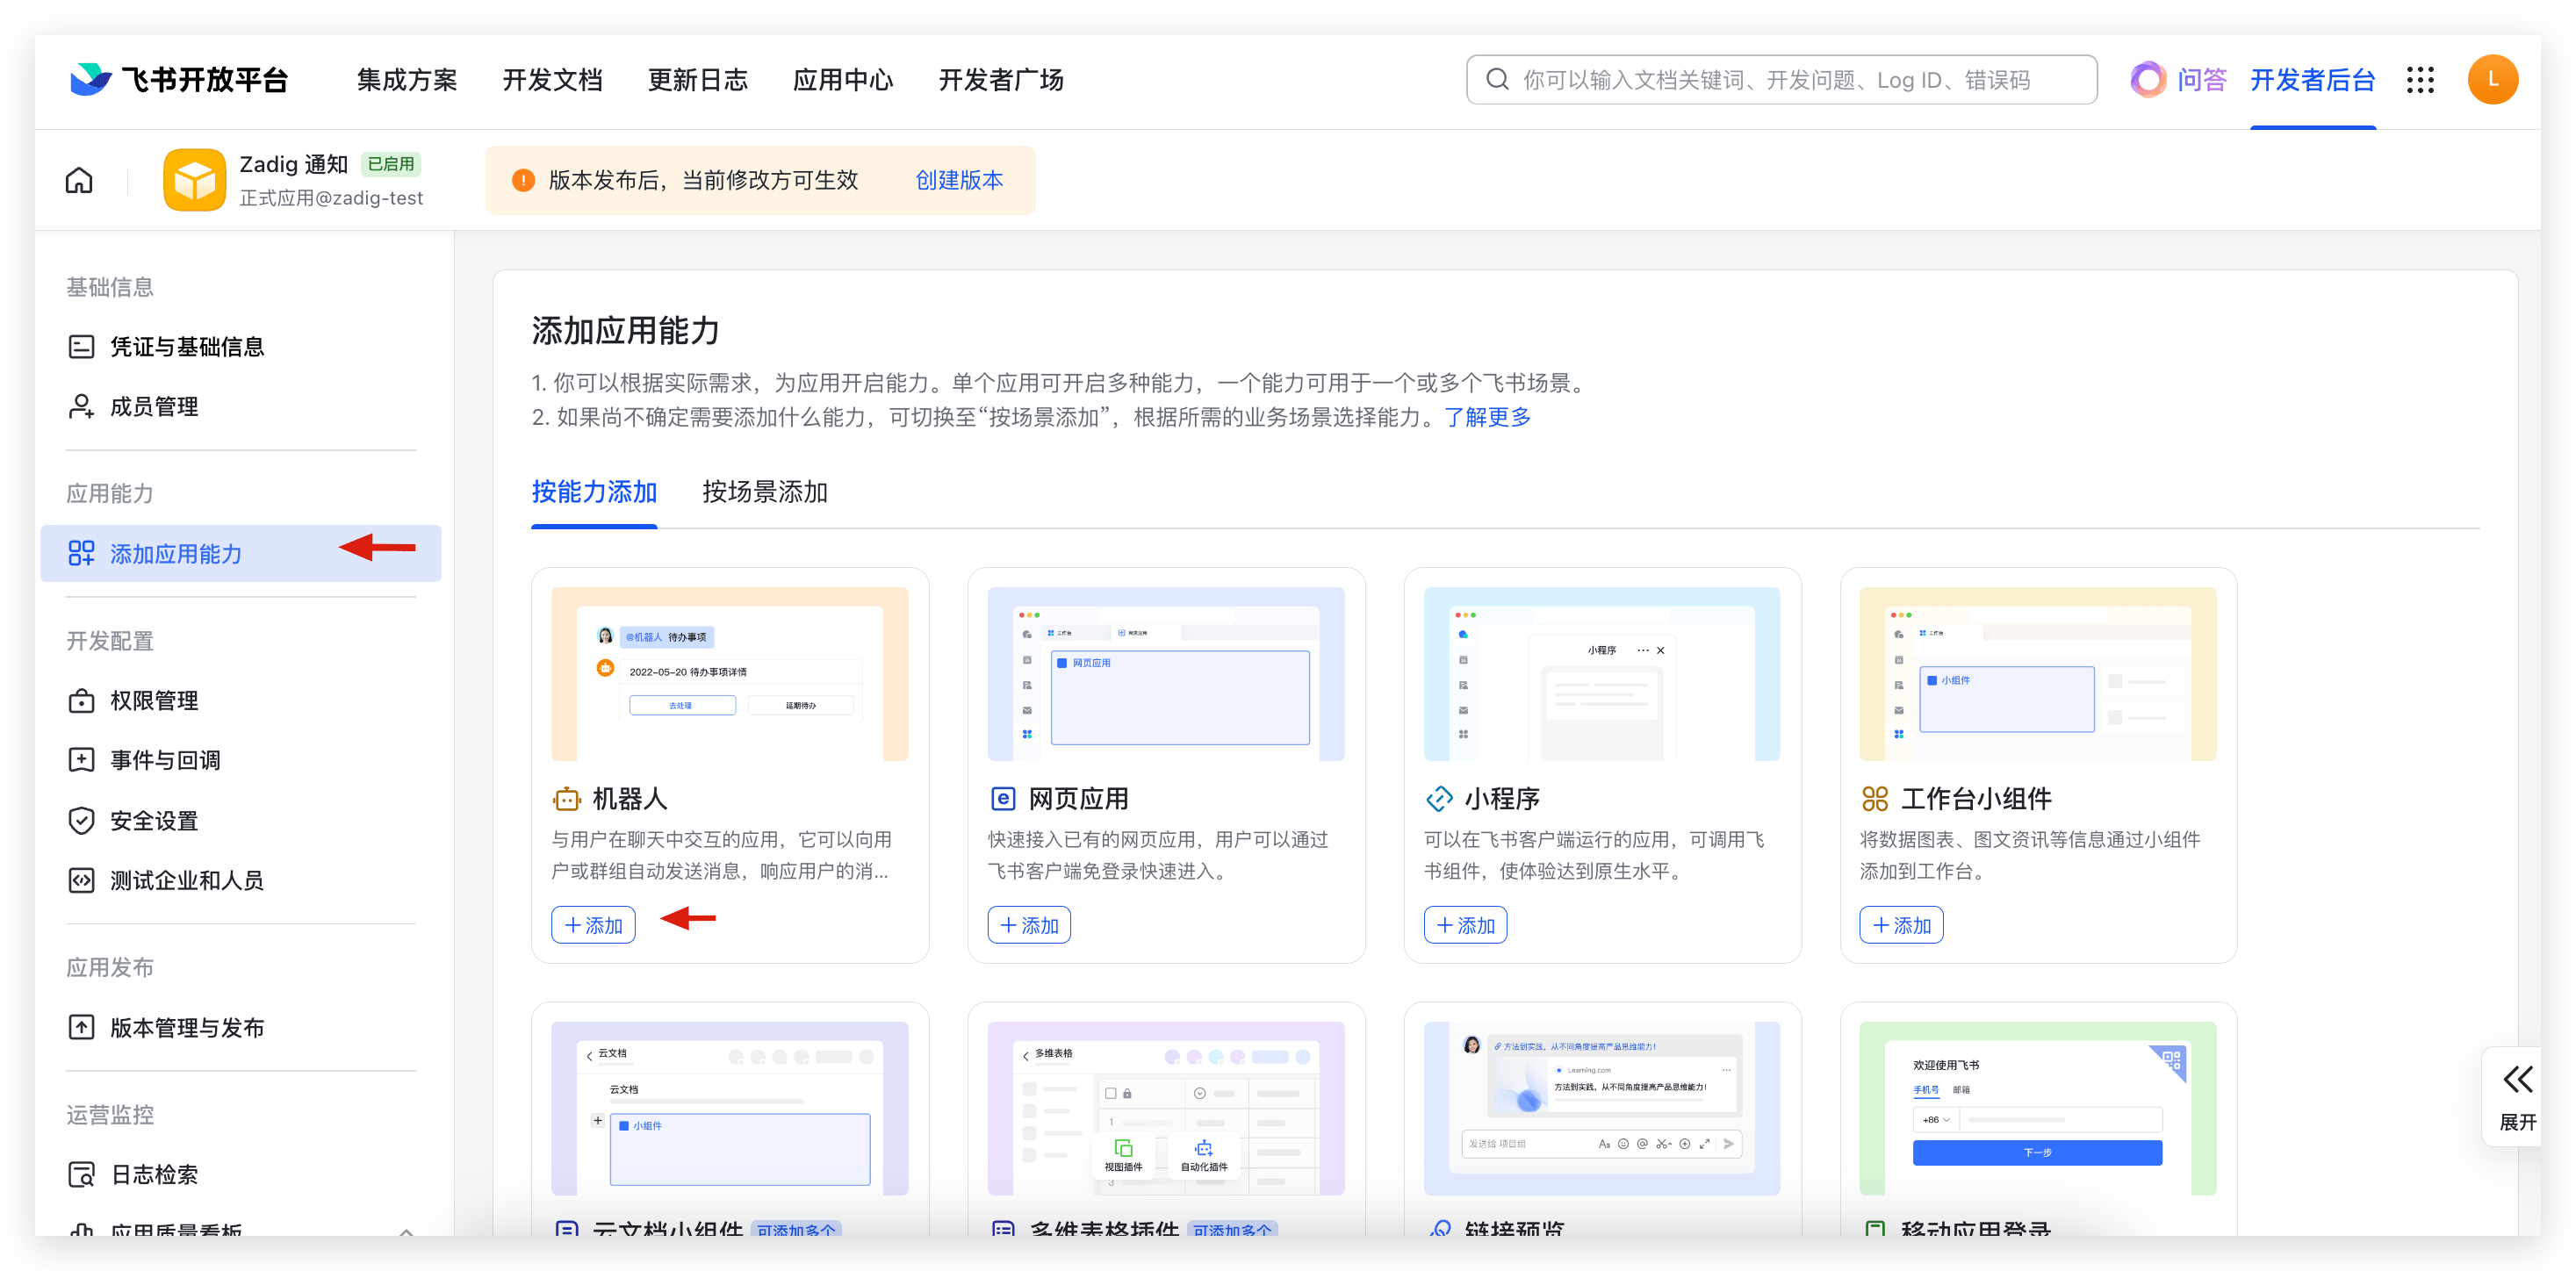
- Add a robot. If "Feishu Group Notification" is configured in the "Notification Task," the robot needs to be added to the corresponding group.
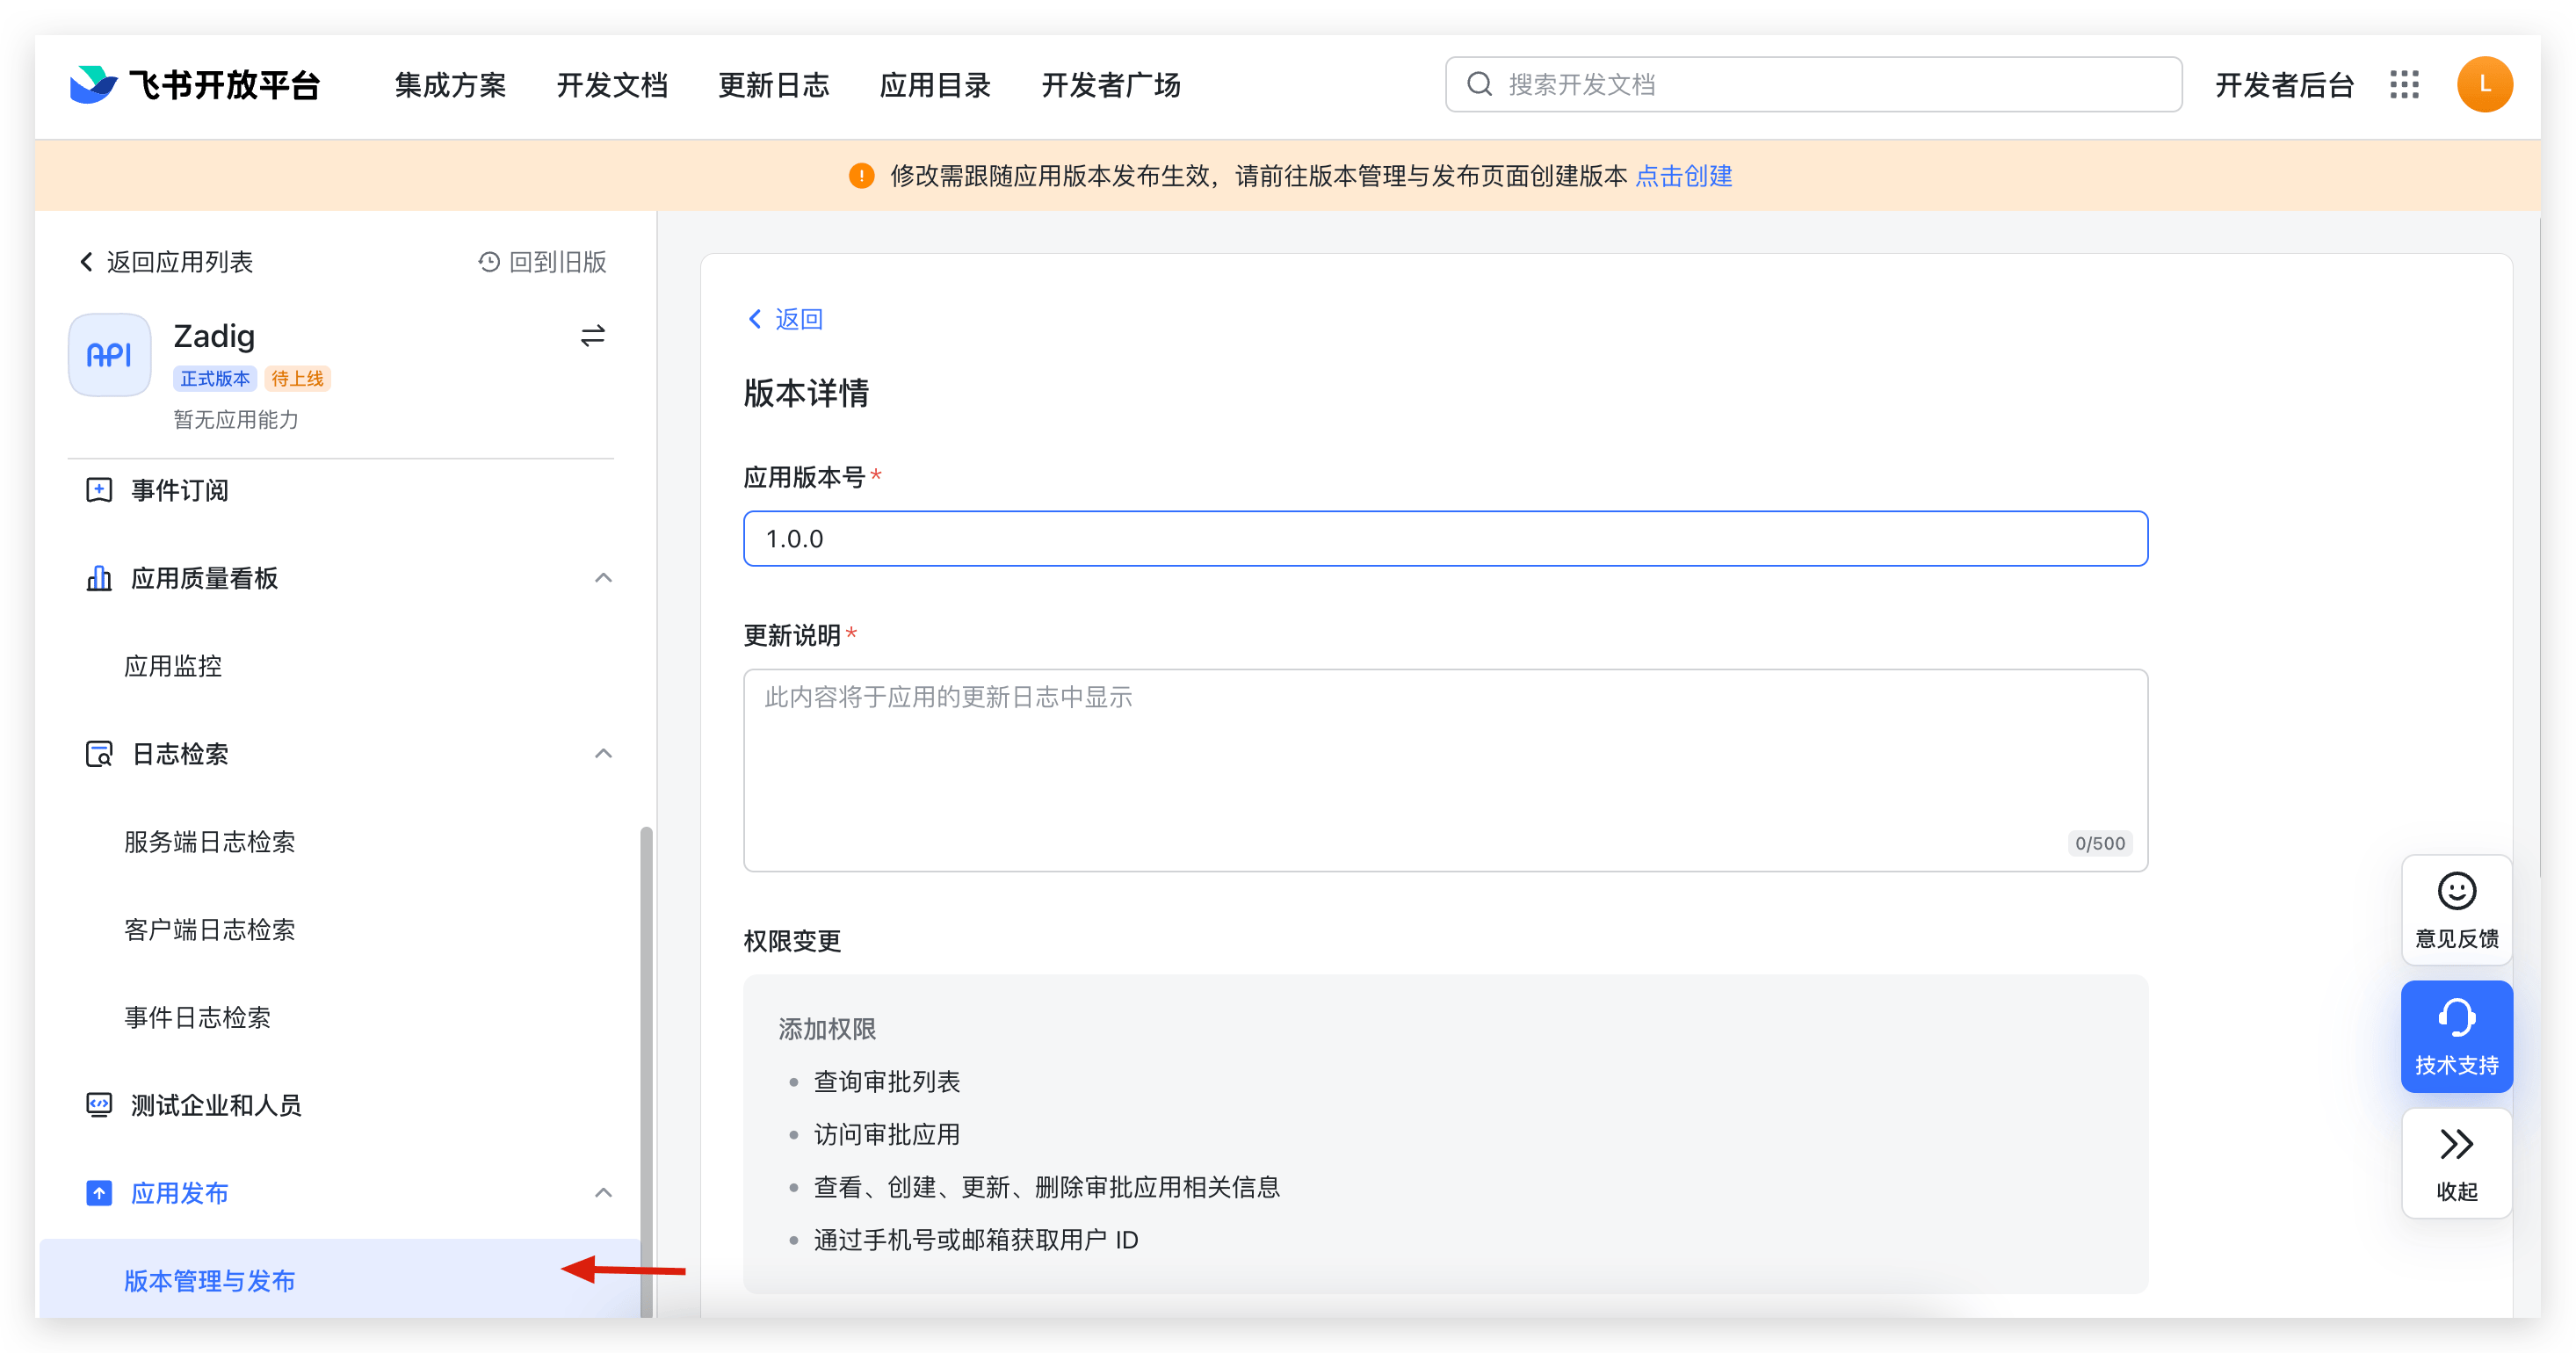
- Create an application version and request publication.
Please configure other required information for the application release process yourself.
- Obtain the
App IDandApp Secret.
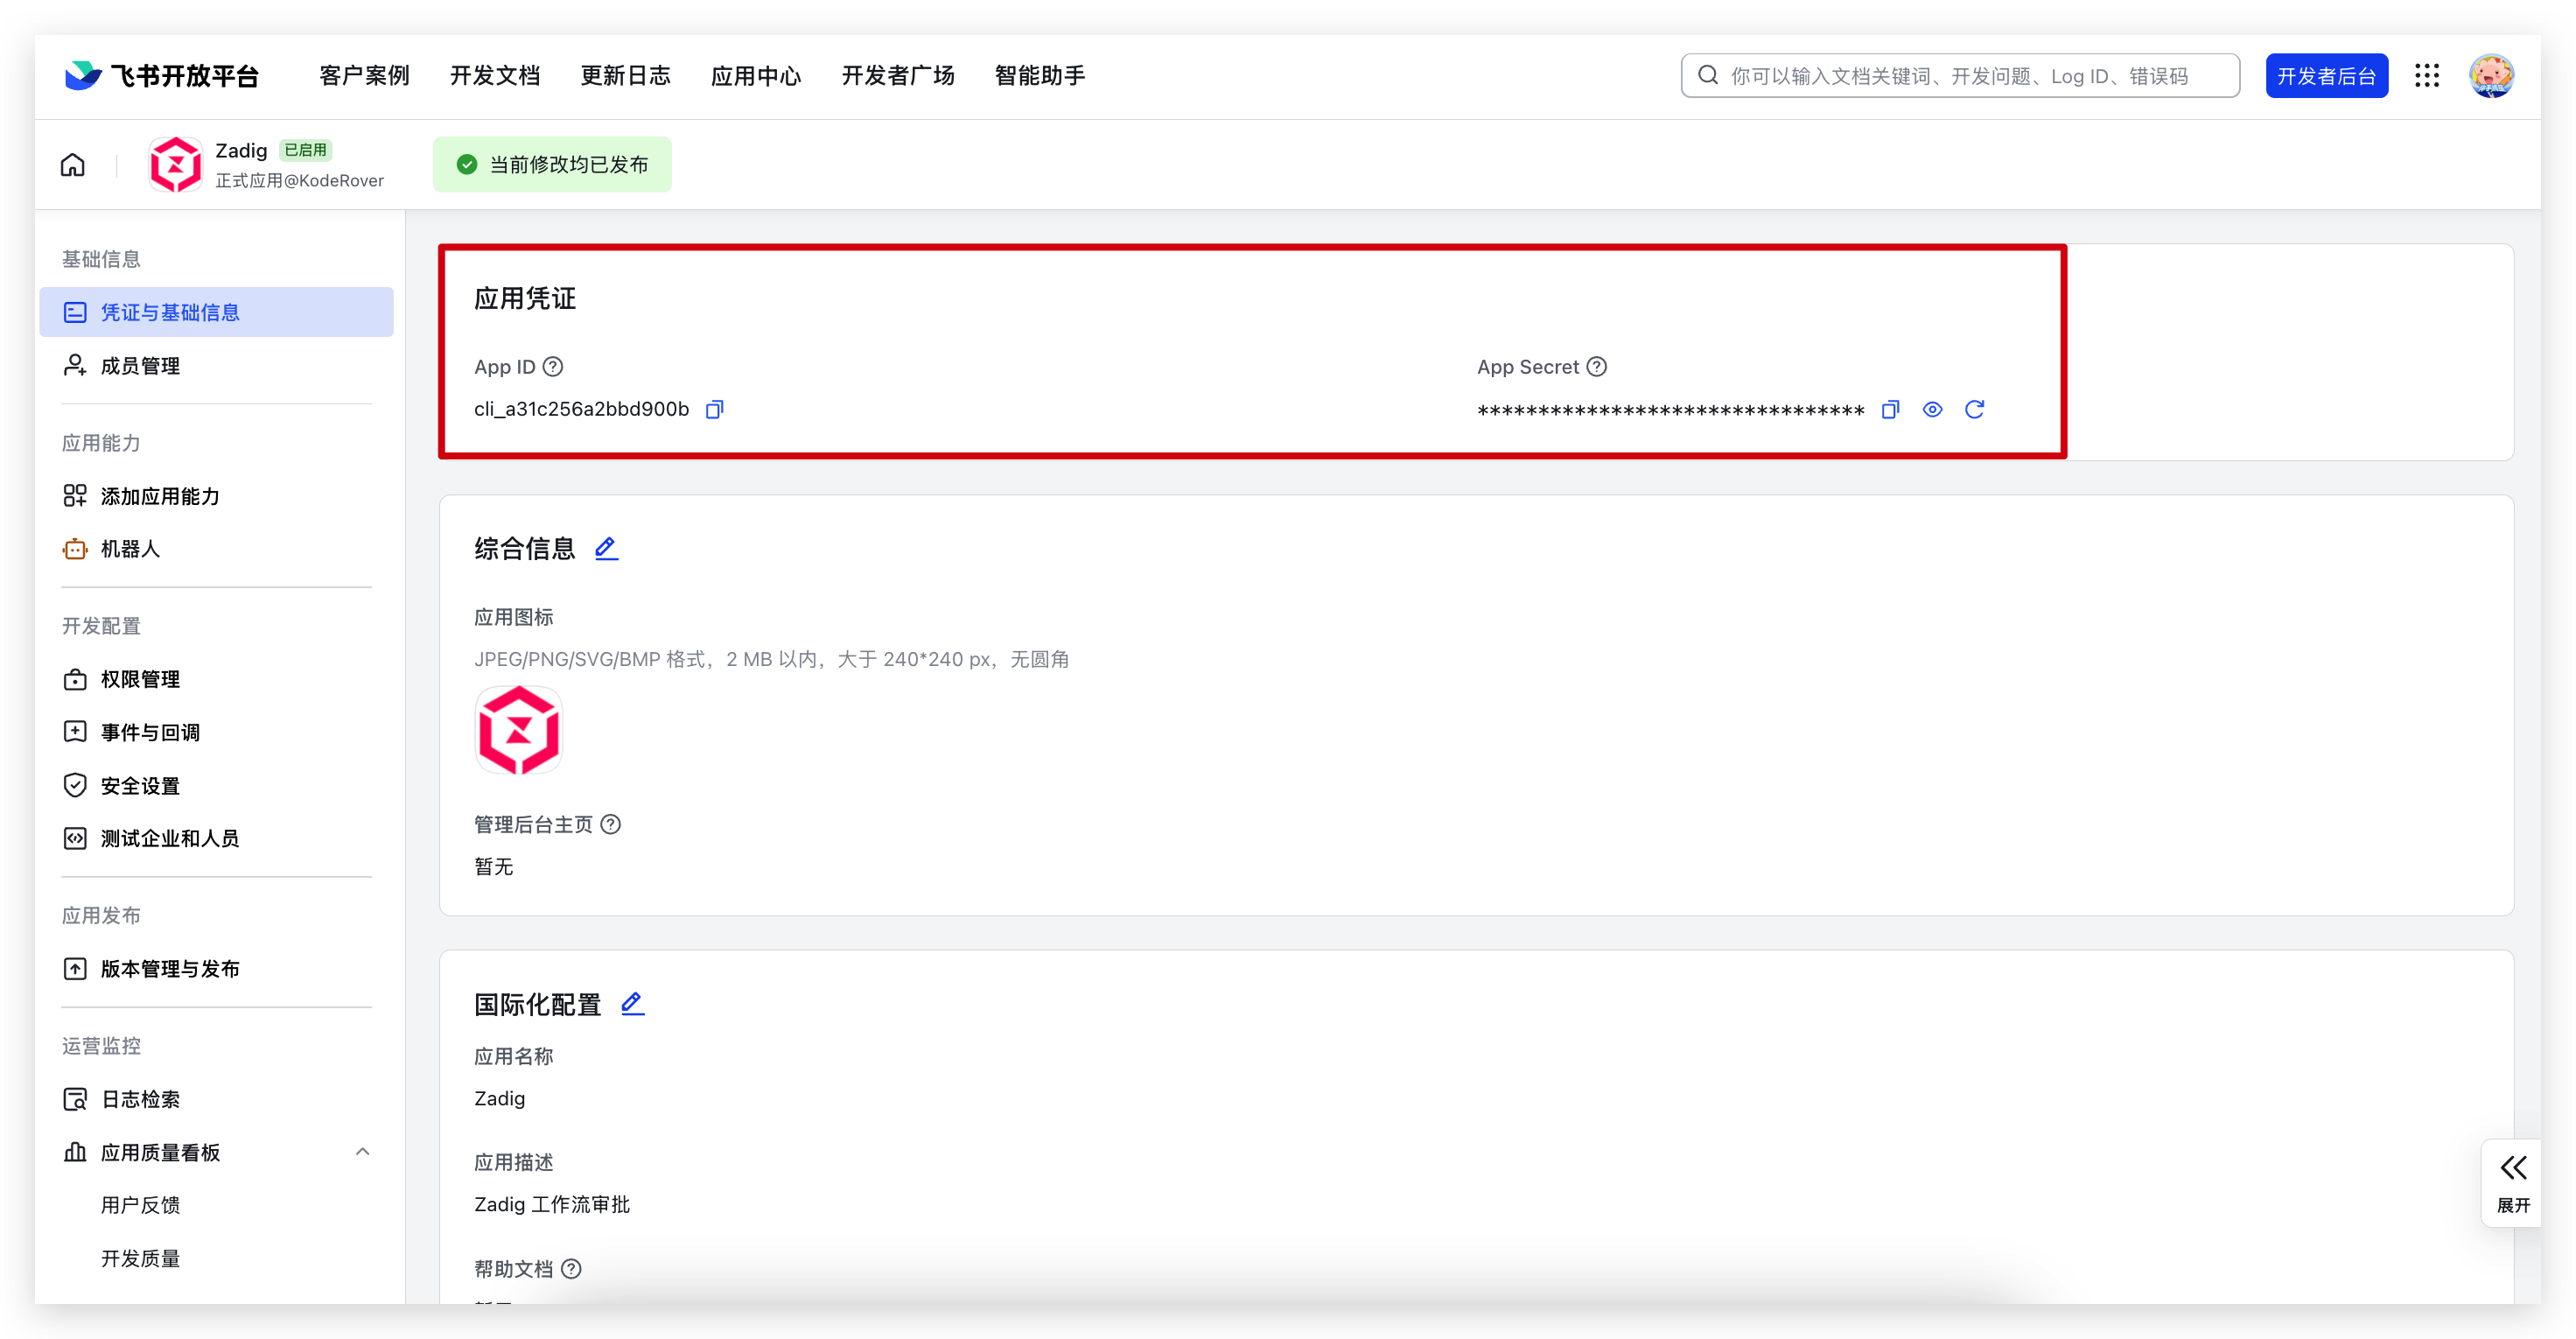
After the application release is approved, proceed to the next configuration step.
# Step 2: Integrate IM Application
Visit Zadig, click System Settings -> Integrations -> Approval System, and add the Feishu approval application as shown below.
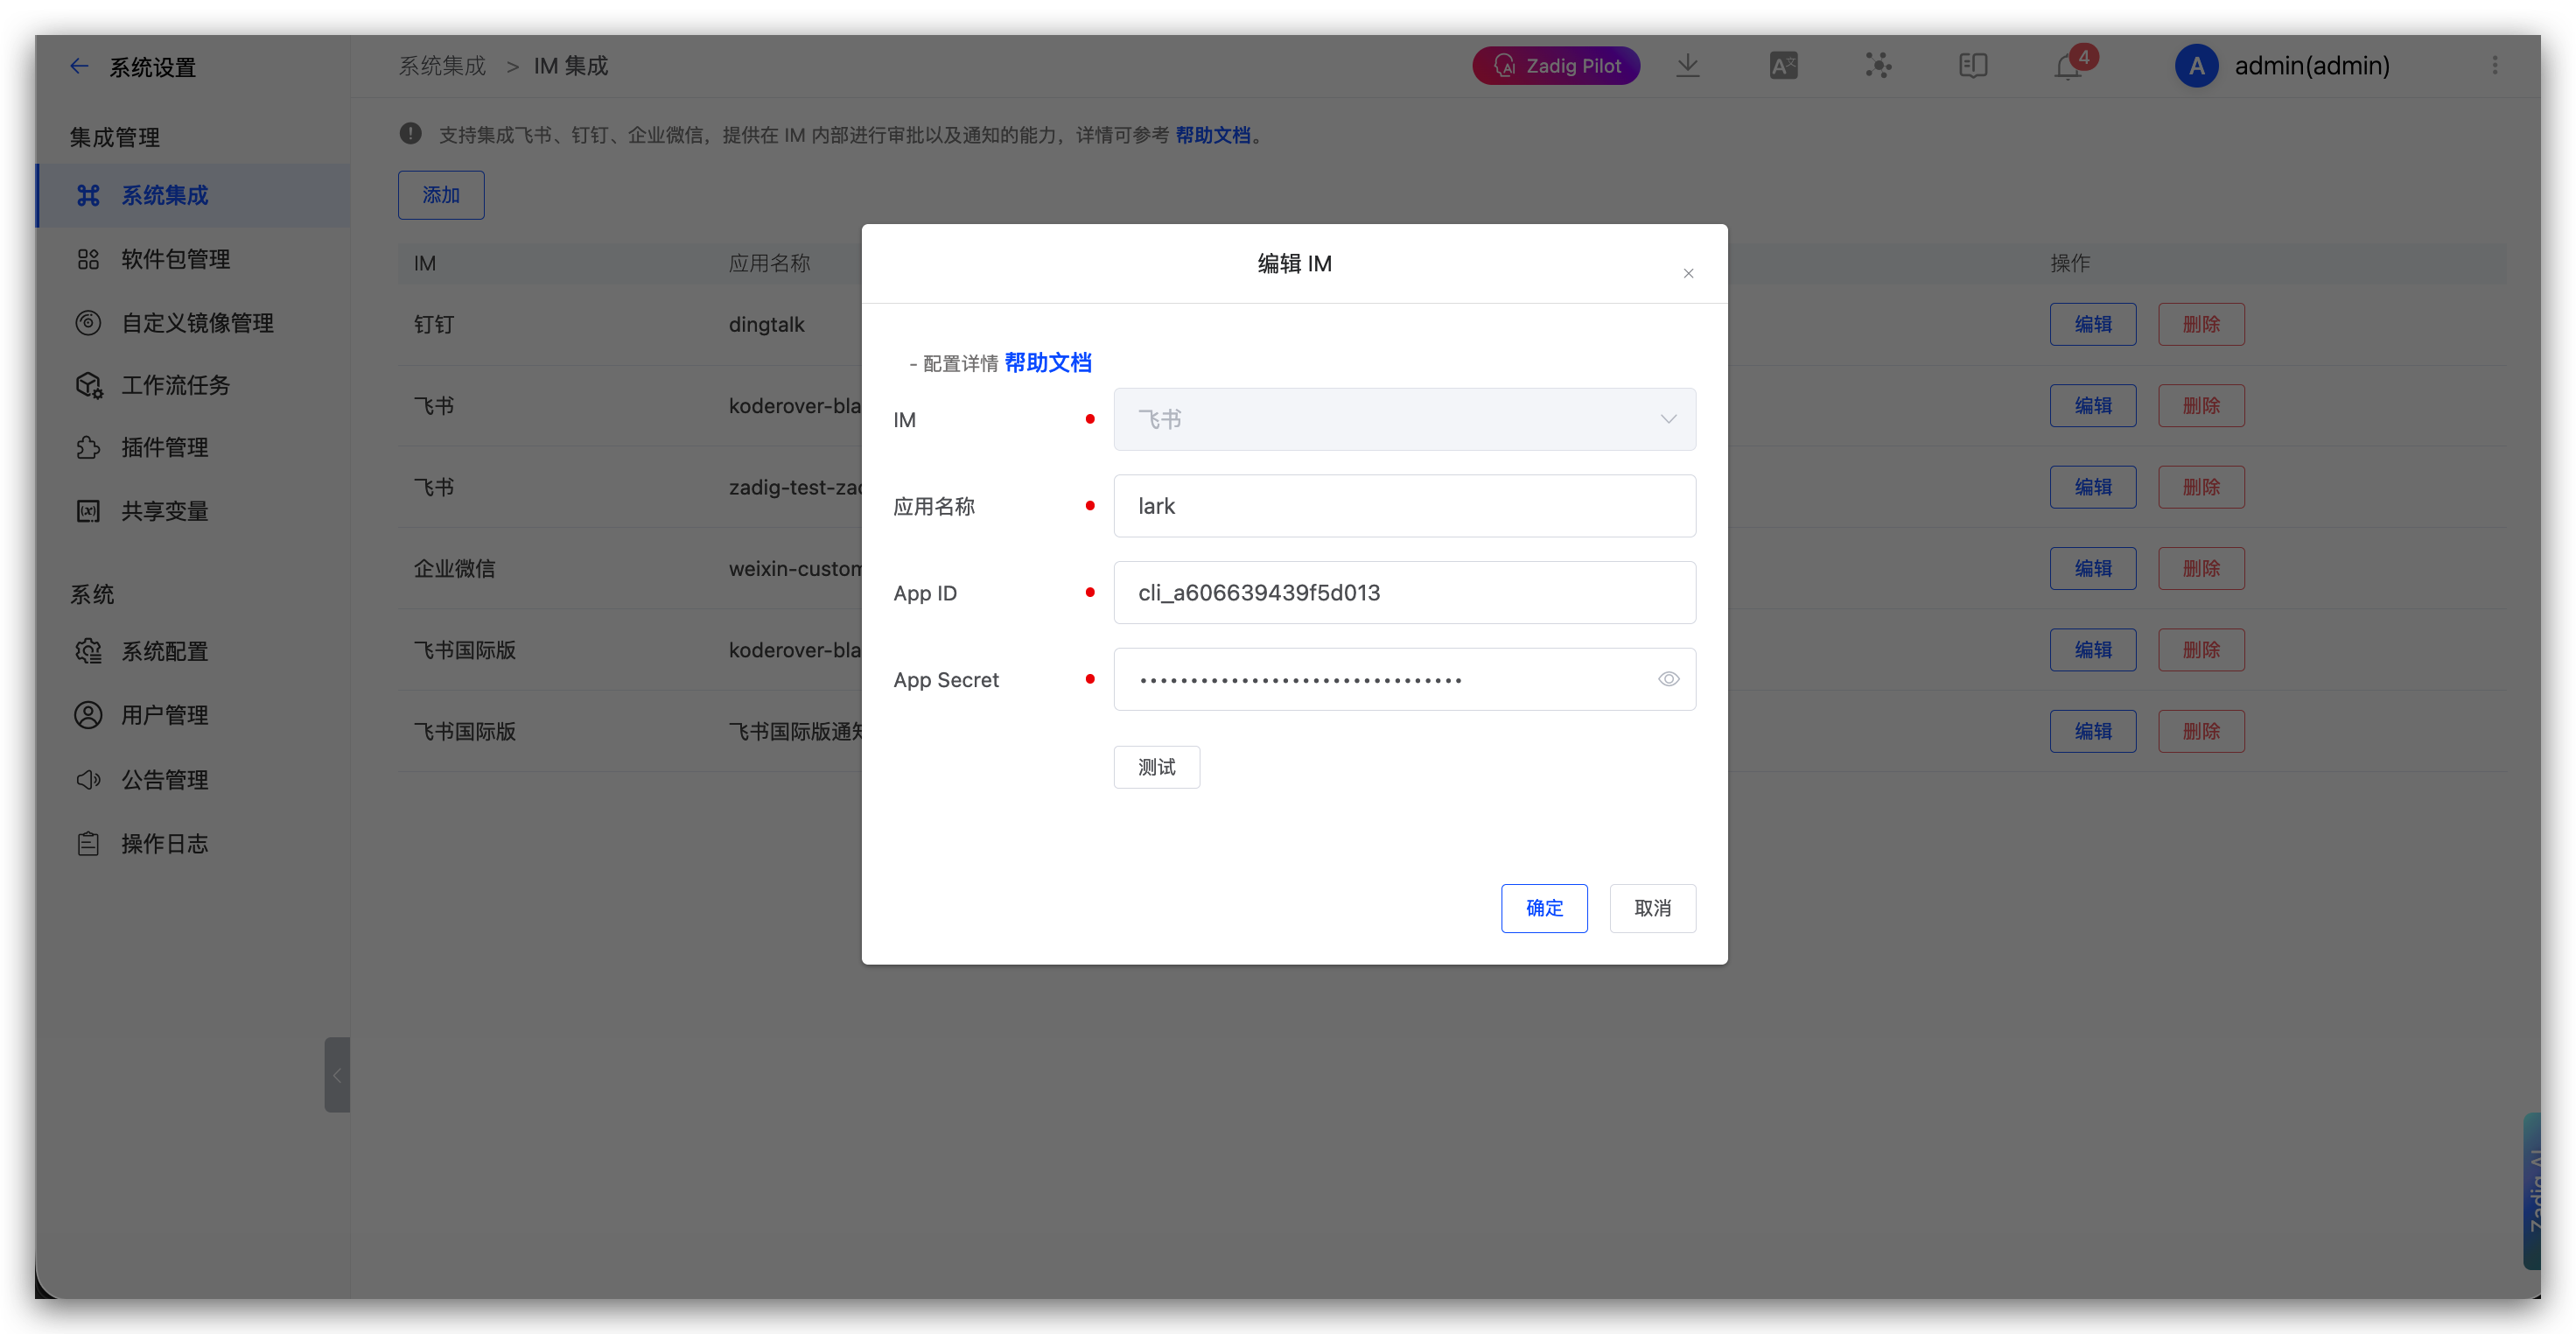
Parameter descriptions:
App Name: Customize for easy identification in the Zadig systemApp ID: Obtained in Step 1App Secret: Obtained in Step 1
# Lark
Used for "Manual Approval" and "Notification" tasks in workflows.
Follow these steps to configure Lark notifications and approvals:
- Create and publish an application on the Lark Developer Platform
- Configure application credentials in Zadig
# Step 1: Create a Lark App
- Visit the Lark Developer Platform(opens new window) and create an "enterprise self-built application" as shown below.
- In
Permission Management-Data Permission, set the address book permission scope, and inAPI Permission, enable the permissions required for the approval application as shown below.
Zadig workflows support Lark approvals, and available approvers are related to the address book scope specified here.
Approval requires these permissions:
approval:approvalapproval:approval.list:readonlyapproval:approval:readonlycontact:user.id:readonlycontact:contact.base:readonlycontact:user.employee_id:readonlycontact:user.base:readonlycontact:department.base:readonlycontact:group:readonly
Notification requires these permissions:
im:chatim:chat:readim:chat:readonlyim:messageim:message:send_as_botim:message:send_multi_deptscontact:user.id:readonlycontact:contact.base:readonlycontact:user.employee_id:readonlycontact:user.base:readonly
- Add a robot. If "Lark Group Notification" is configured in the "Notification Task," the robot needs to be added to the corresponding group.
- Create an application version and request publication.
Please configure other required information for the application release process yourself.
- Obtain the
App IDandApp Secret.
After the application release is approved, proceed to the next configuration step.
# Step 2: Integrate IM Application
Visit Zadig, click System Settings -> Integrations -> Approval System, and add the Lark approval application as shown below.
Parameter descriptions:
App Name: Customize for easy identification in the Zadig systemApp ID: Obtained in Step 1App Secret: Obtained in Step 1
# DingTalk
Tip
After users complete approval on DingTalk, the DingTalk platform needs to callback the approval status to Zadig. To ensure normal DingTalk approval functionality, please ensure the DingTalk platform can access the Zadig domain name.
Follow these steps to configure DingTalk approvals:
- Create and publish an application on the DingTalk Developer Platform
- Configure application credentials in Zadig to obtain the
Request URLfor event message push - Configure the
Request URLon the DingTalk Developer Platform
# Step 1: Create a DingTalk Application
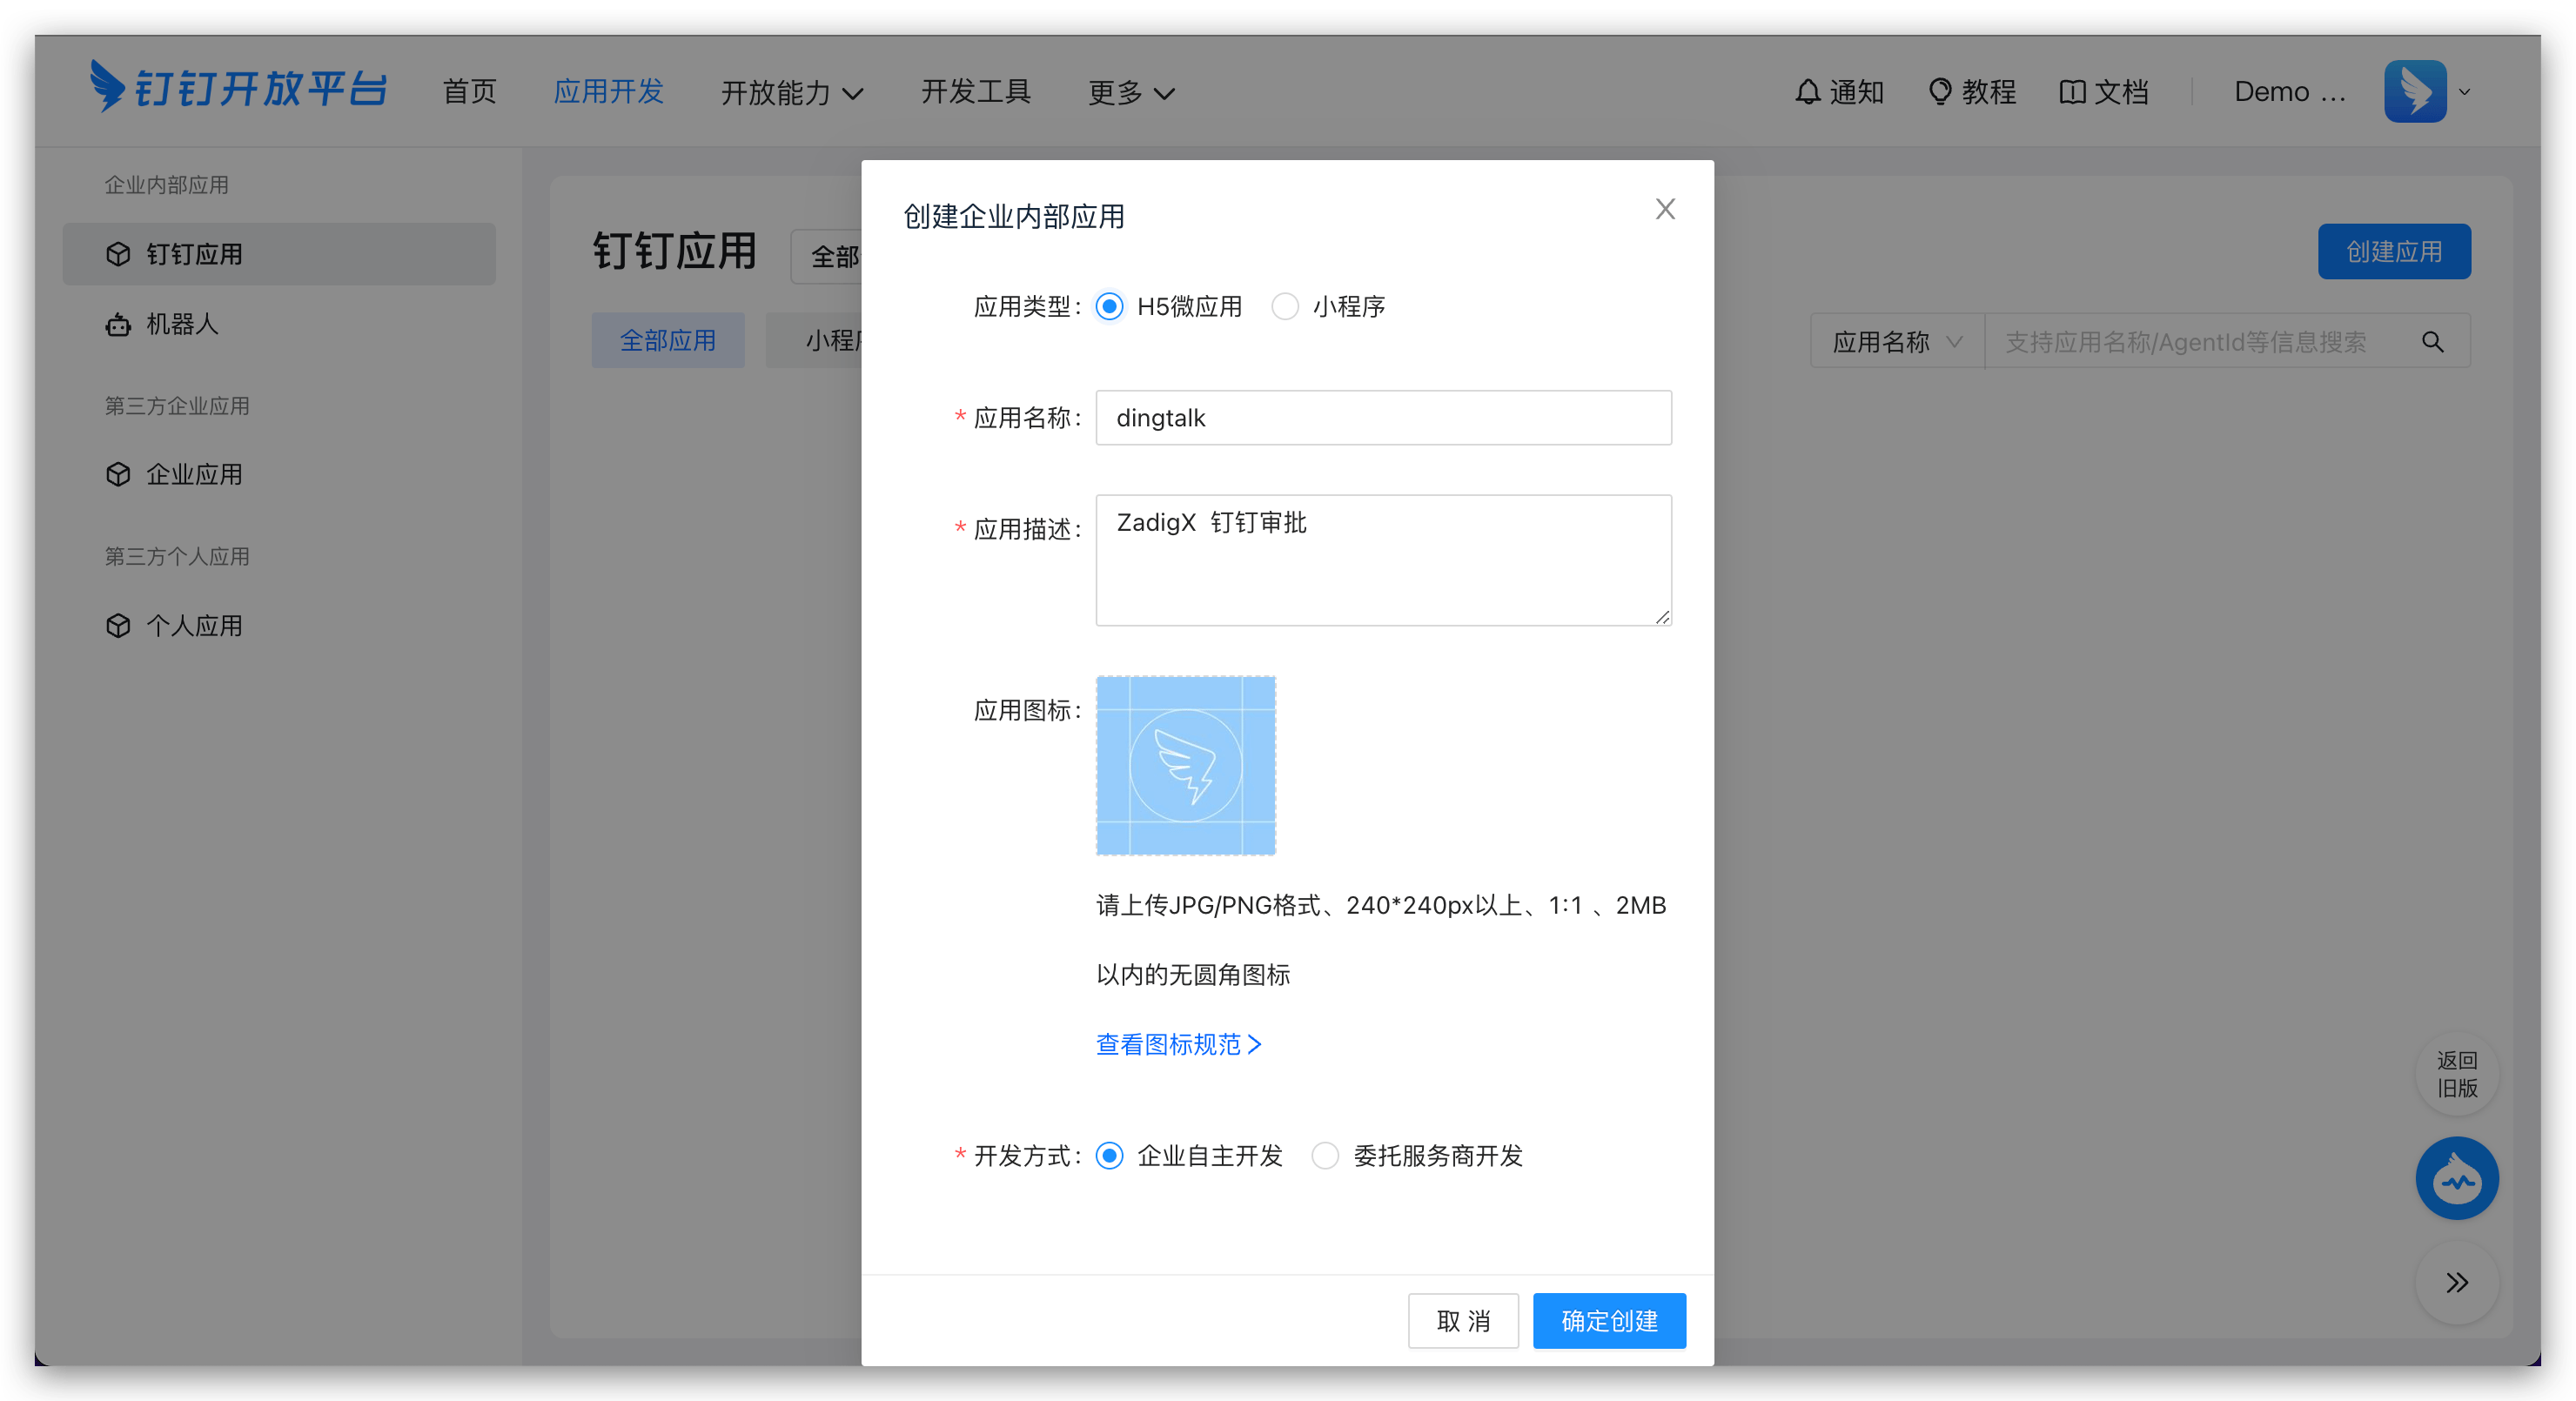
Visit the DingTalk Open Platform(opens new window) and create an application as shown below.
In permission management, configure the permission scope and enable the permissions required for the approval application as shown below.
Zadig workflows support DingTalk approvals, and available approvers are related to the permission scope specified here.
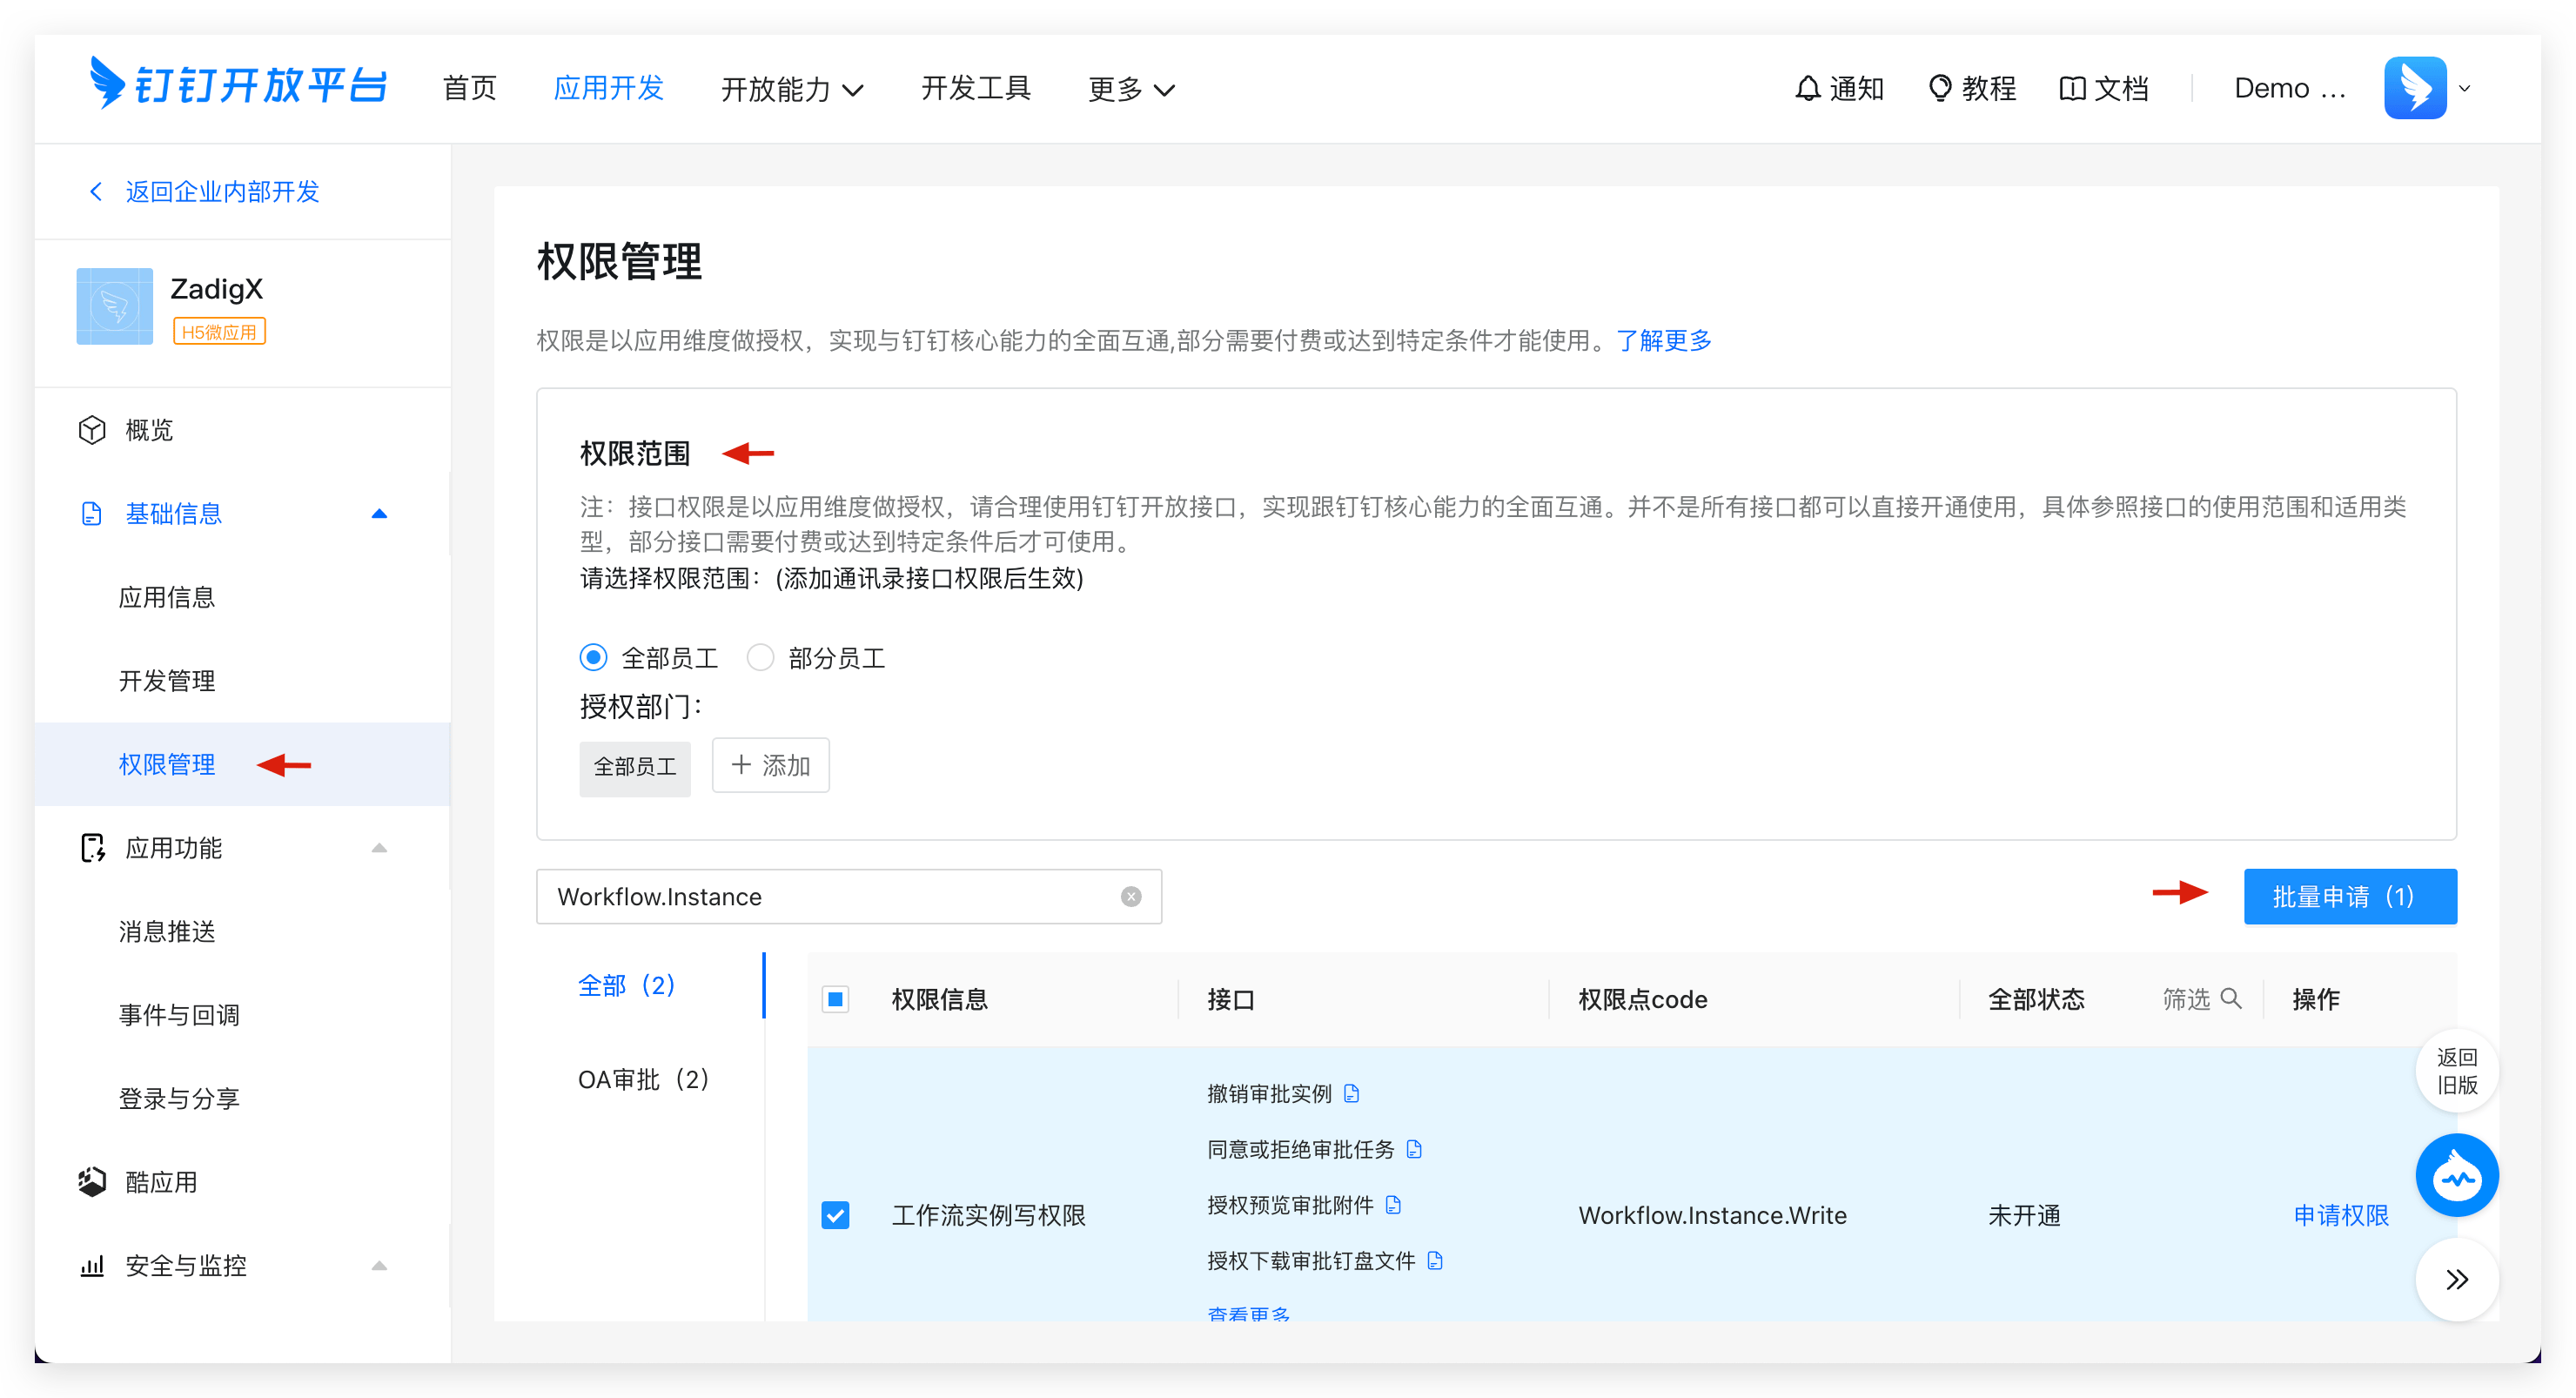
Required permissions:
snsapi_baseqyapi_baseContact.User.Readqyapi_get_department_listqyapi_get_memberqyapi_get_member_by_mobileWorkflow.Form.WriteWorkflow.Form.ReadWorkflow.Instance.ReadWorkflow.Instance.Write
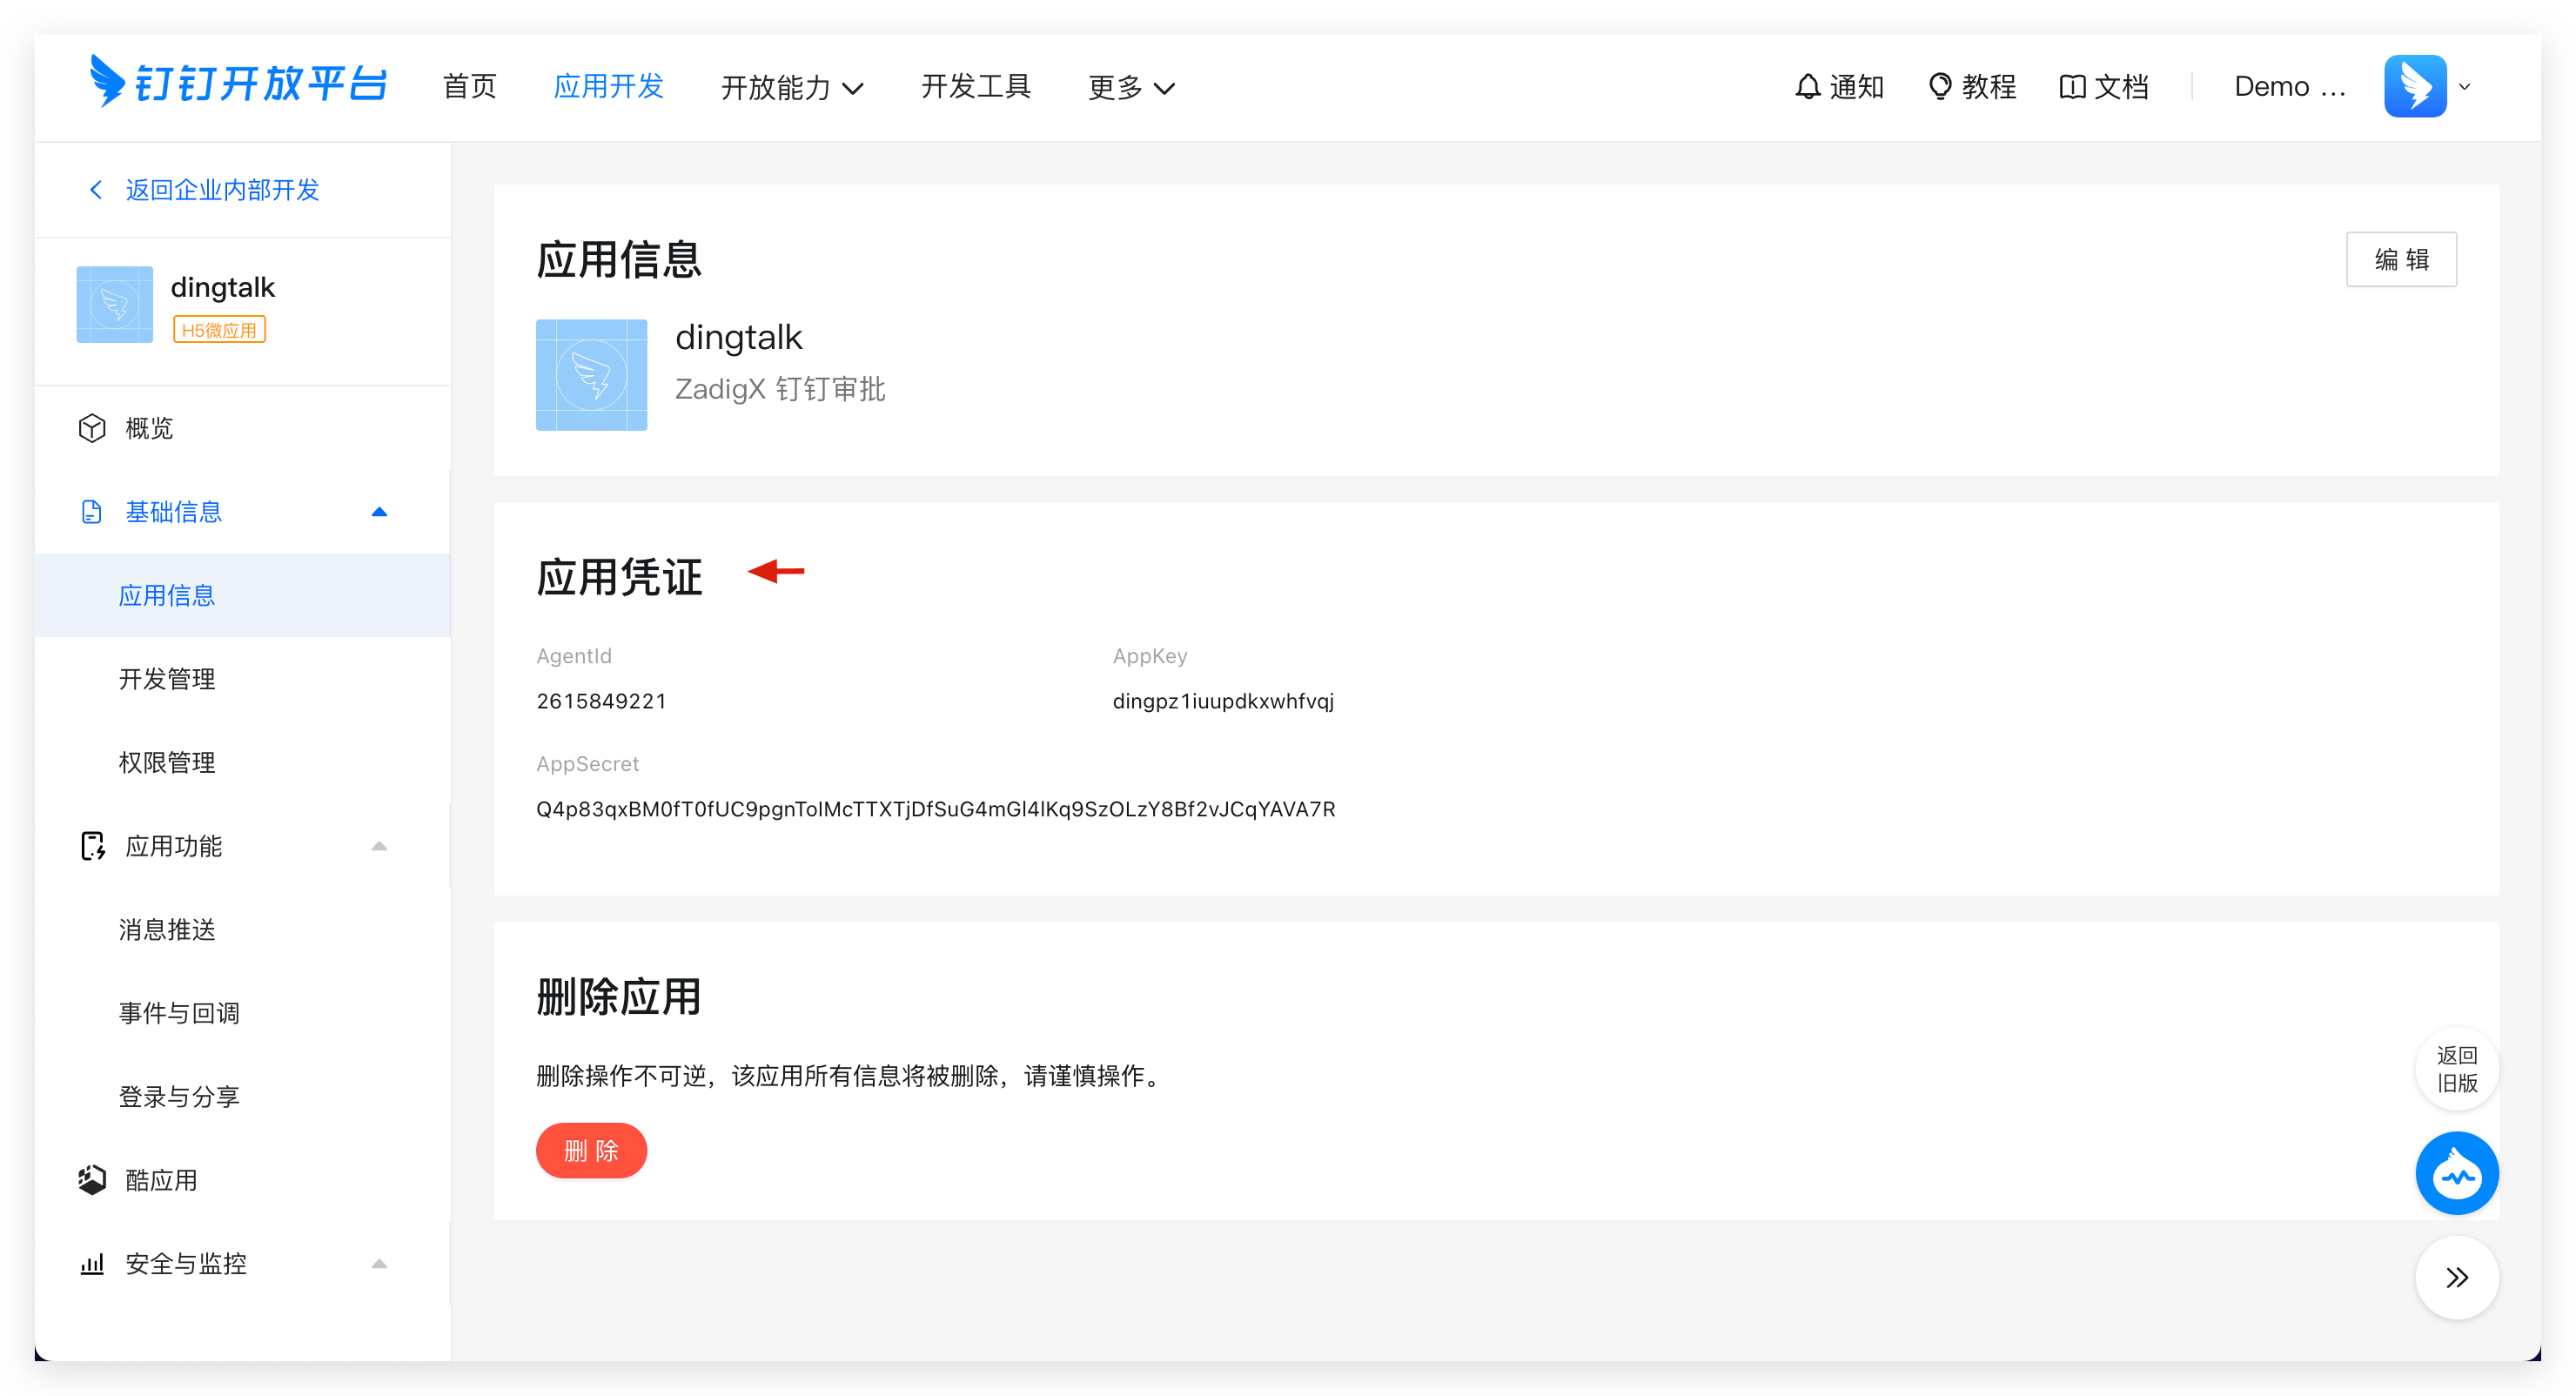
- Obtain the
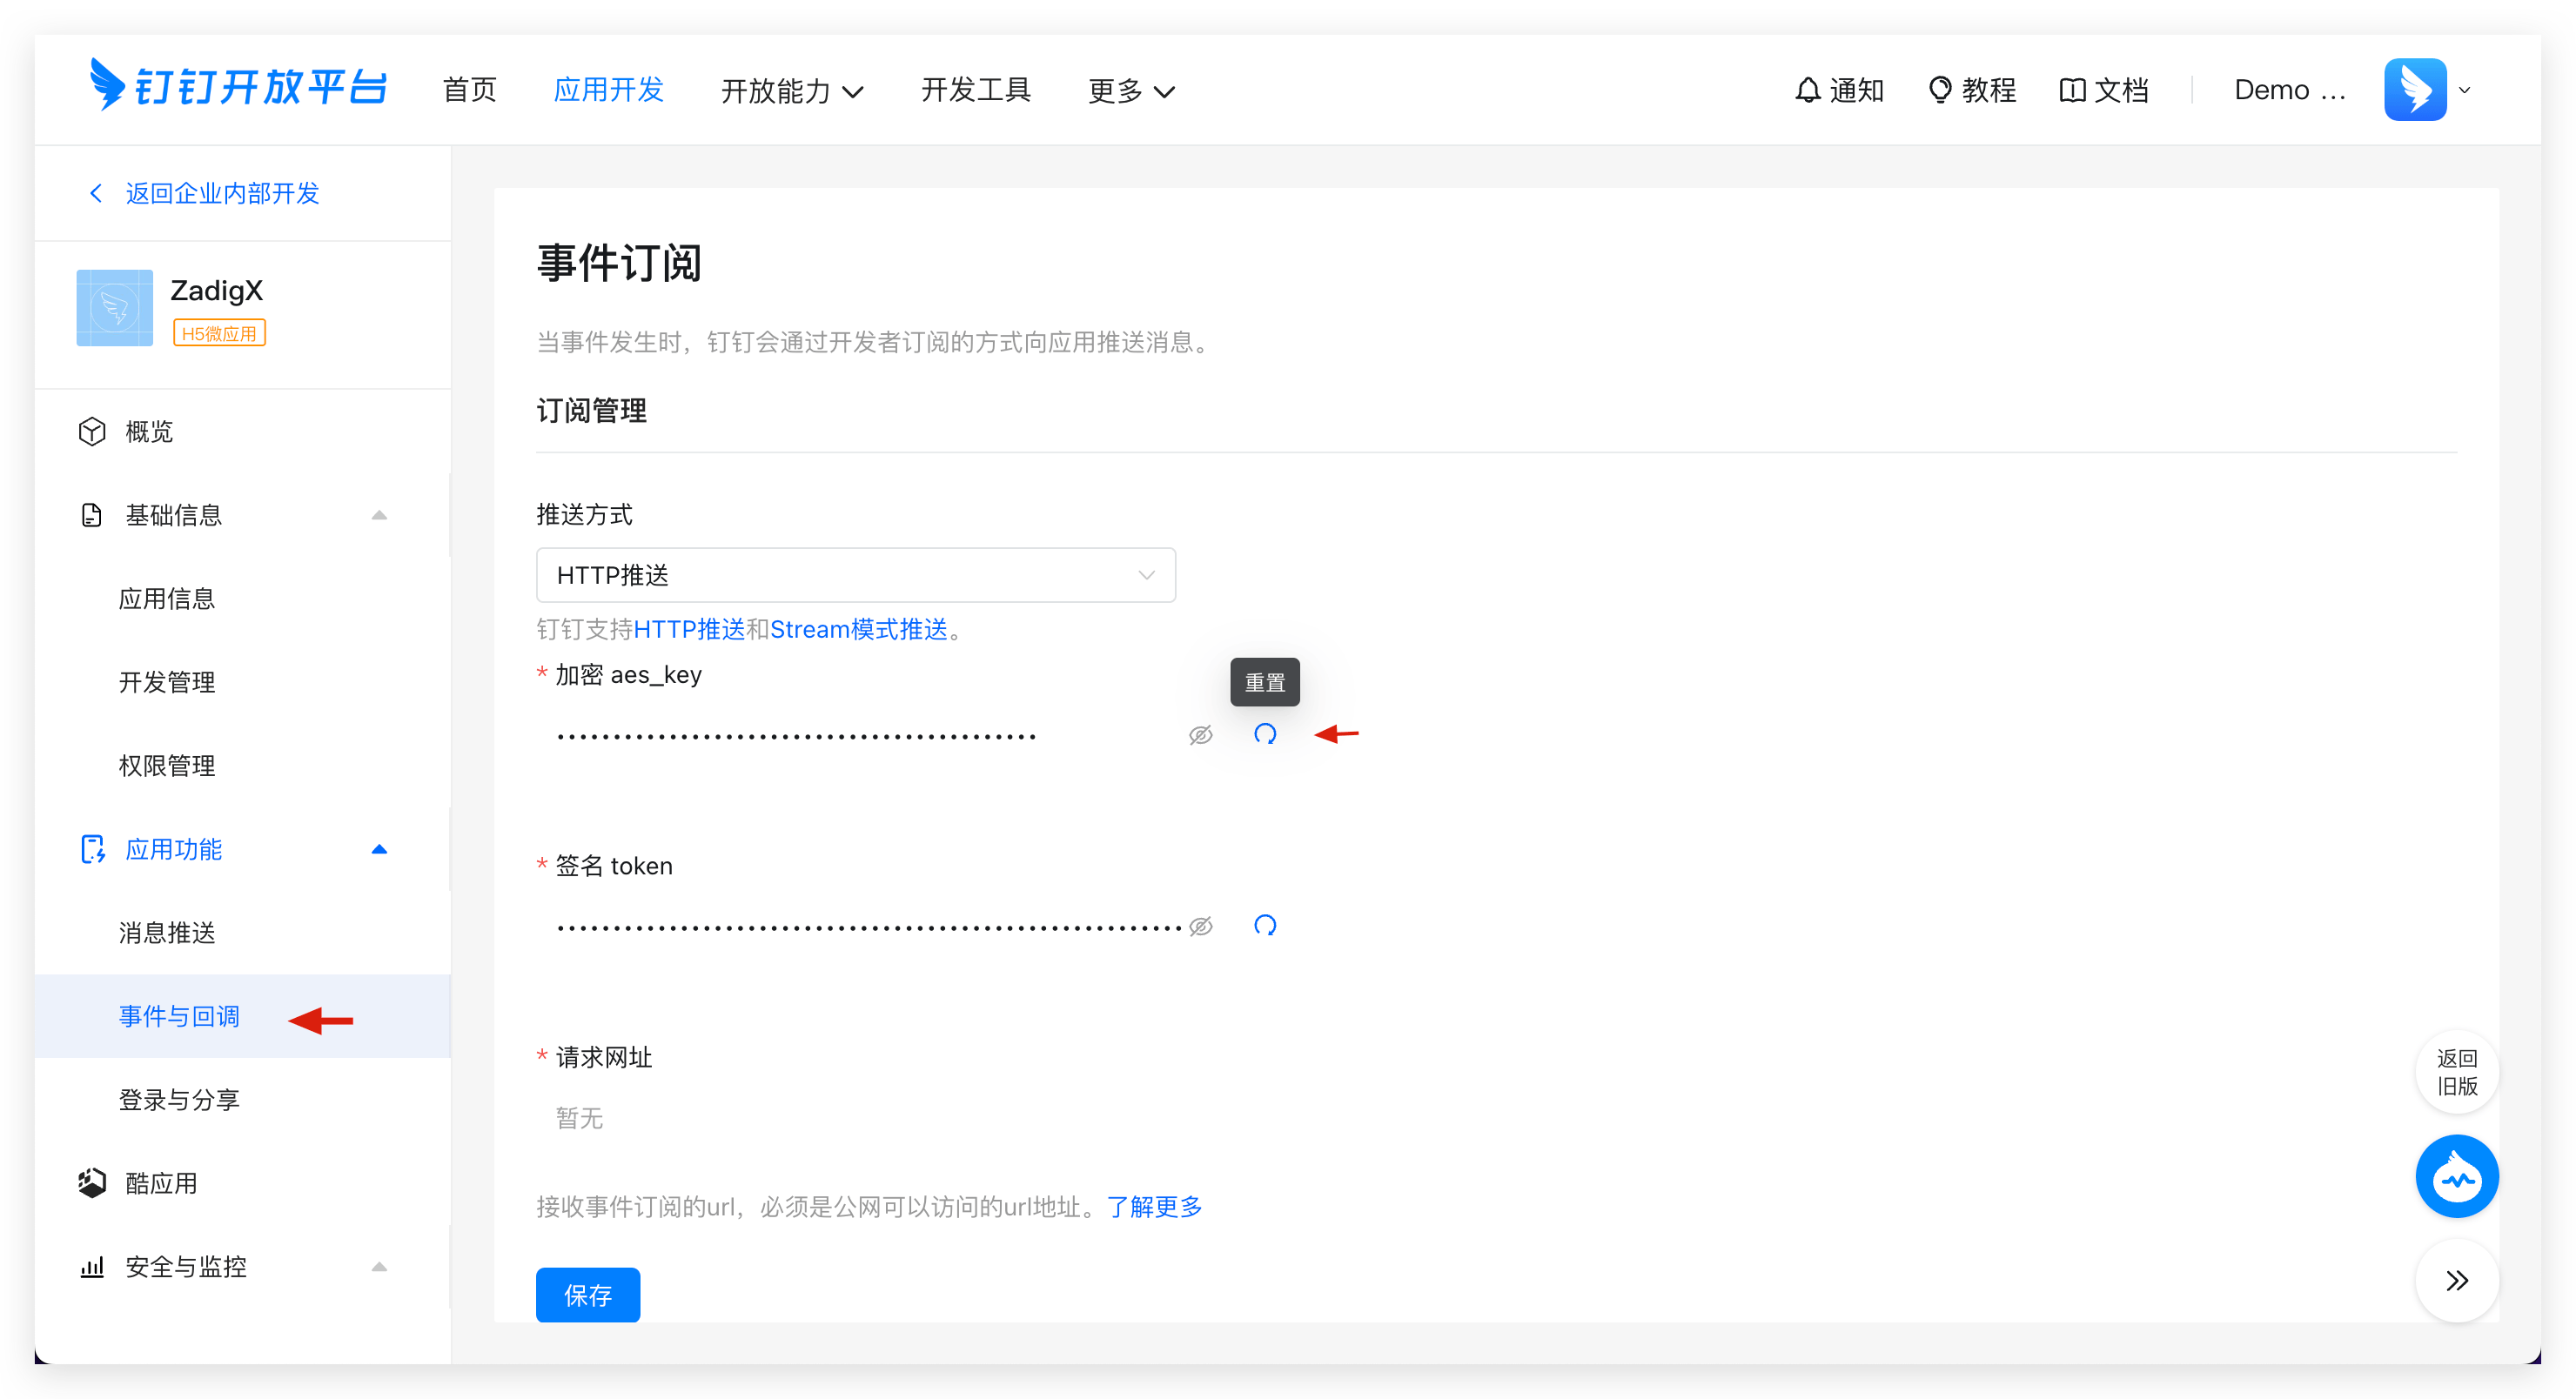
AppKey,AppSecret,aes_key, andtokeninformation.
AppKey and AppSecret are obtained in App Information:
aes_key and token are obtained in Events and Callbacks:
Tip: After saving the aes_key and other information, please do not close the current page. You will need to fill in the request URL here after completing the configuration in Zadig.
# Step 2: Integrate IM Application
Visit Zadig, click System Settings -> Integrations -> IM, and add the DingTalk approval application as shown below.
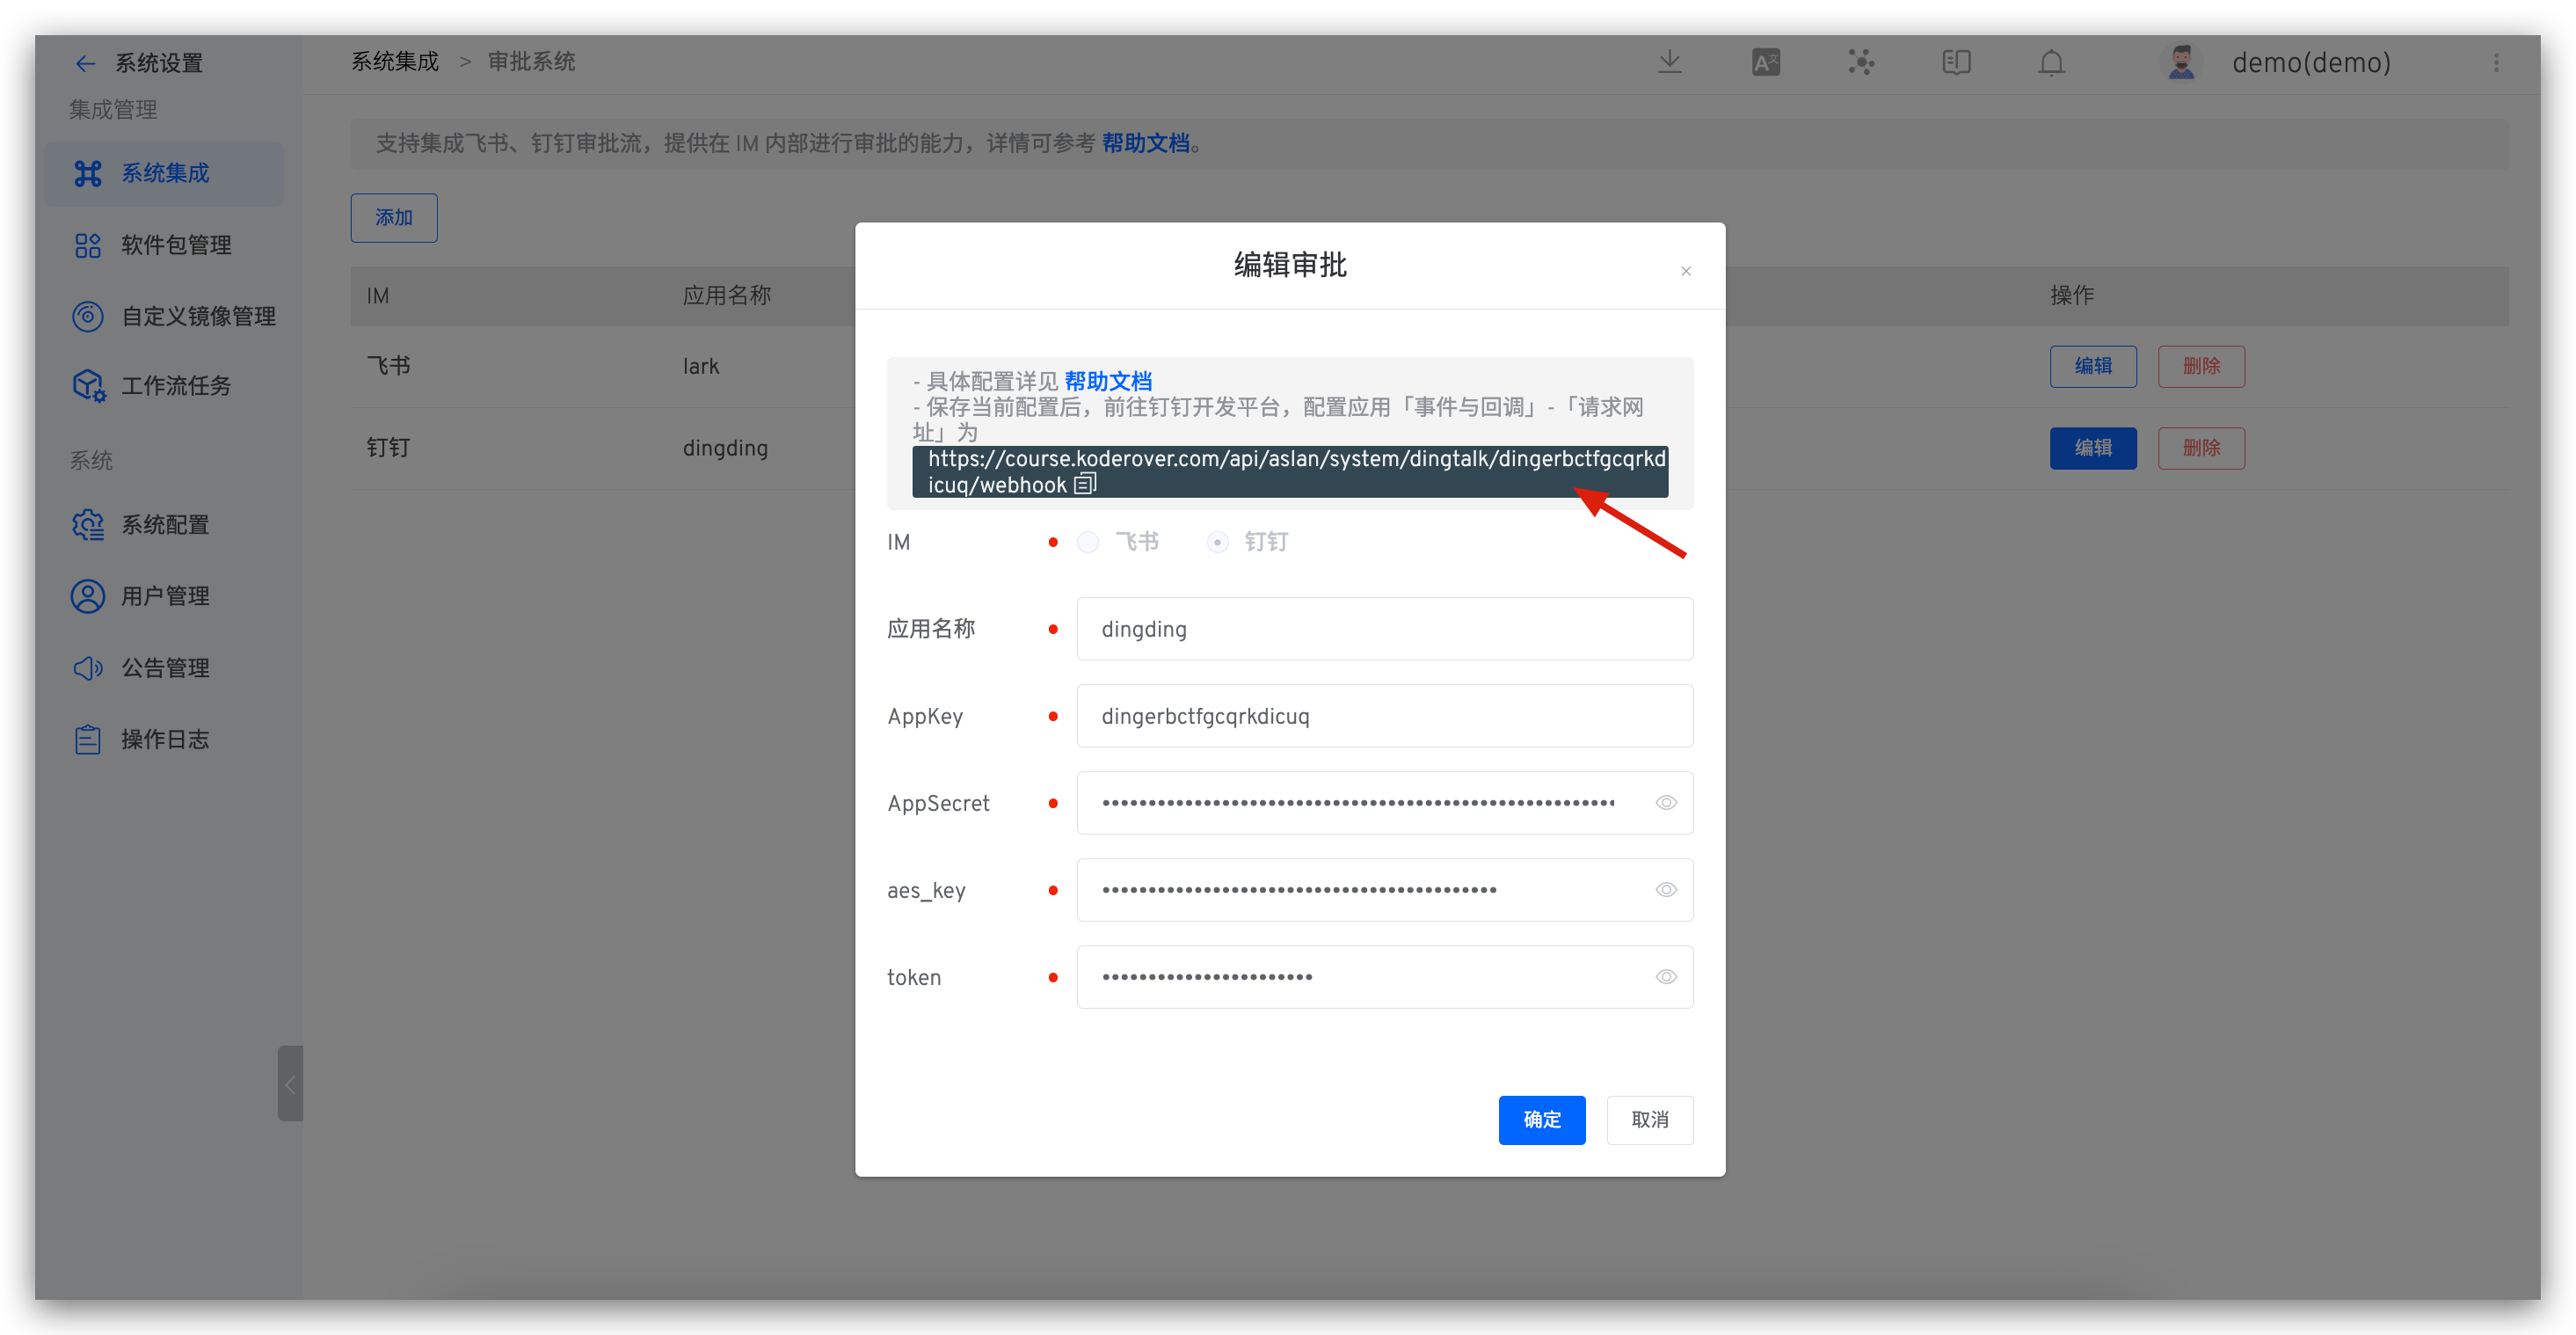
Parameter descriptions:
App Name: Customize for easy identification in the Zadig systemApp Key: Obtained in Step 1App Secret: Obtained in Step 1Aes Key: Obtained in Step 1Token: Obtained in Step 1
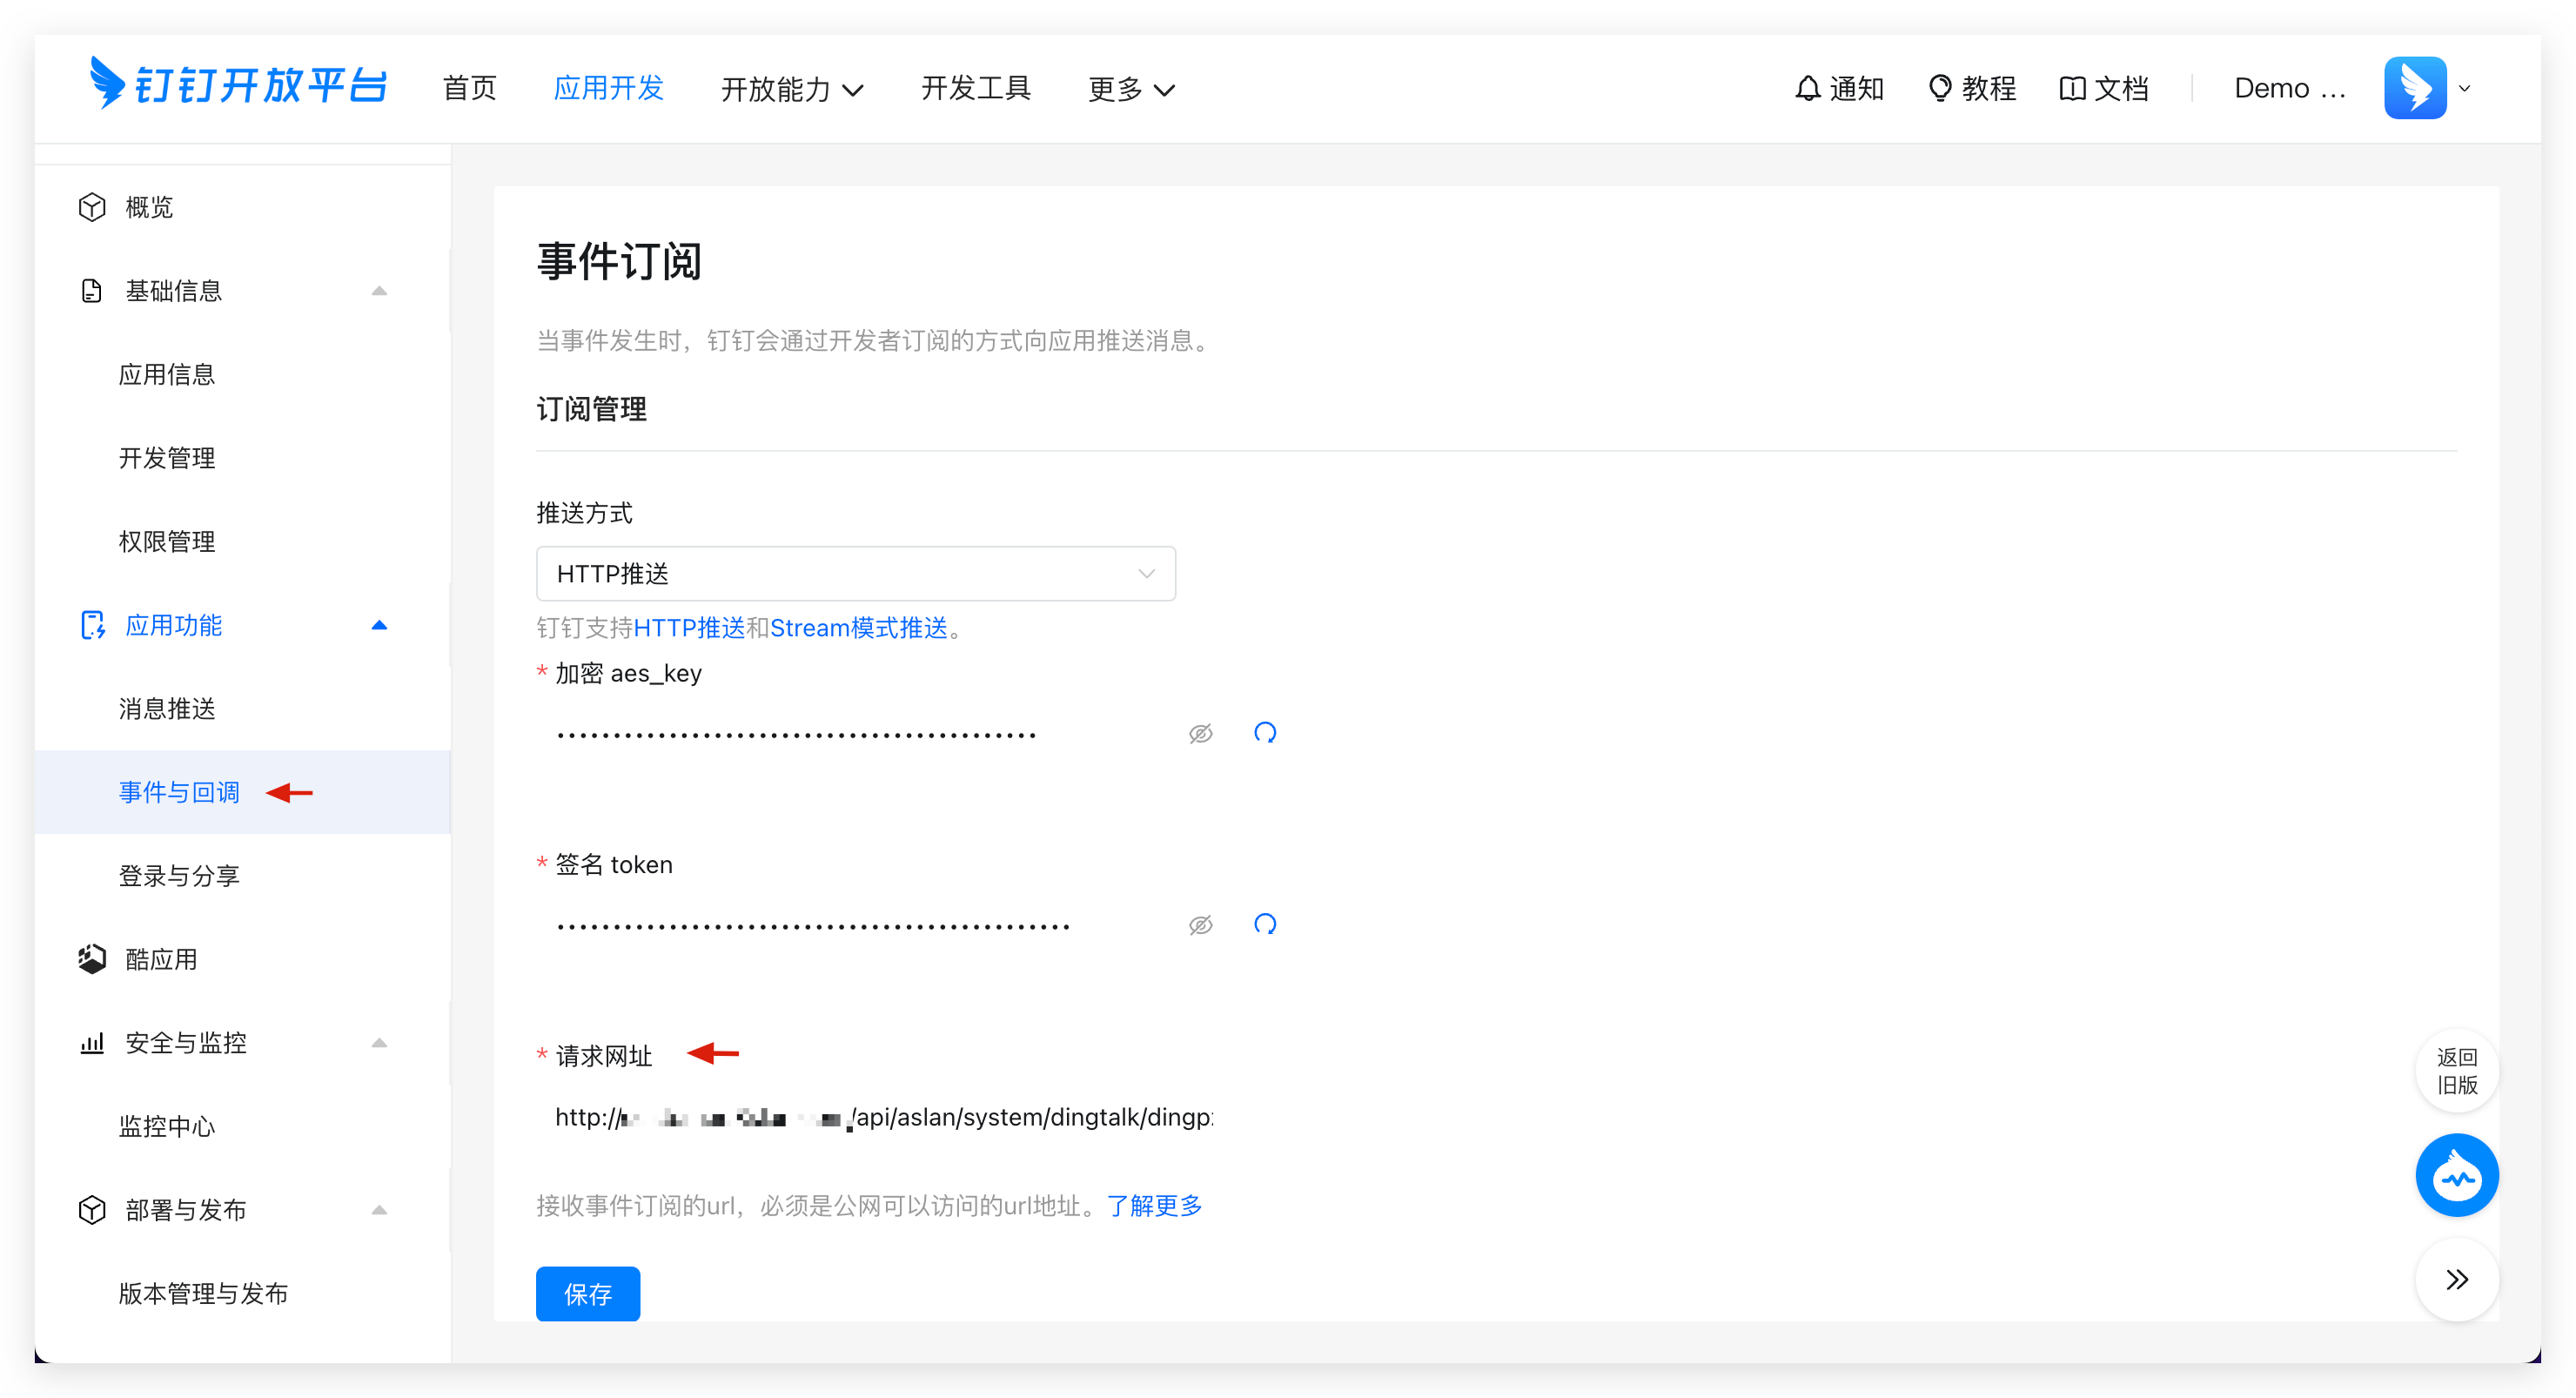
After filling in the details, copy the "request URL" and save the configuration.
# Step 3: Configure "Request URL" and "Events"
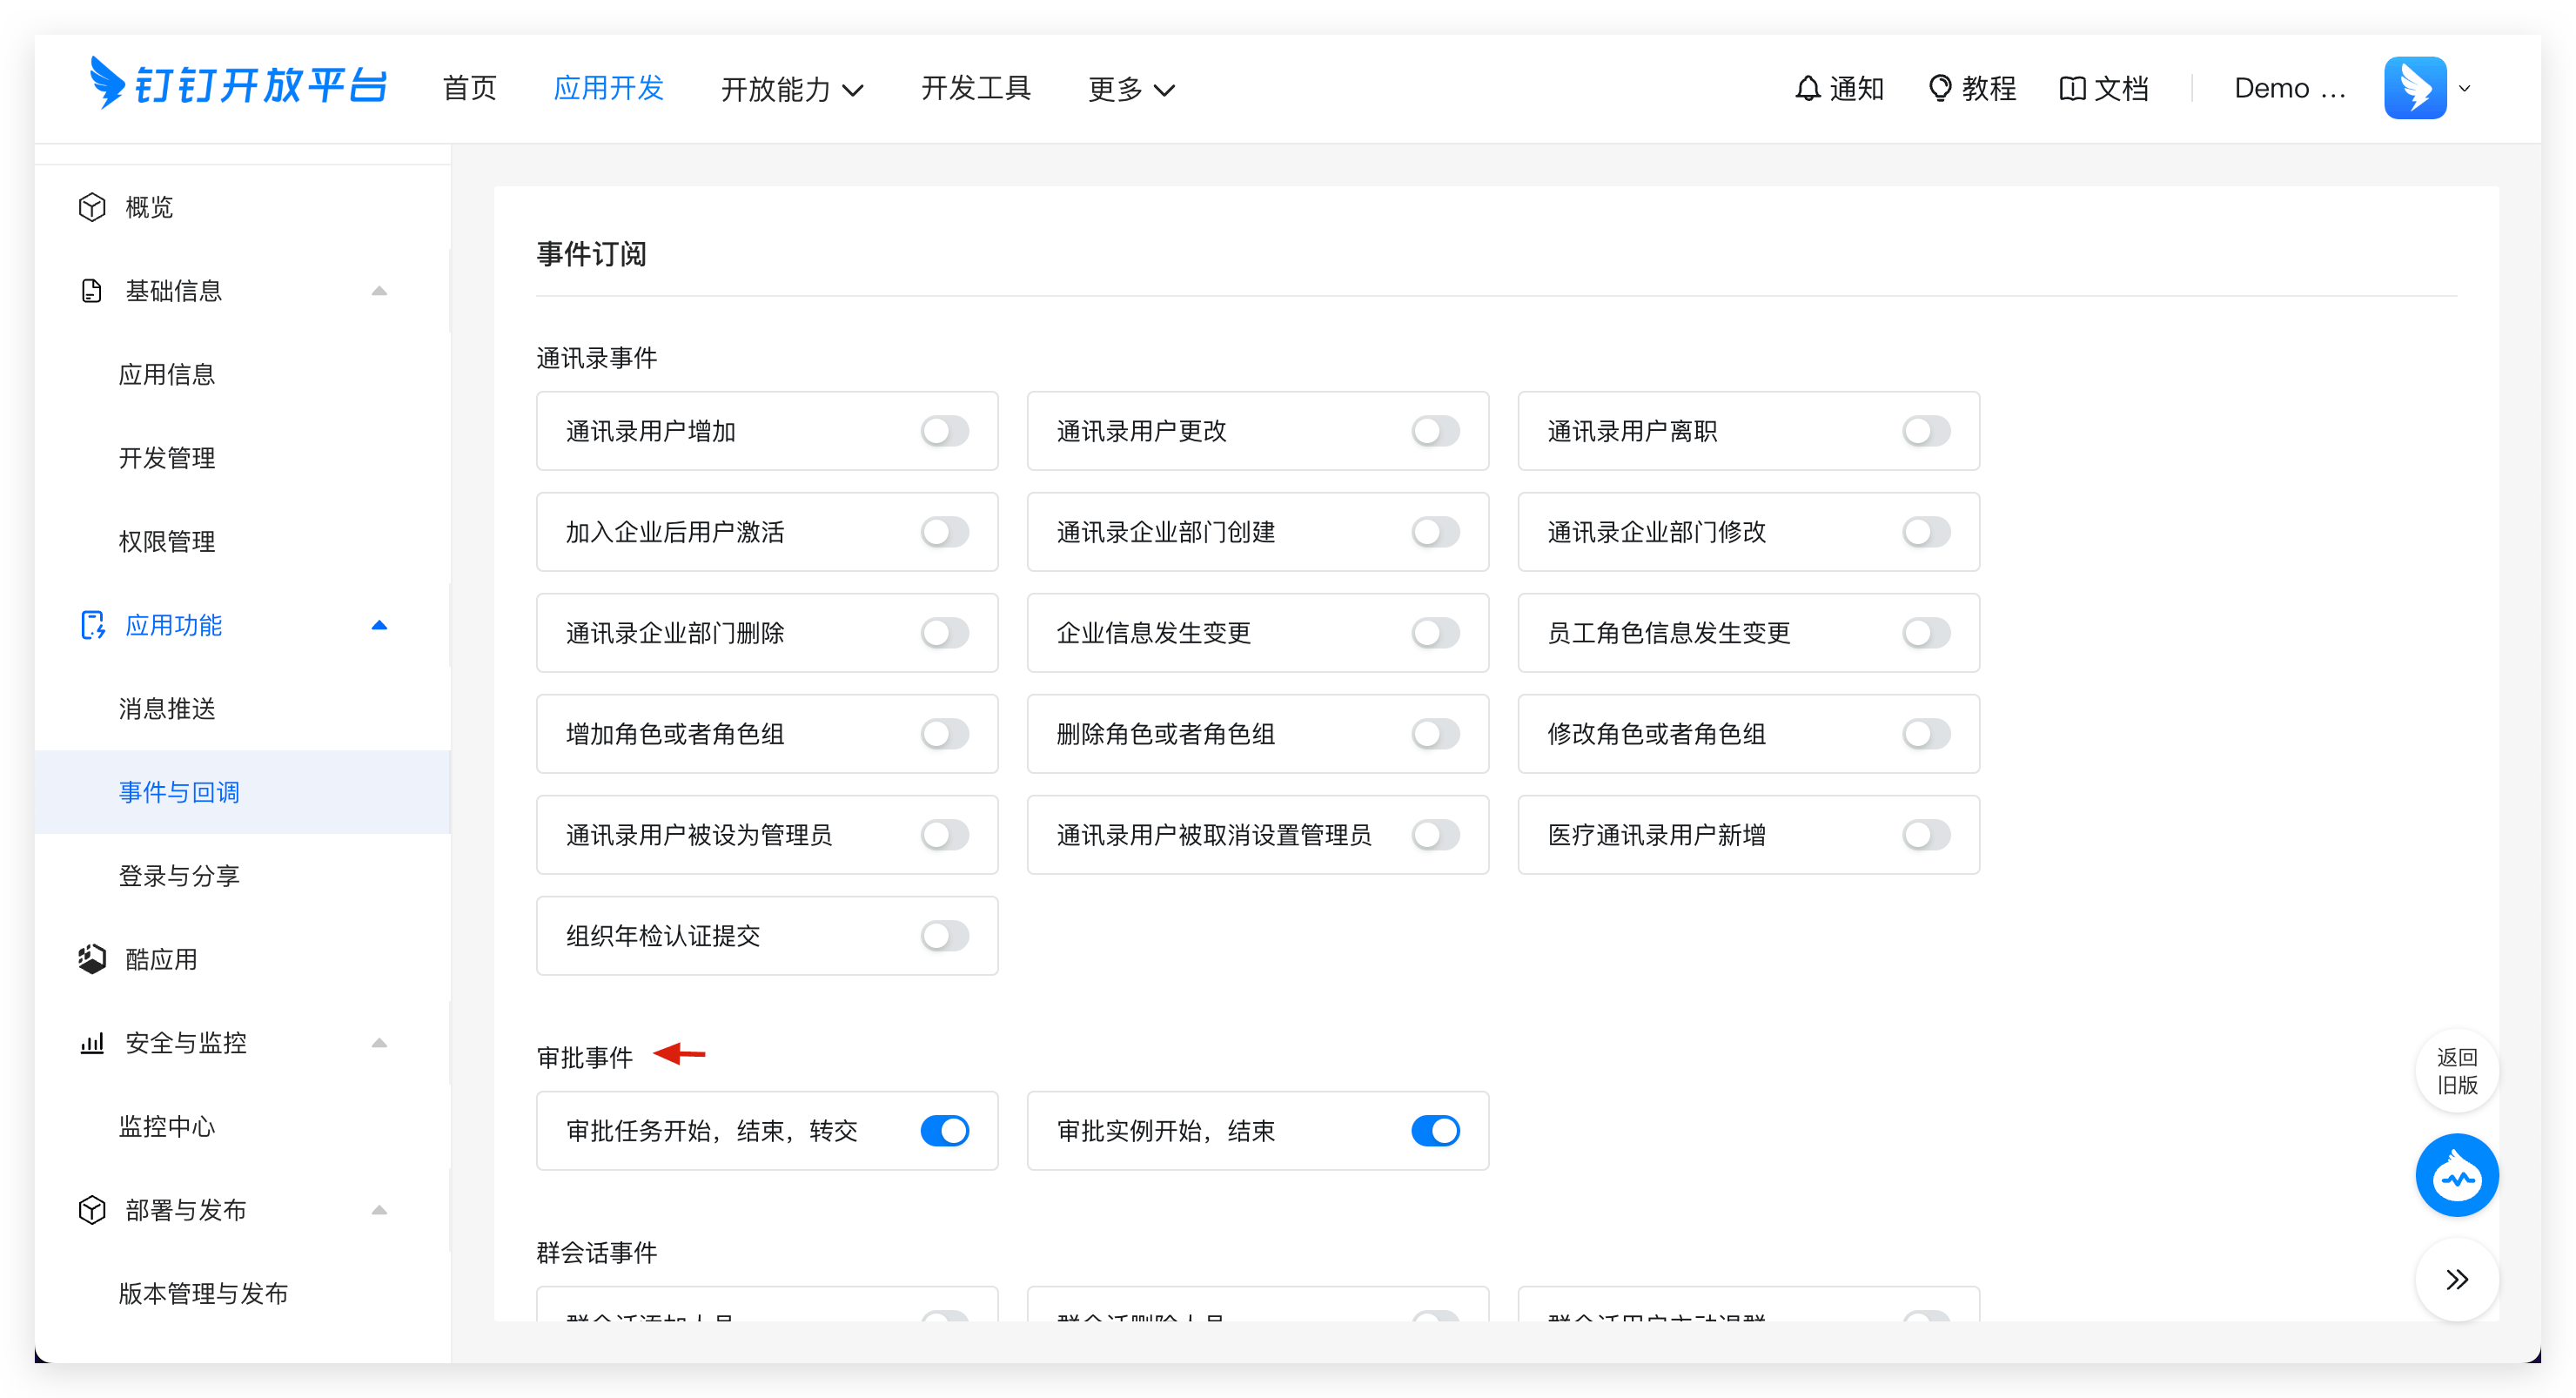
- Visit the DingTalk Open Platform - Application Functions - Events and Callbacks, fill in the request URL and save.
- Enable the following events in the approval event:
Approval Task Start, End, TransferApproval Instance Start, End
# WeChat Work
Tip
After users complete approval on WeChat Work, the WeChat Work platform needs to callback the approval status to Zadig. To ensure normal WeChat Work approval functionality, please ensure the WeChat Work platform can access the Zadig domain name.
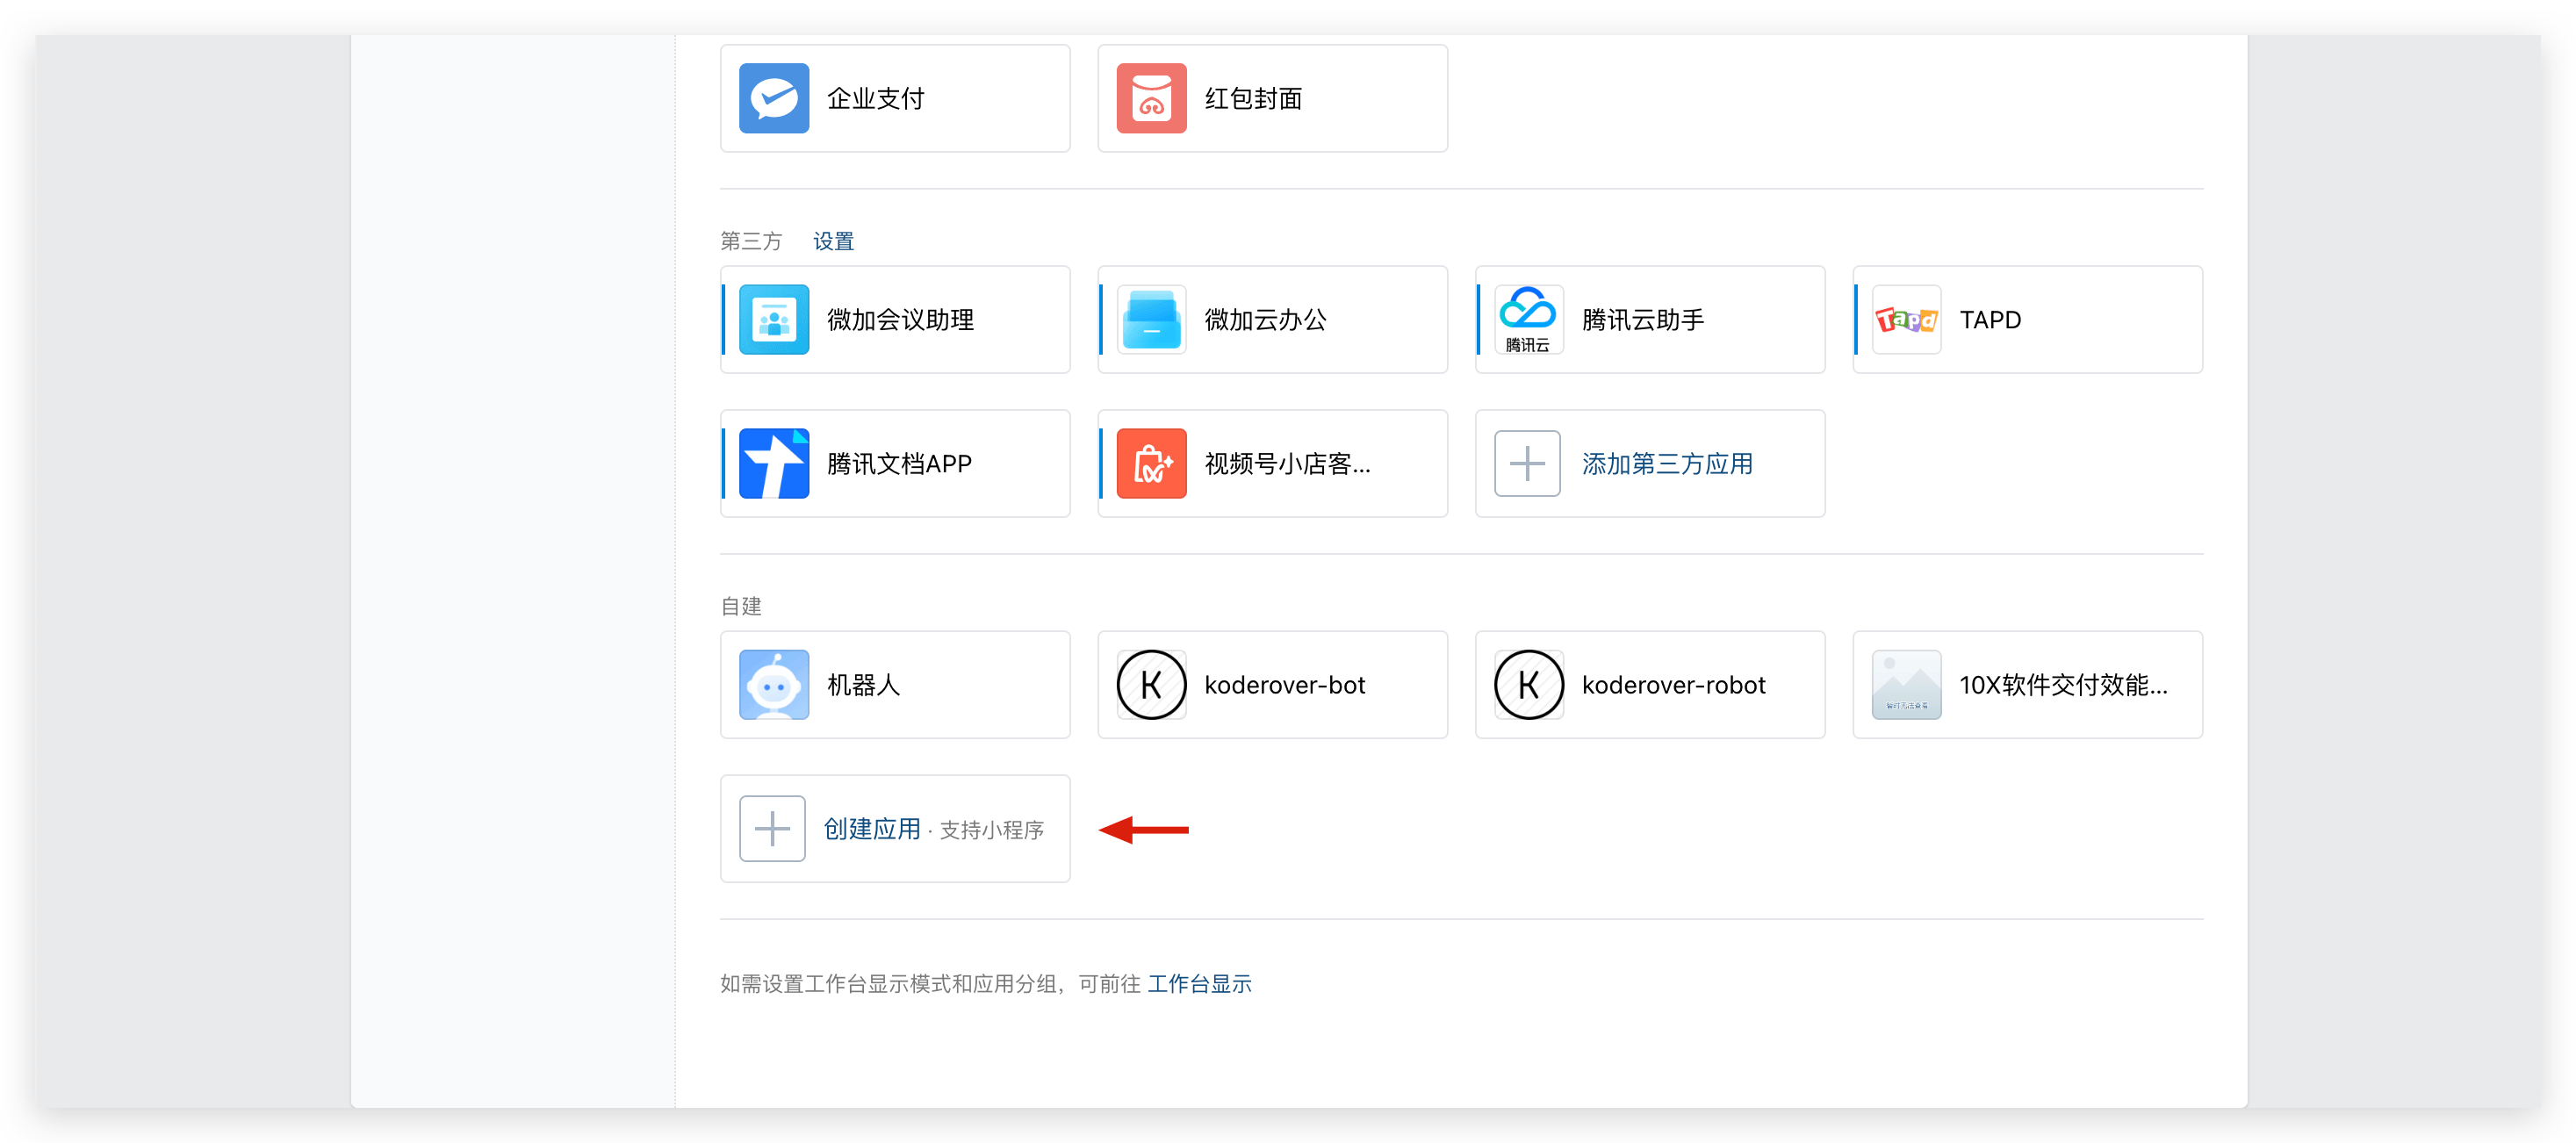
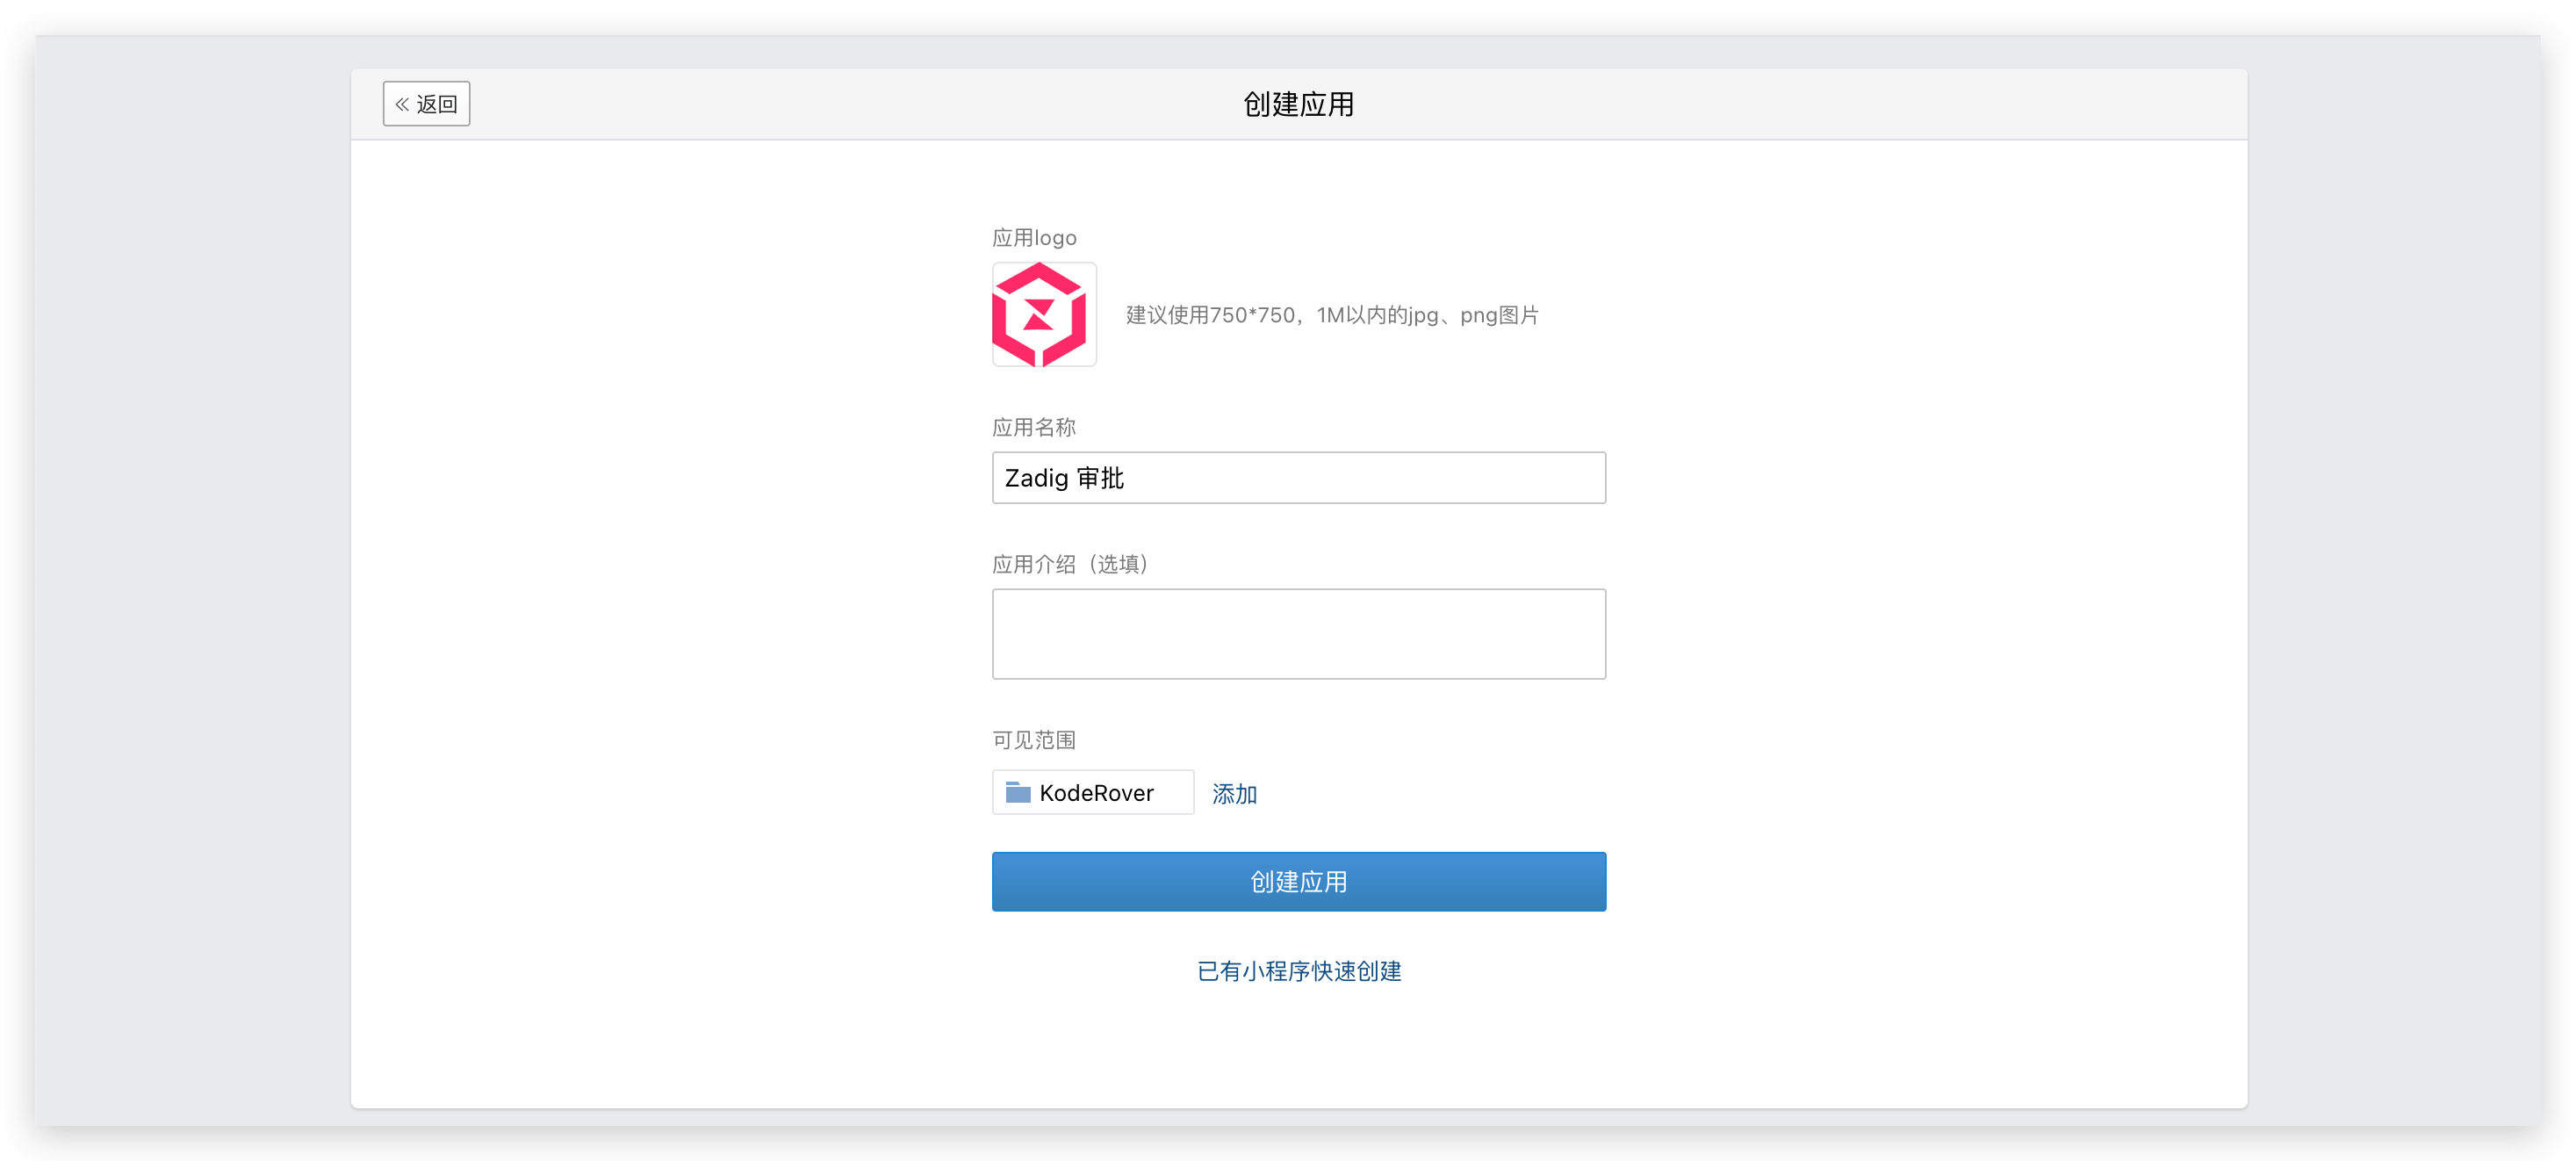
# Step 1: Create an Application
Visit the WeChat Work backend(opens new window) and create an application as shown below.
Obtain the
AgentIDandSecret.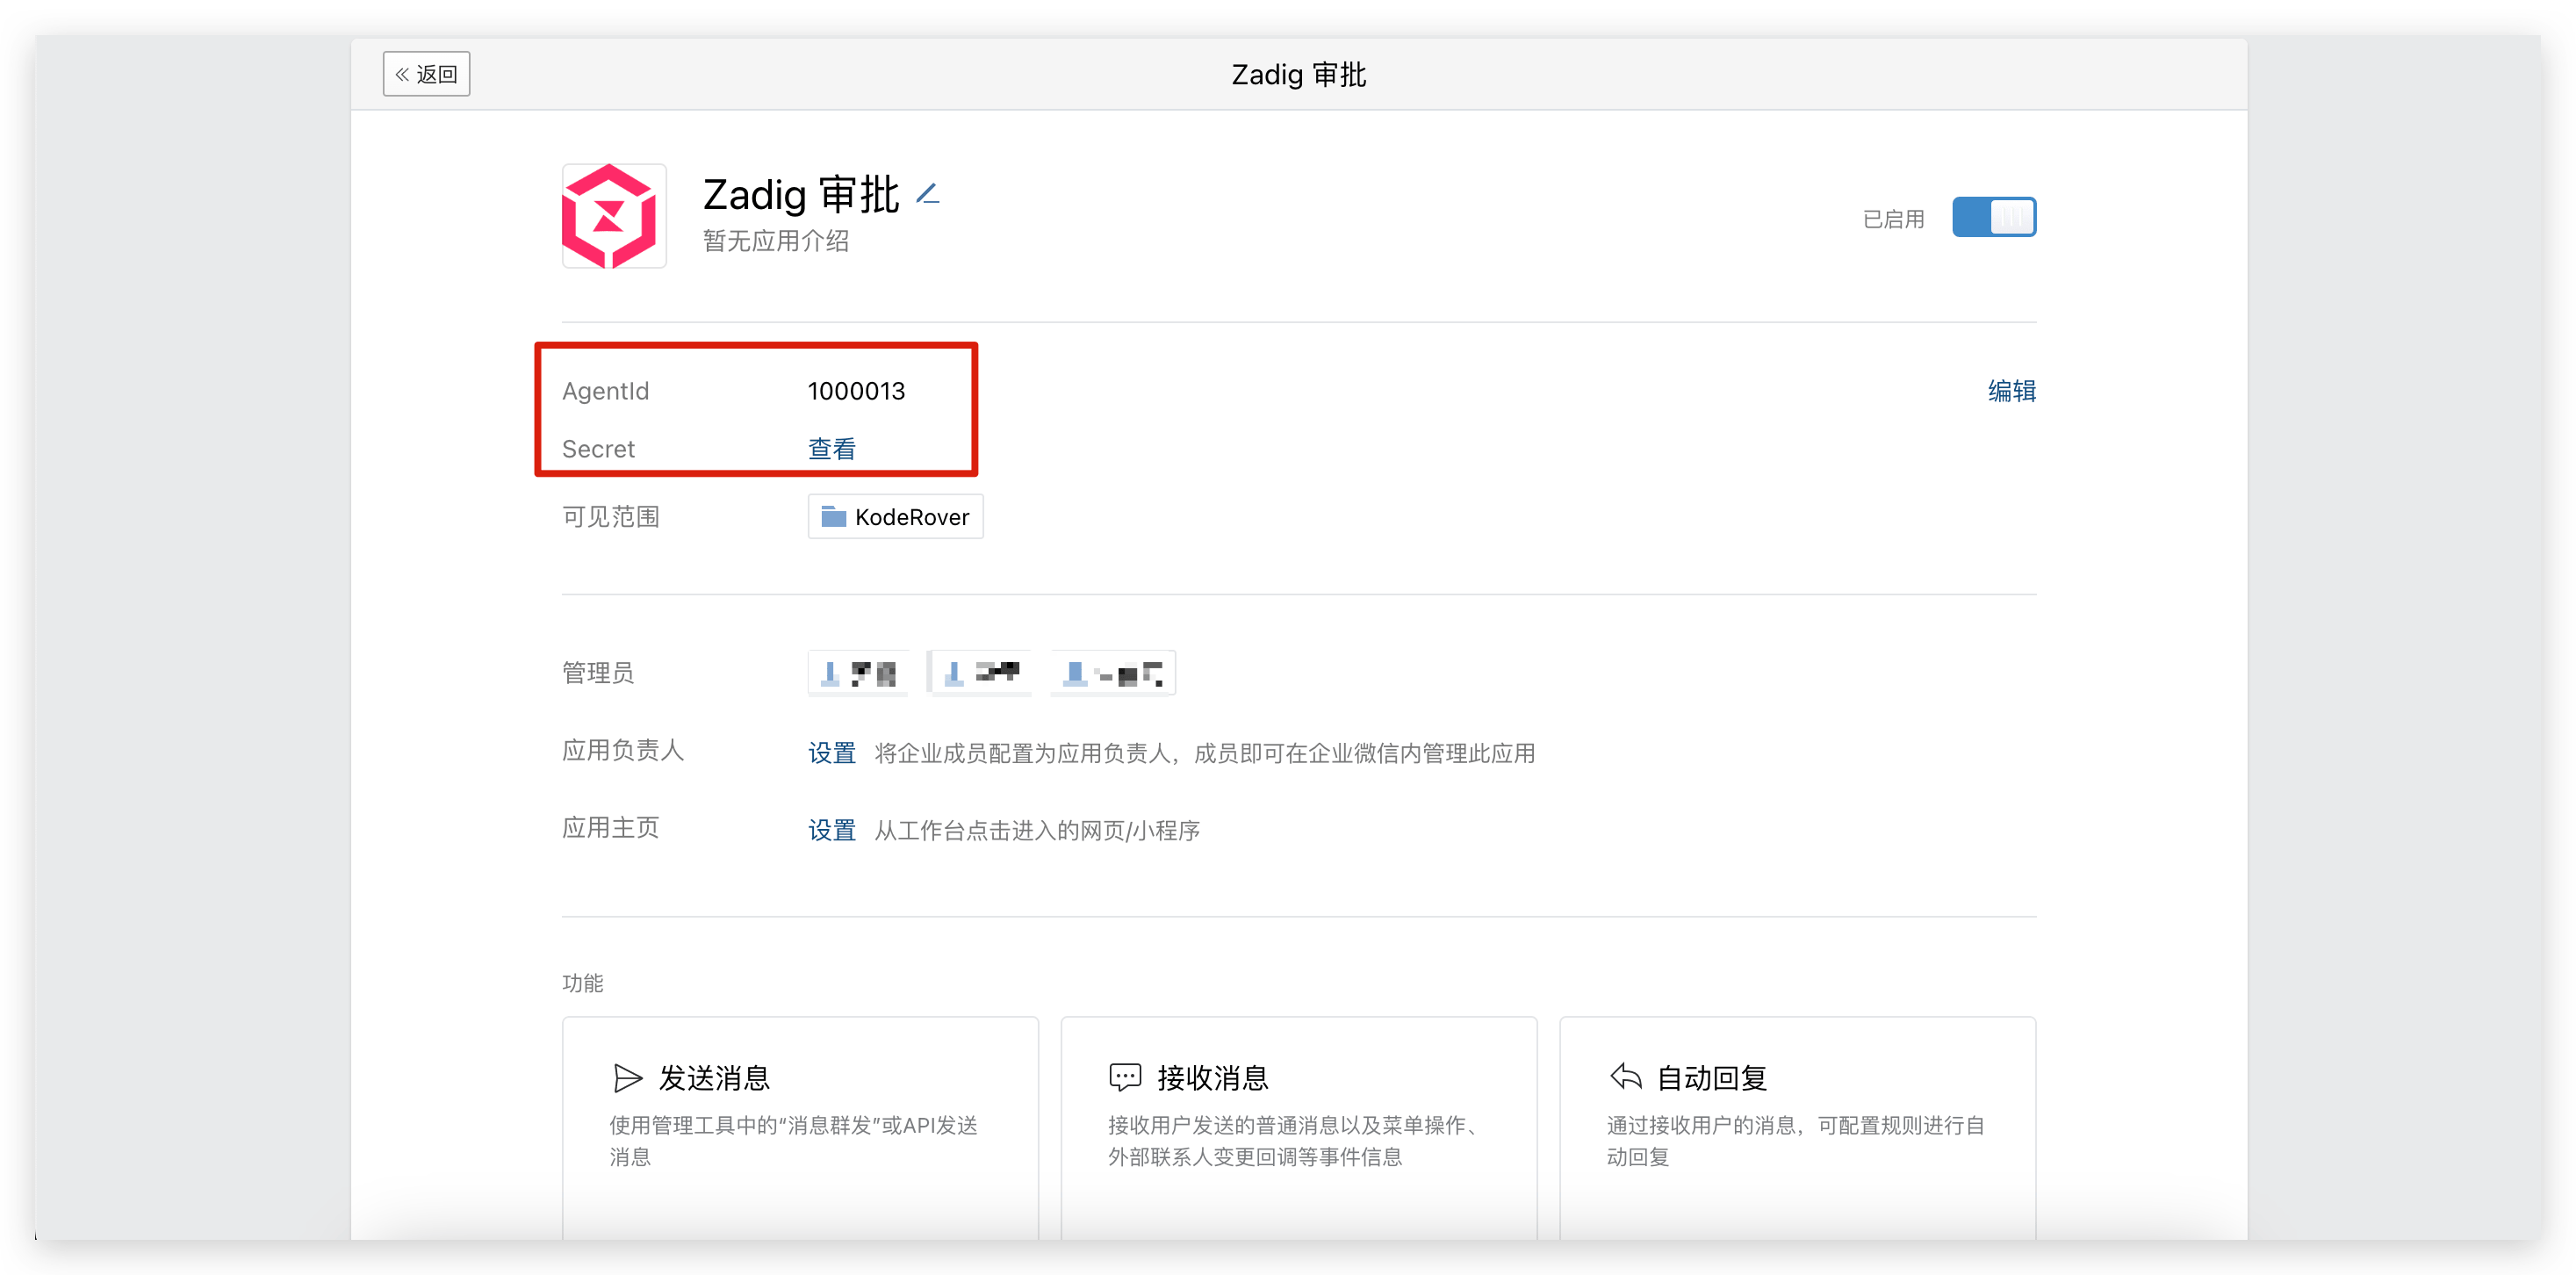
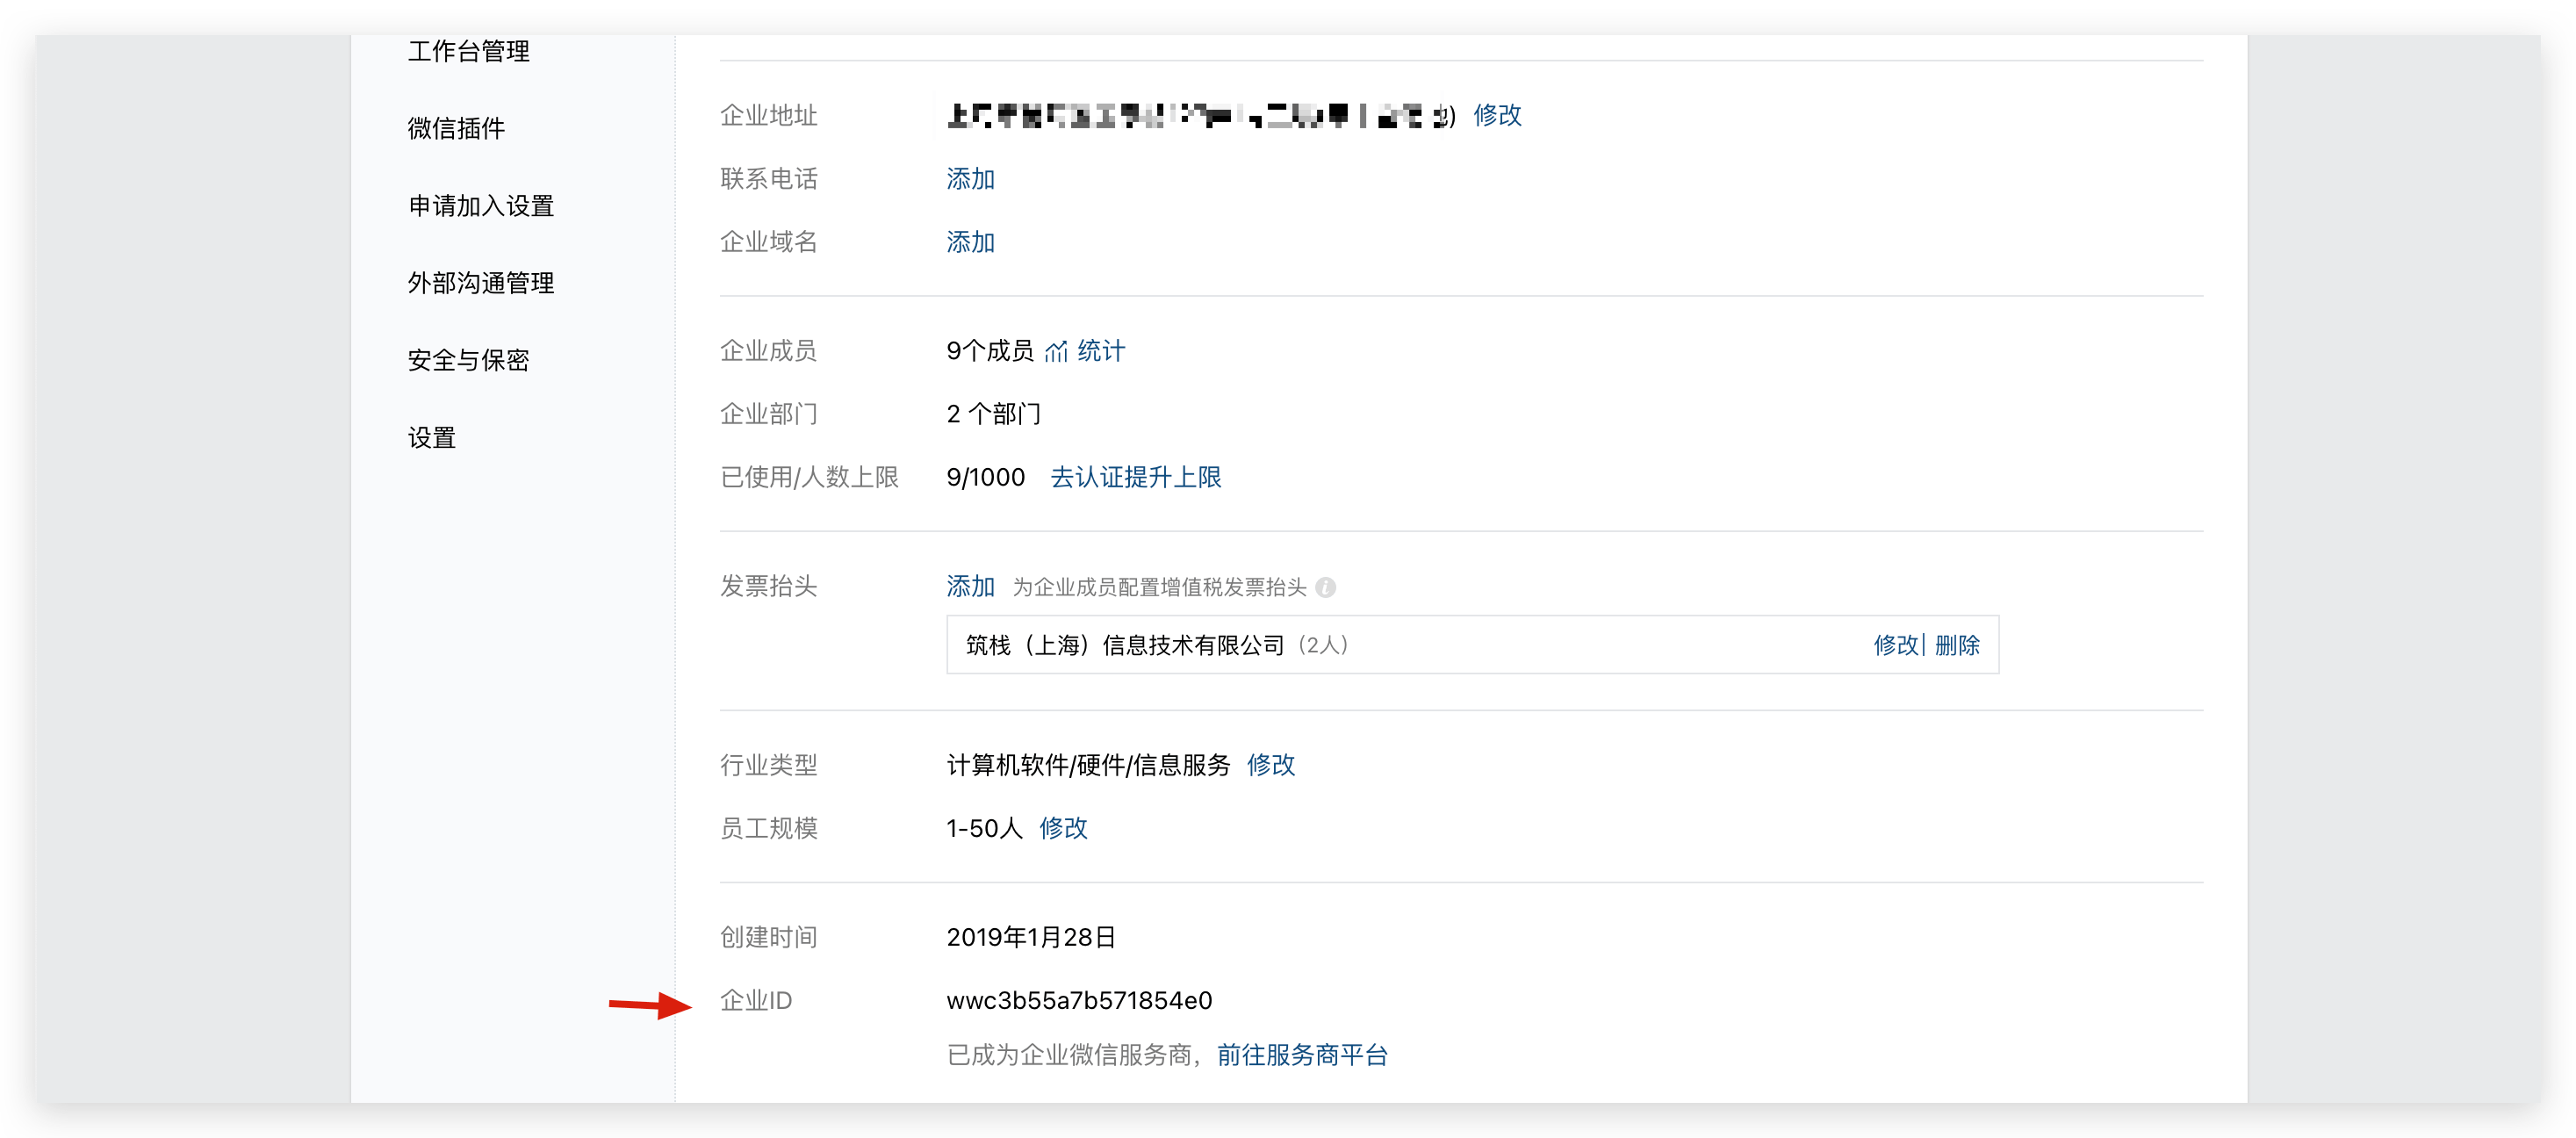
Go to "My Enterprise" -> "Enterprise Information" and obtain the
Enterprise ID.
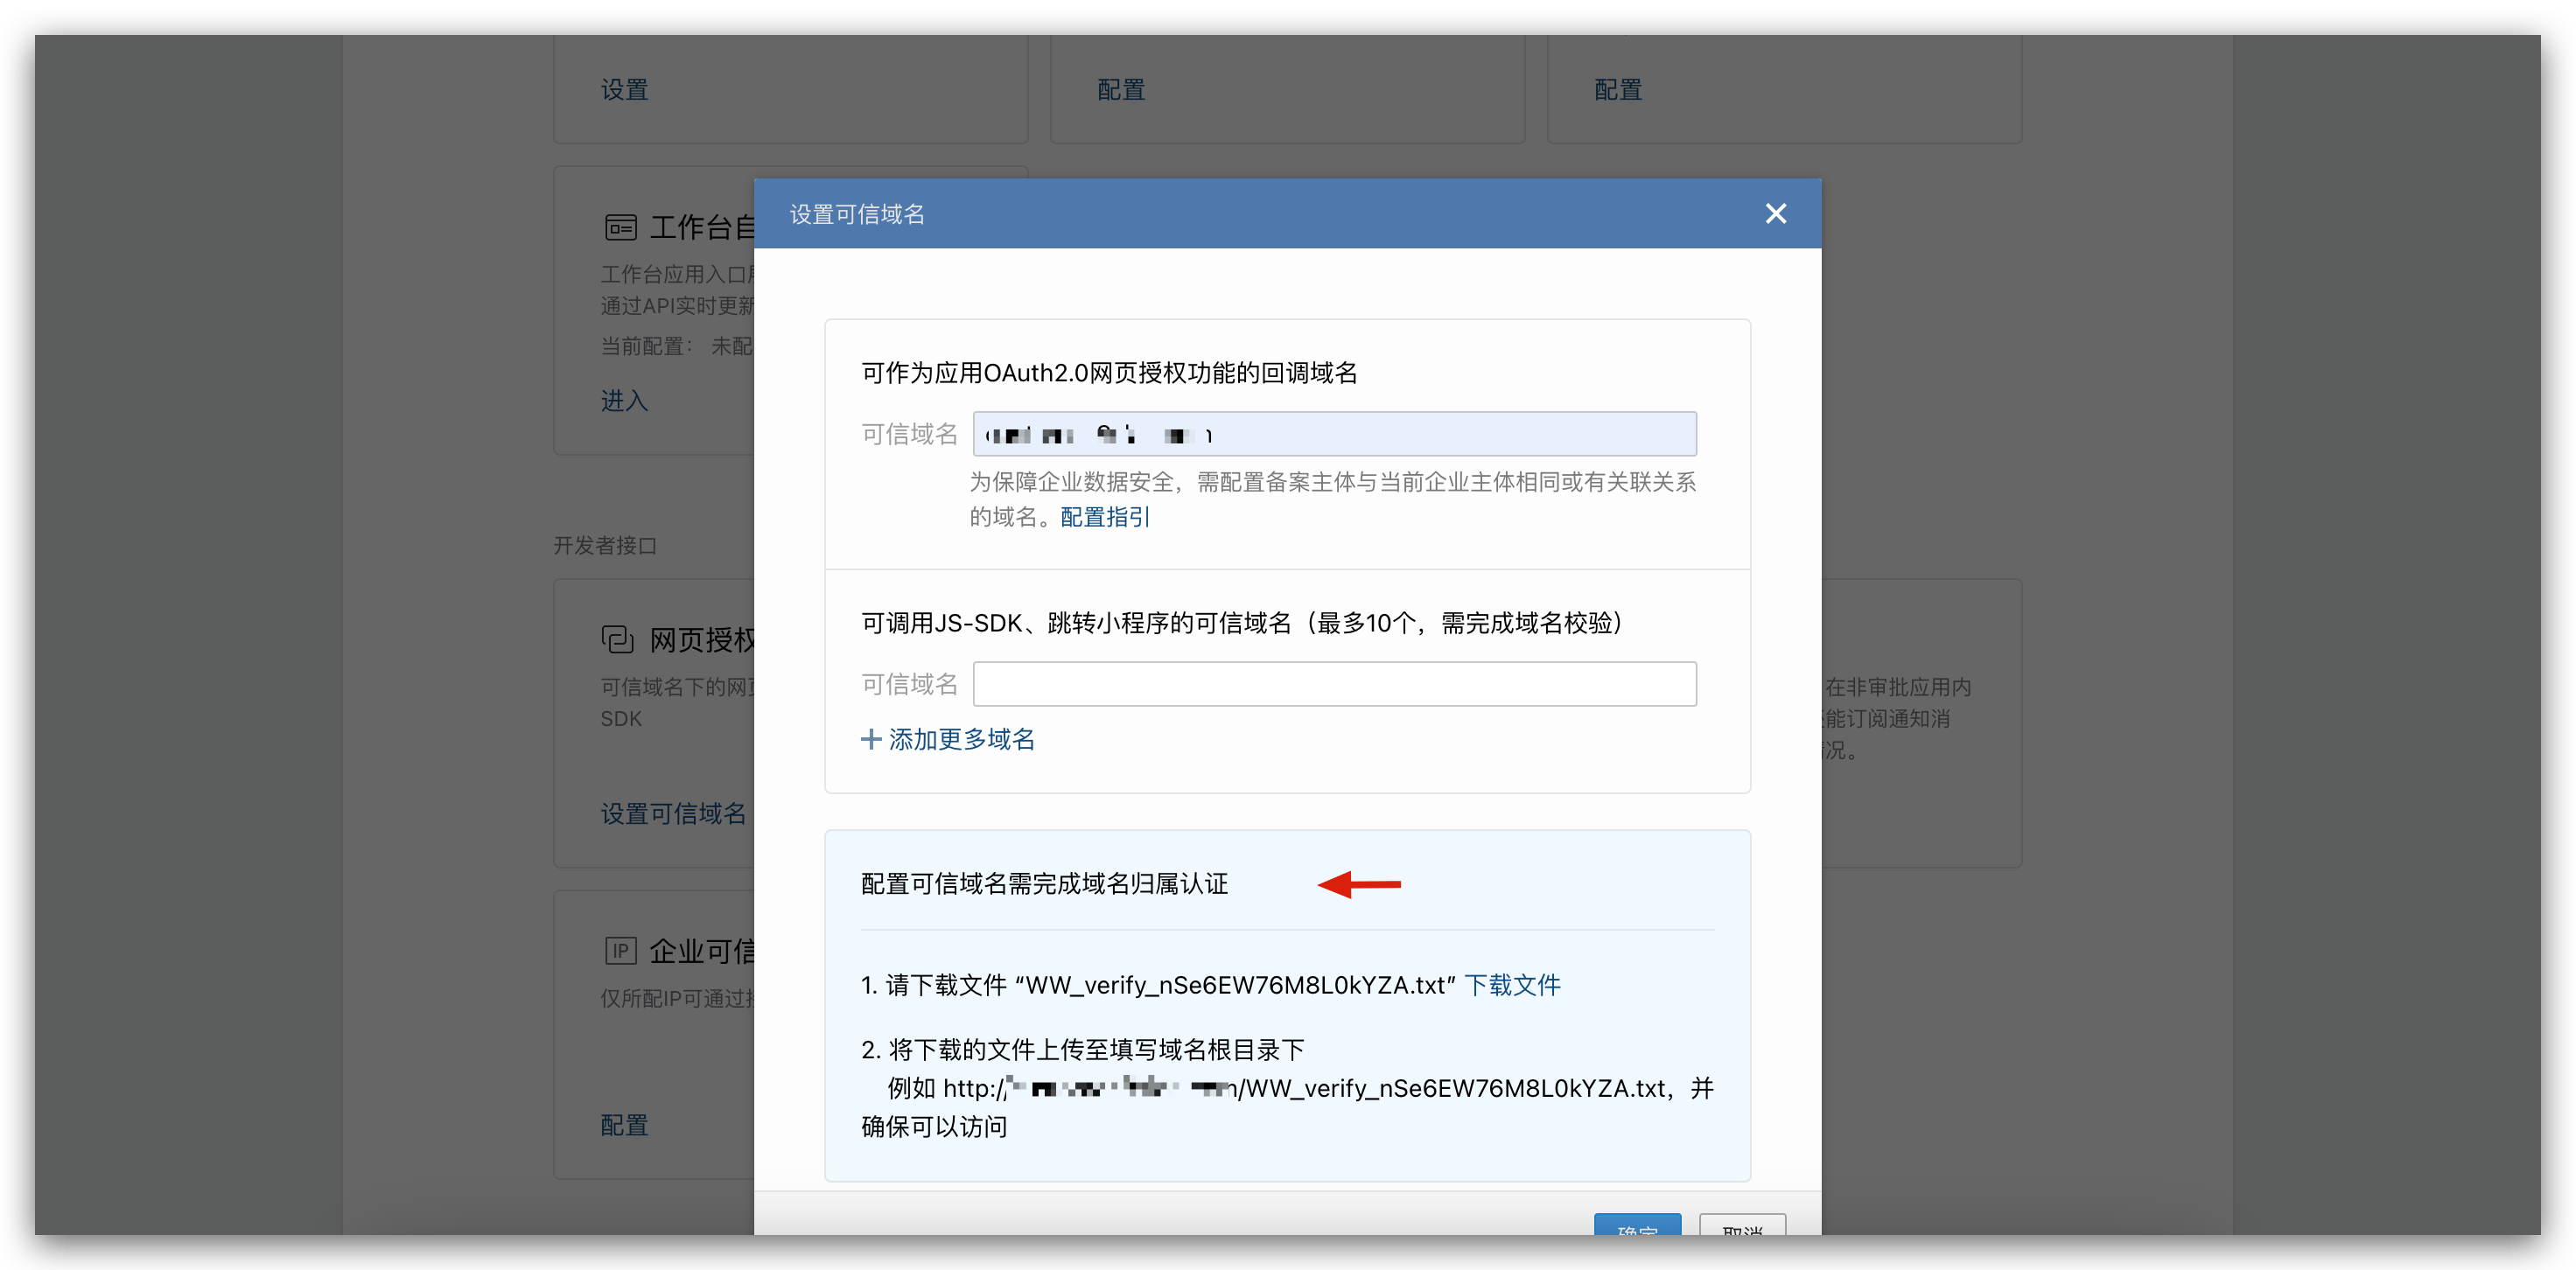
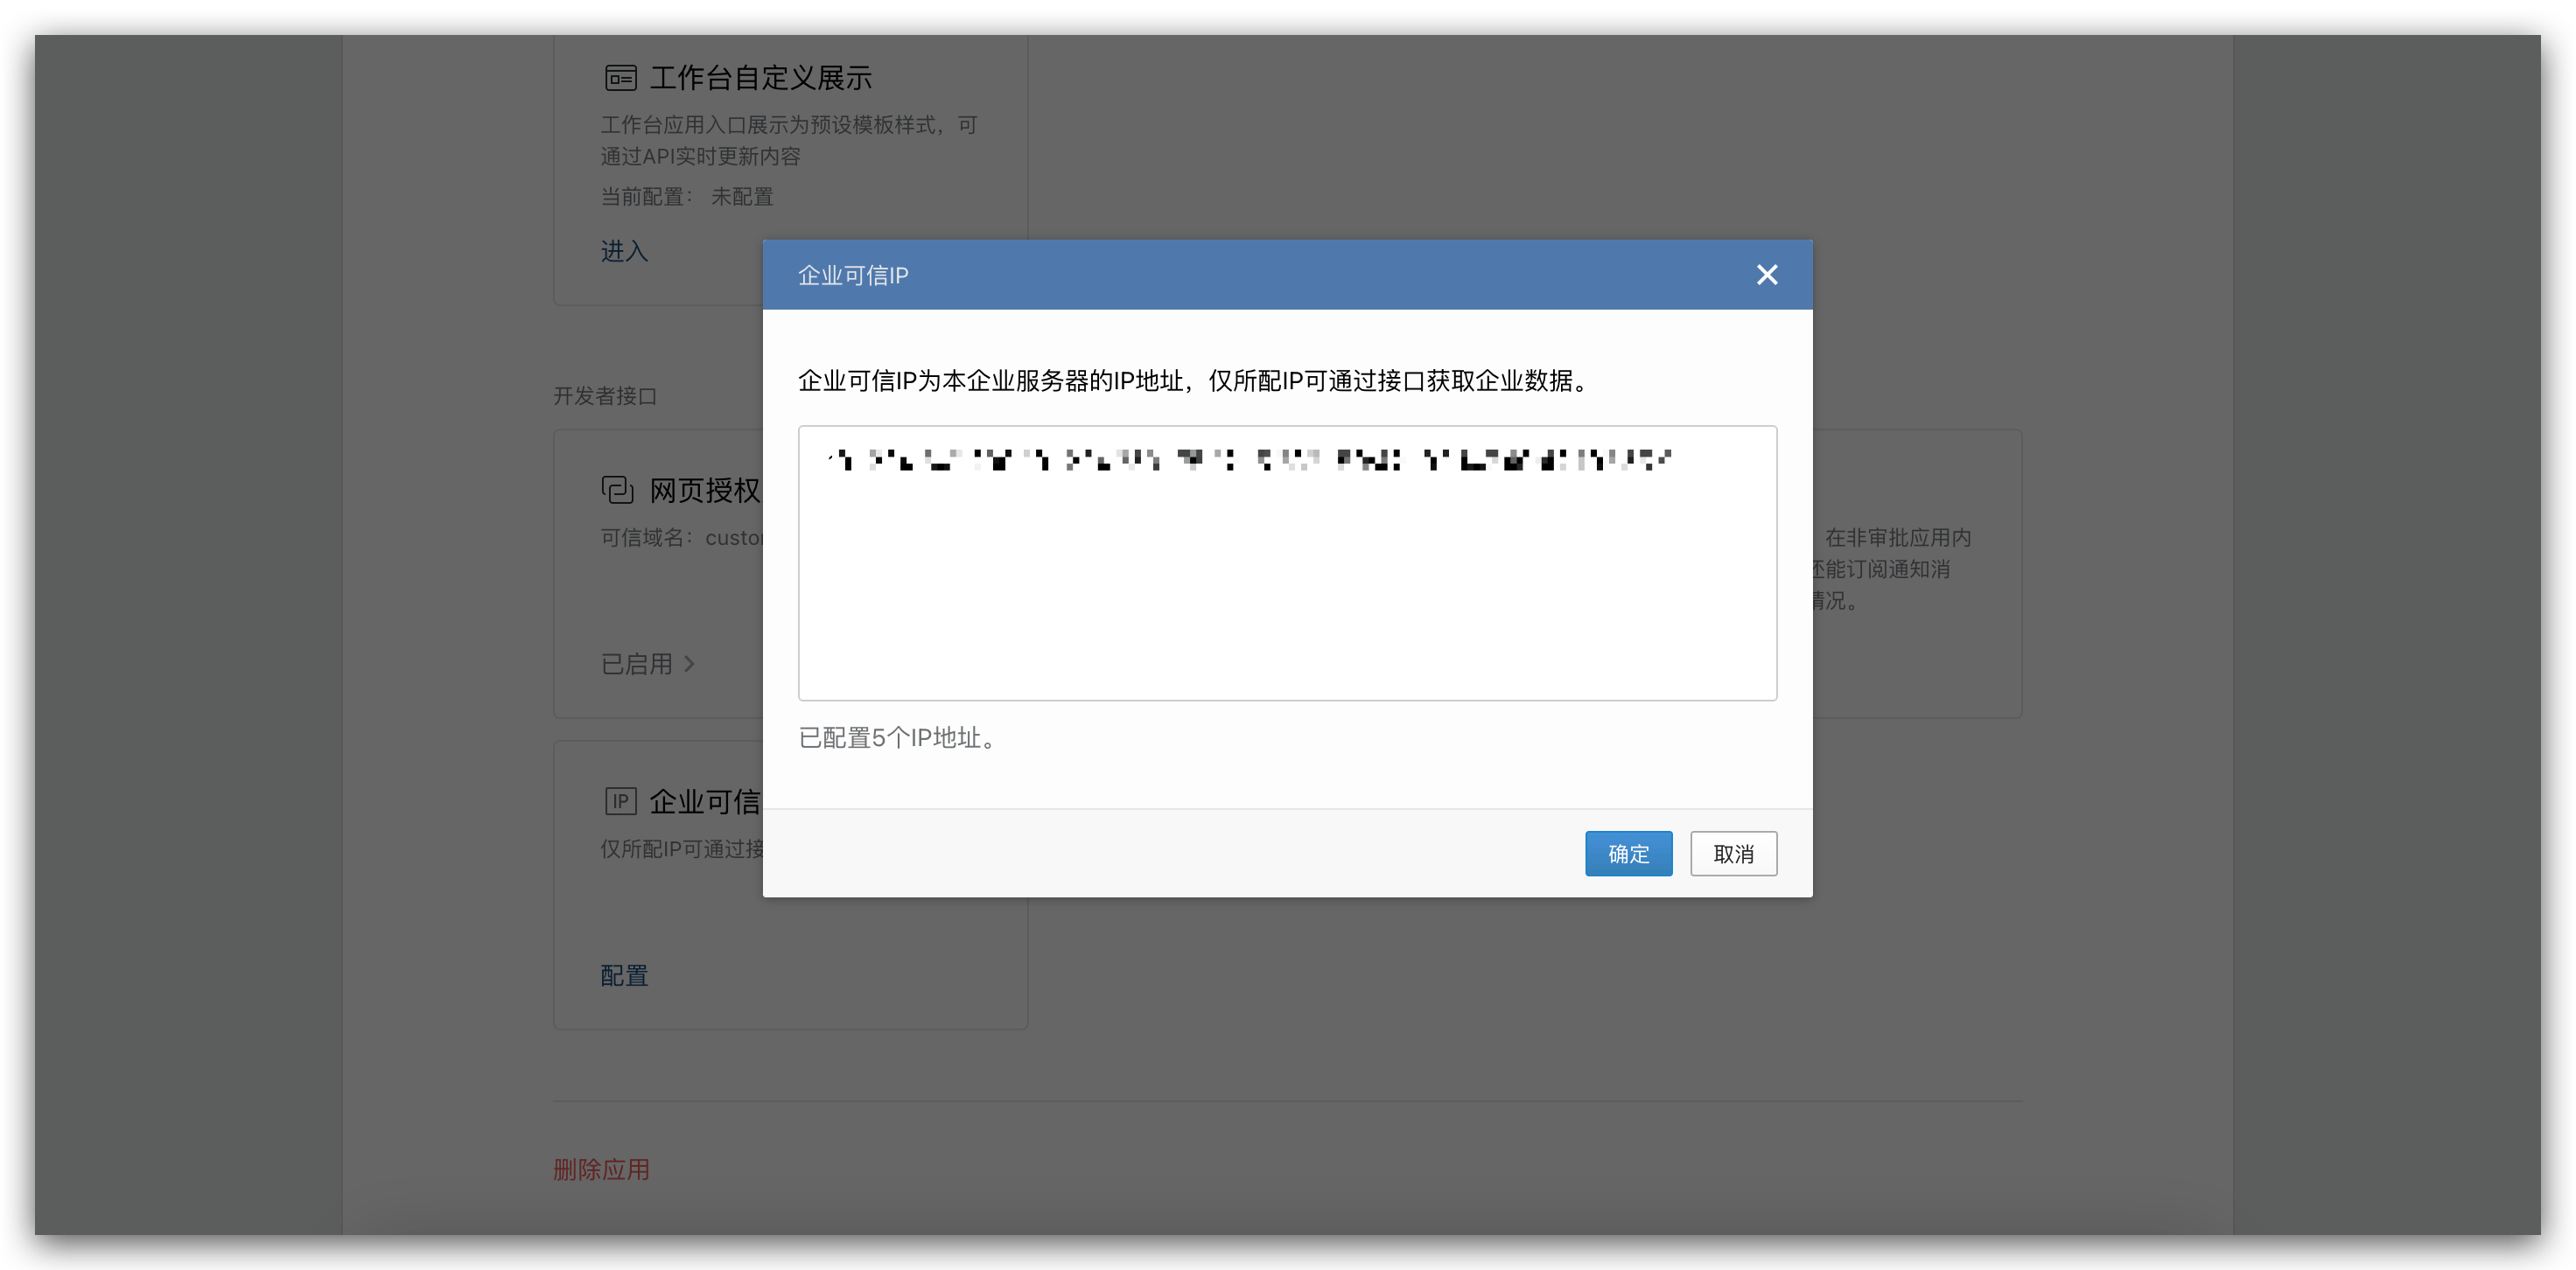
- Configure trusted domain names
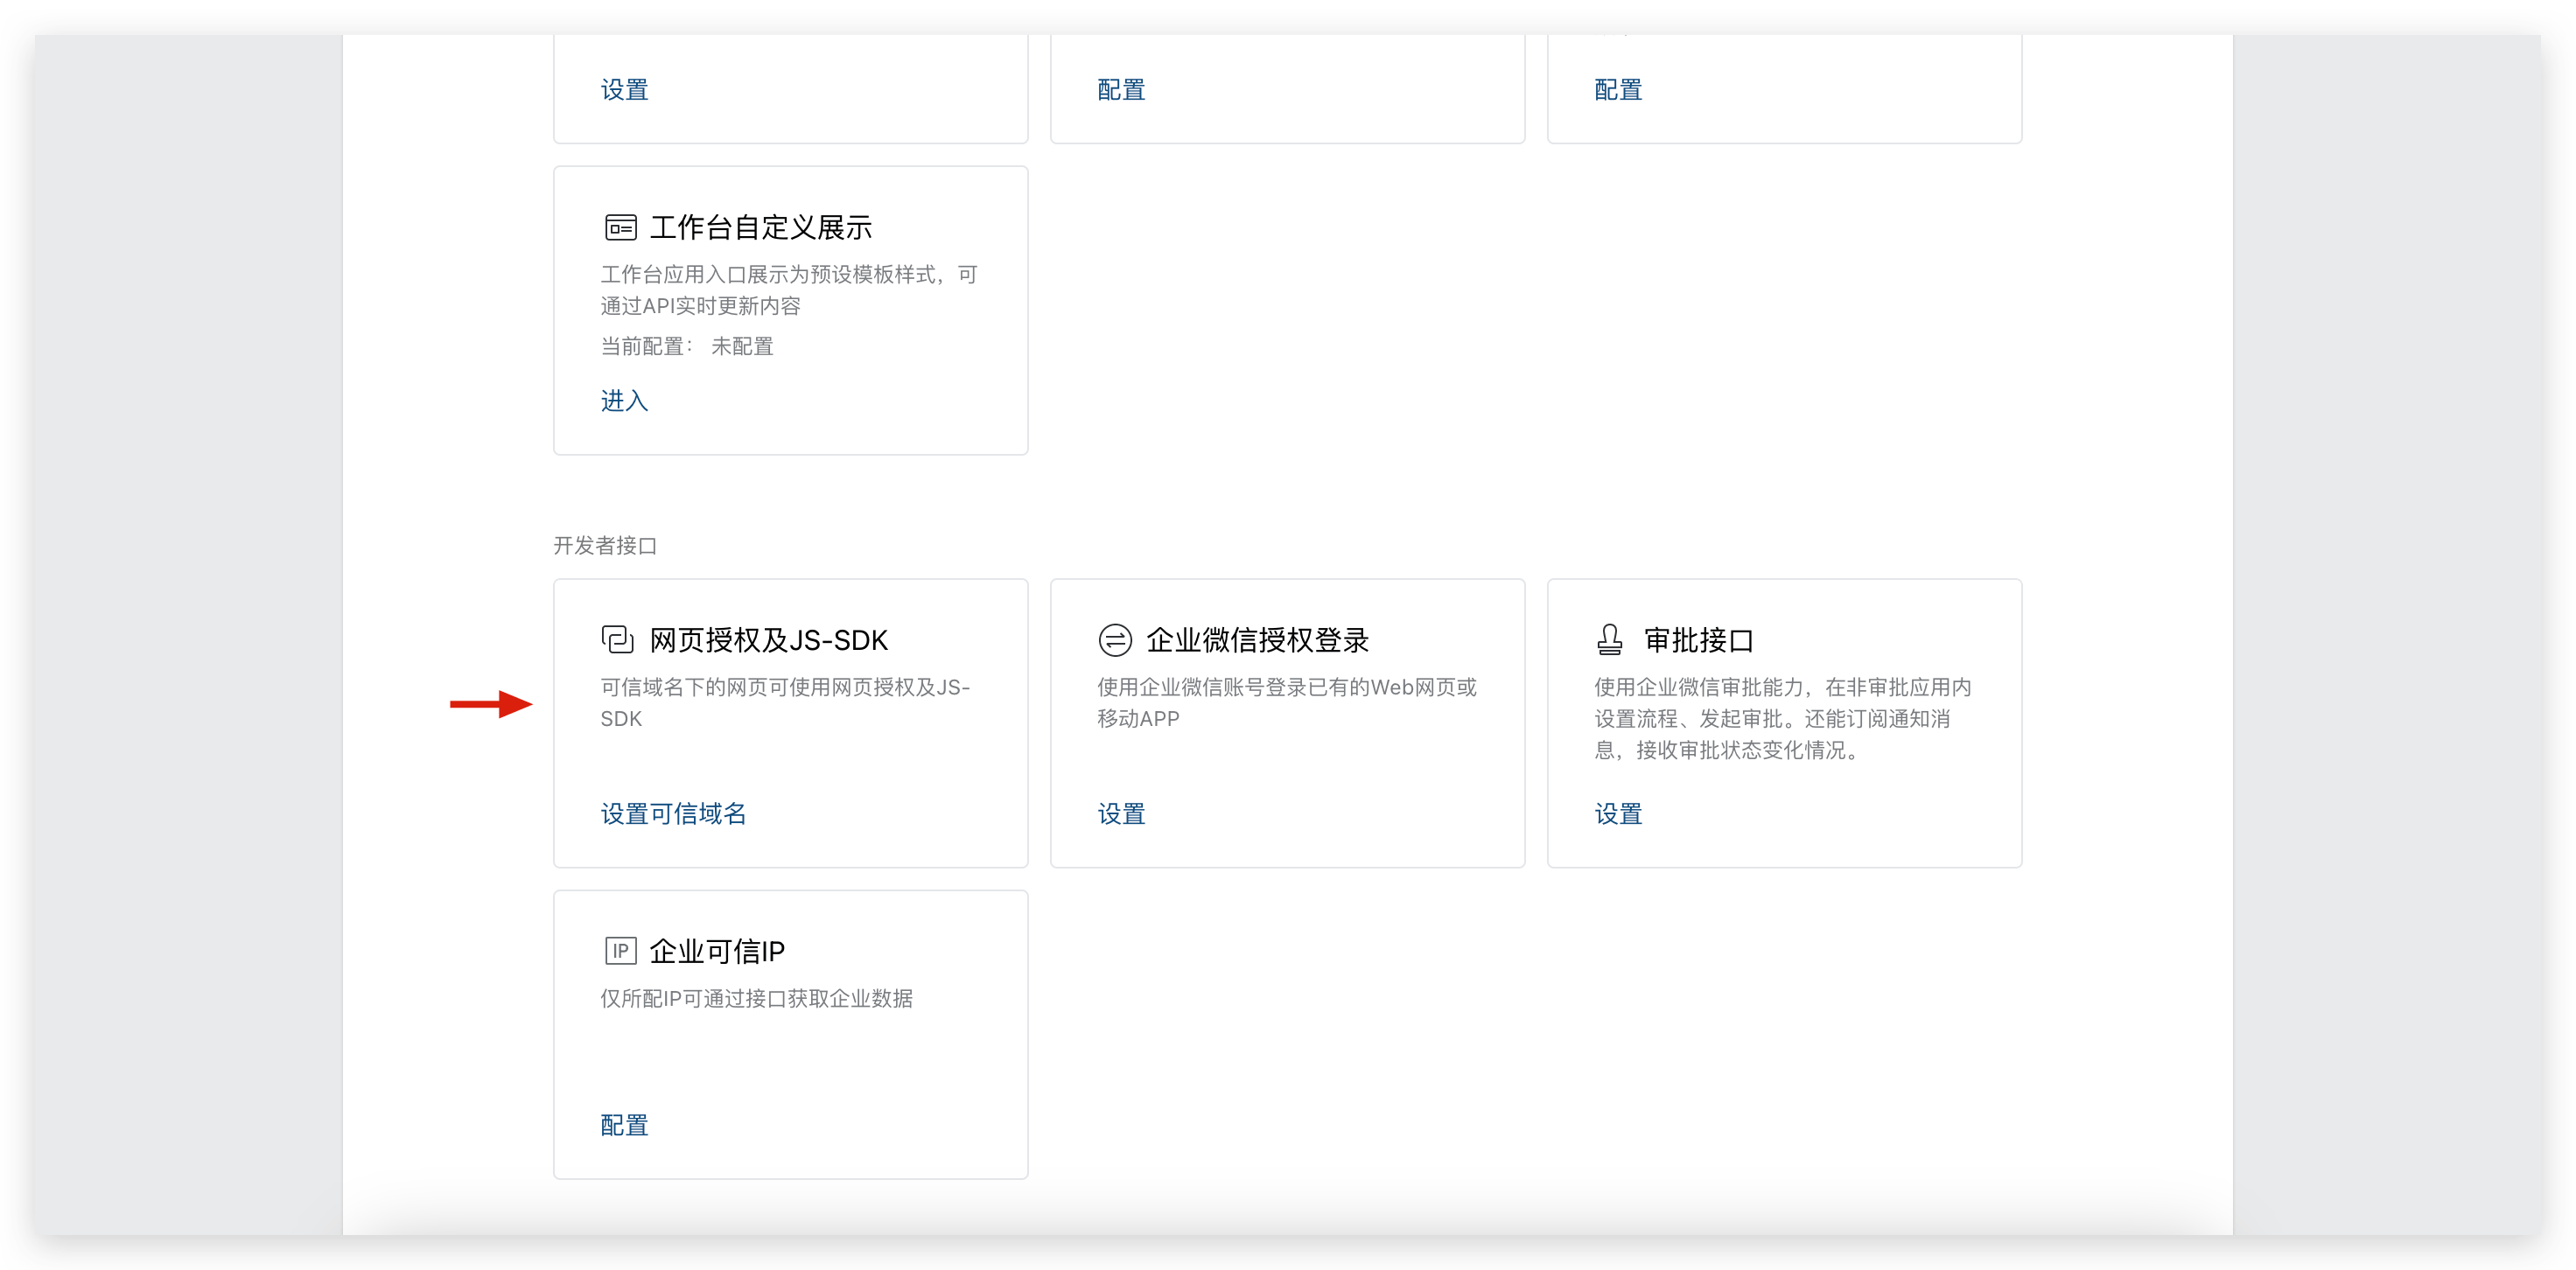
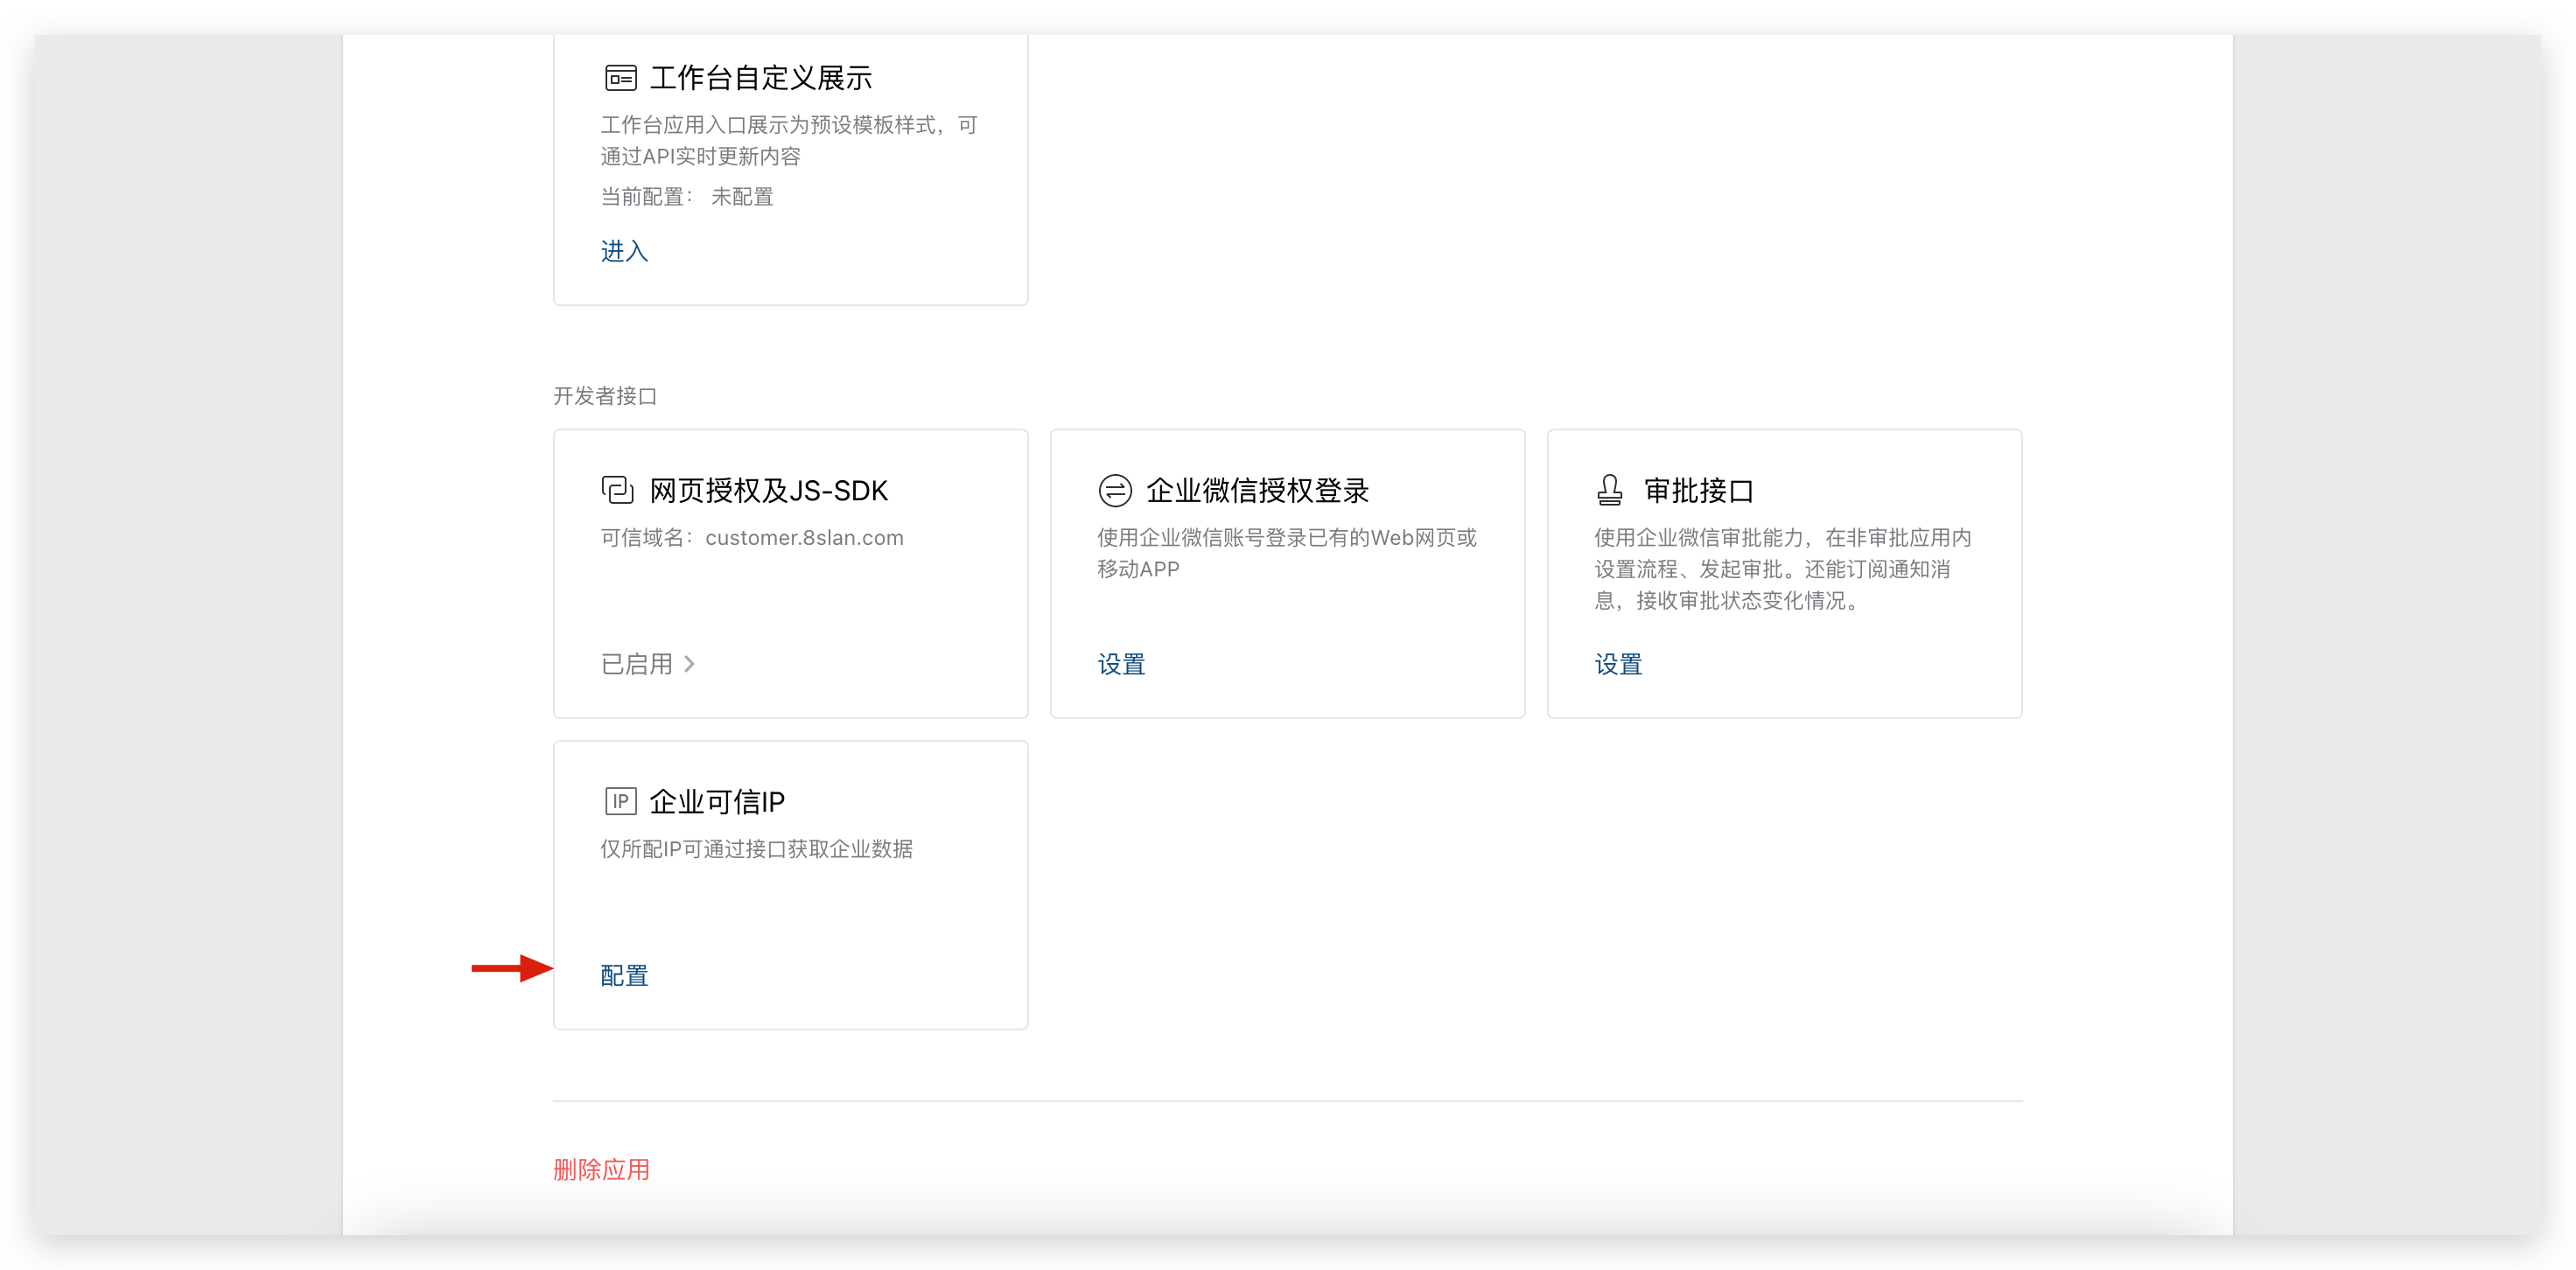
- Configure enterprise trusted IPs
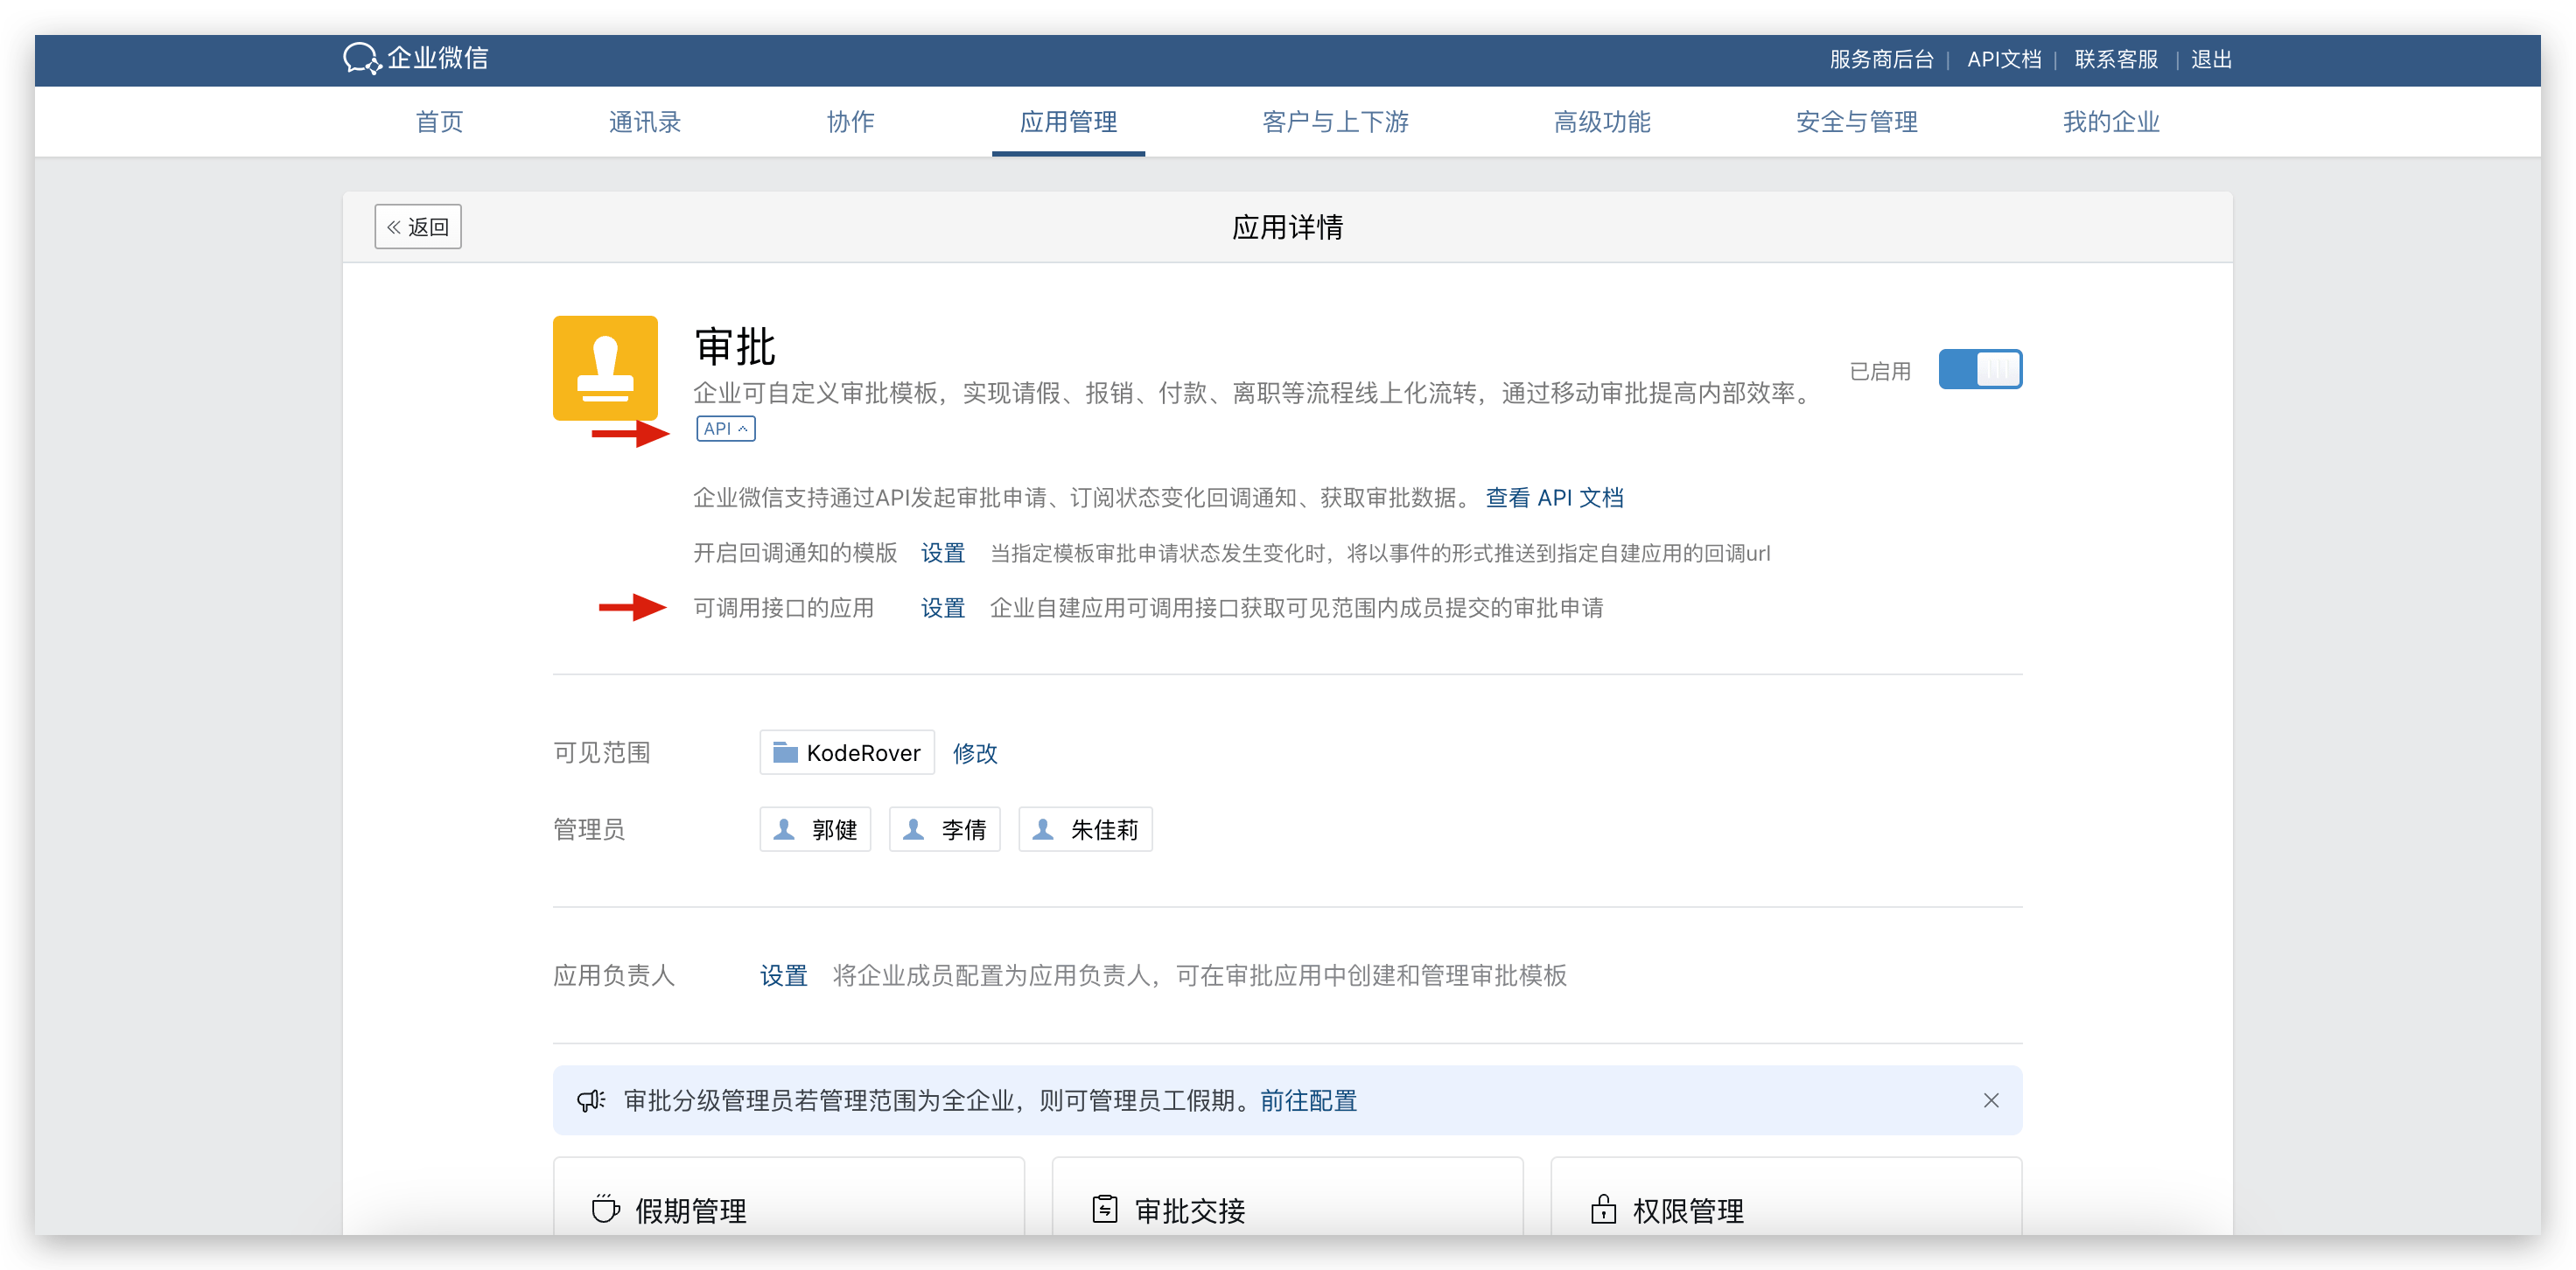
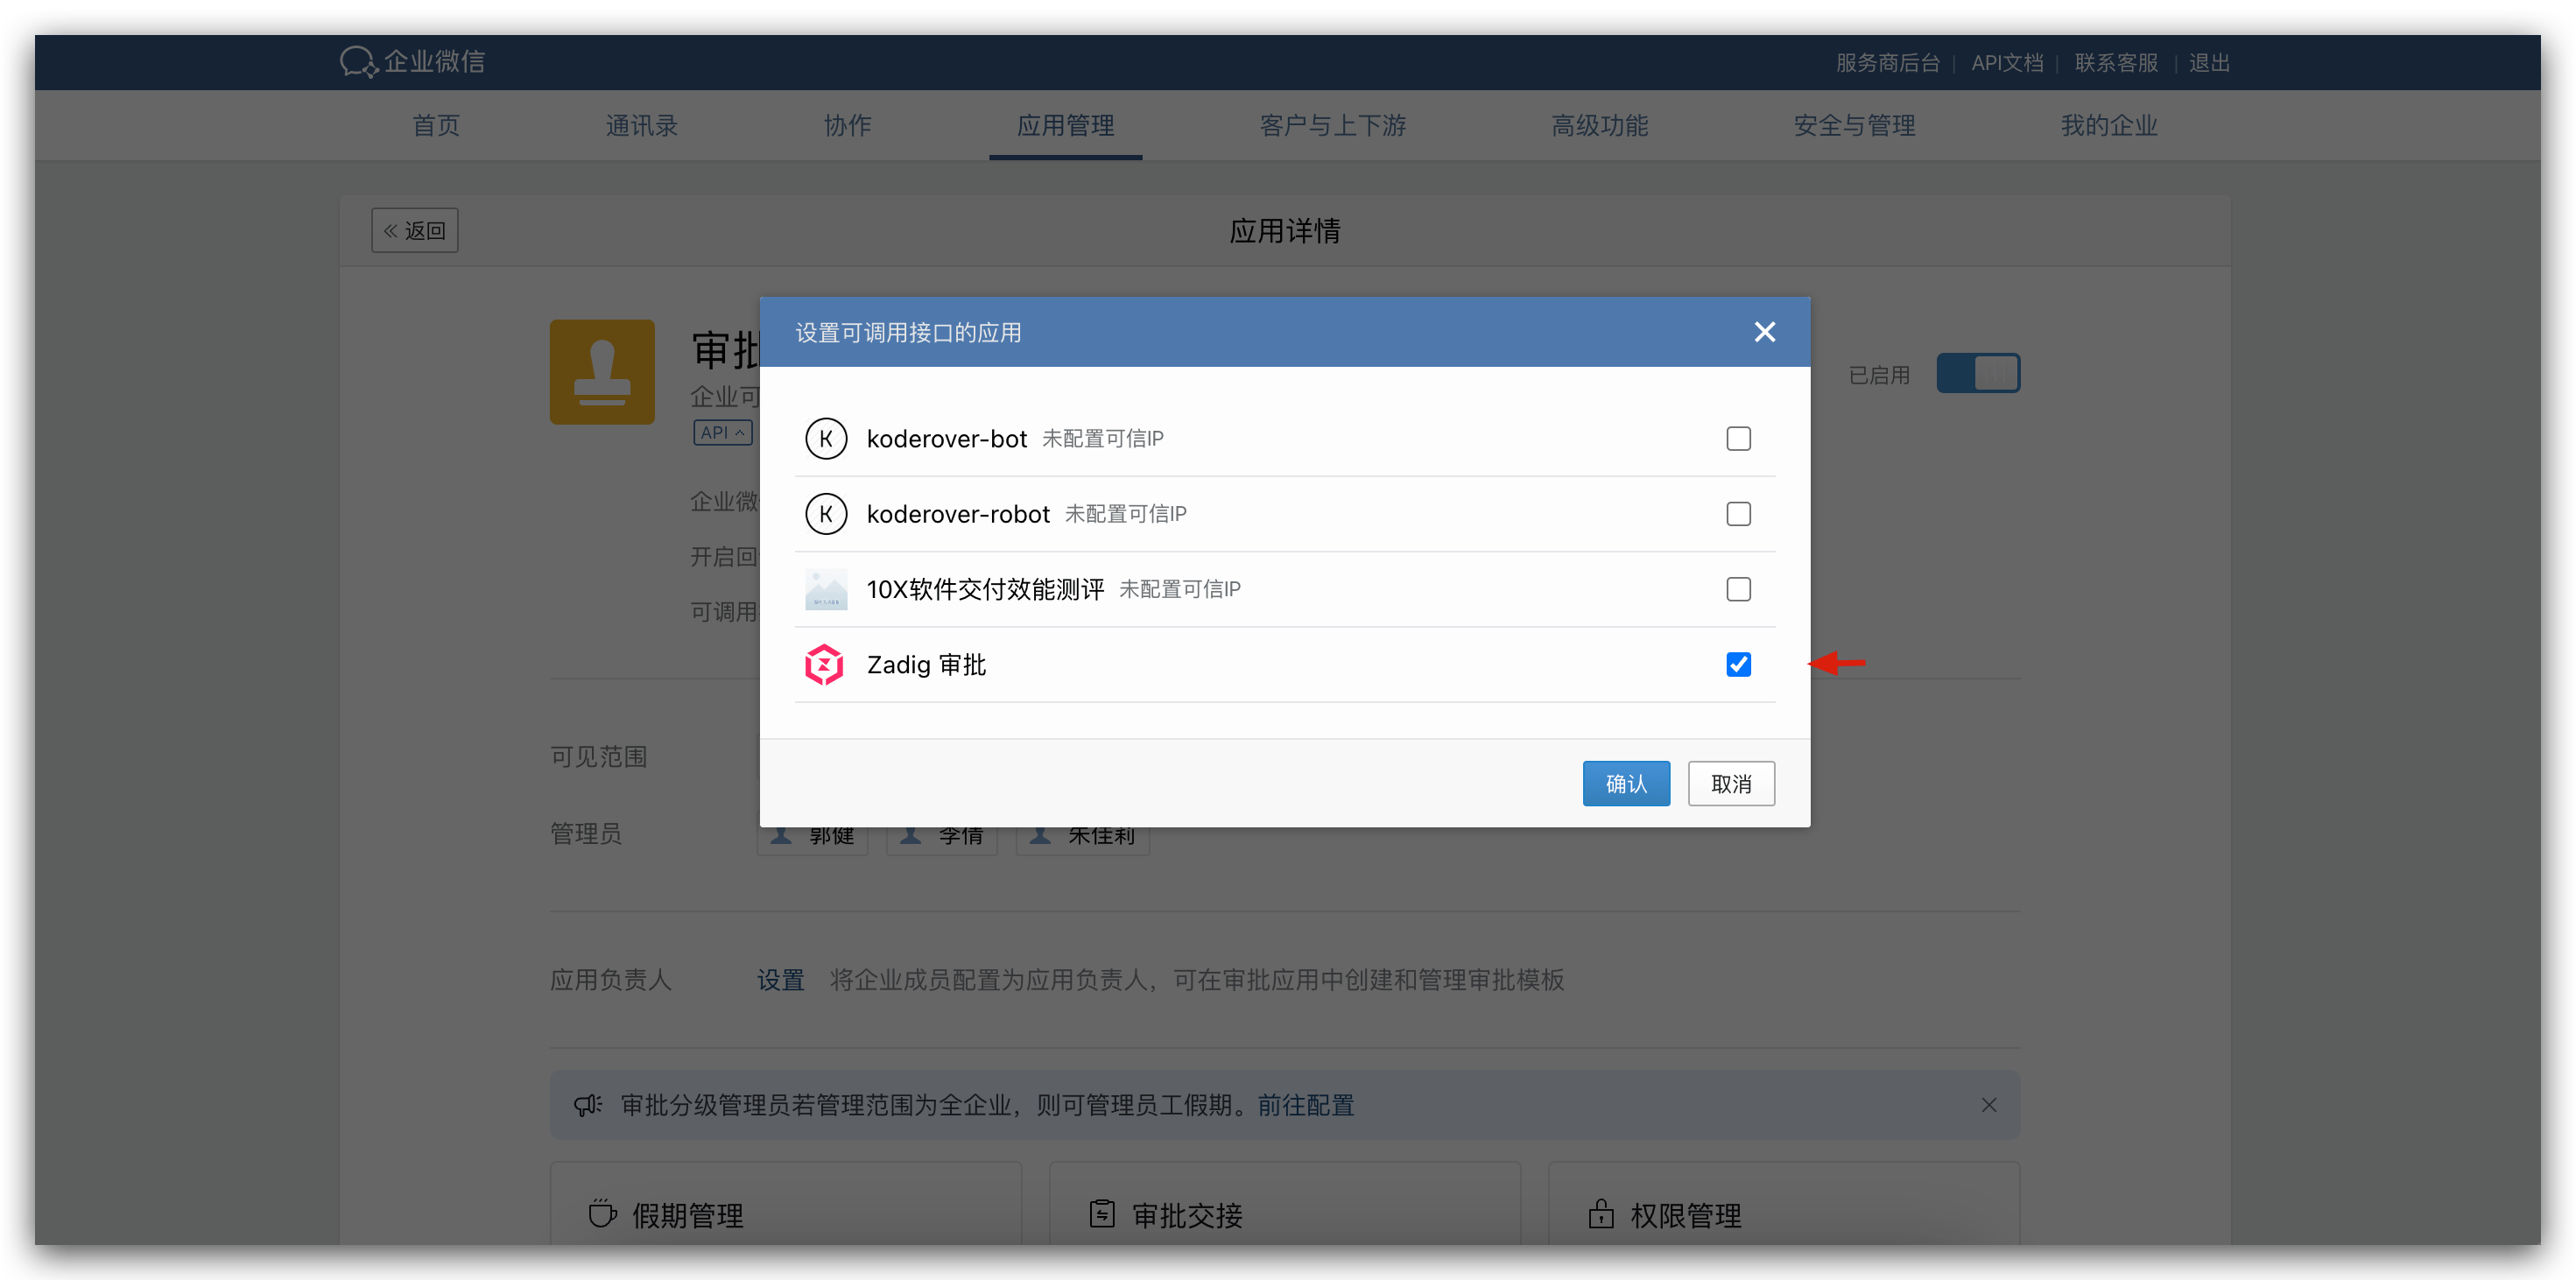
- Go to the "Approval" application and configure the "Application with Callable Interface," checking the created application.
# Step 2: Integrate IM Application
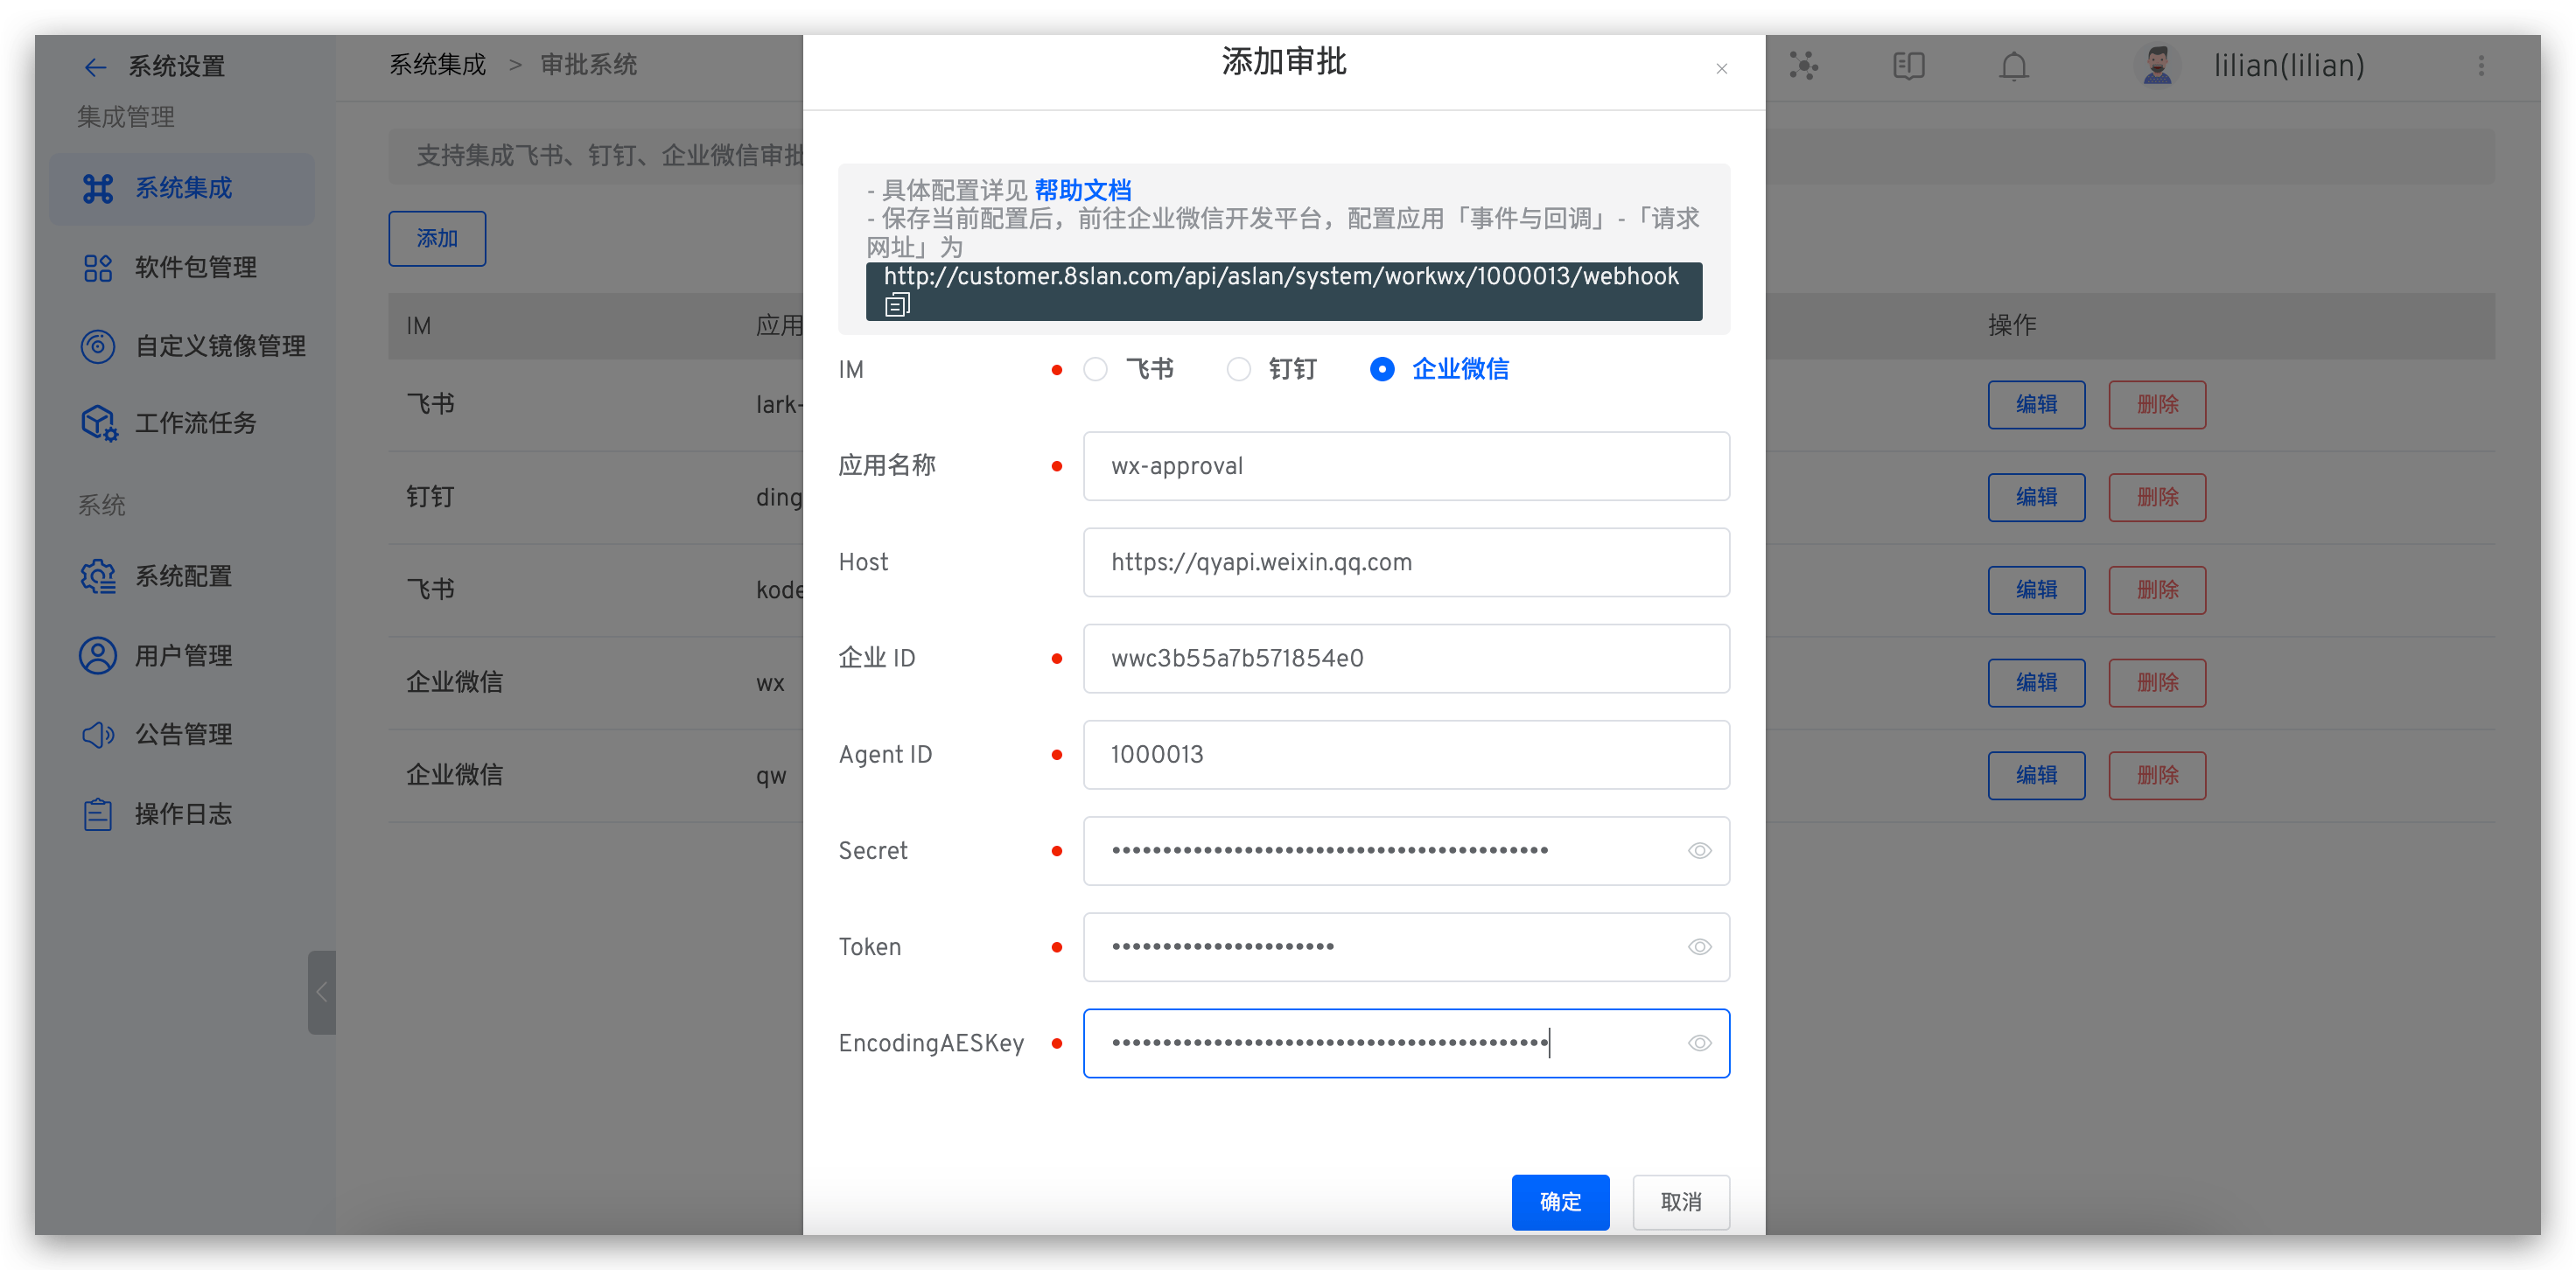
- Visit Zadig, click
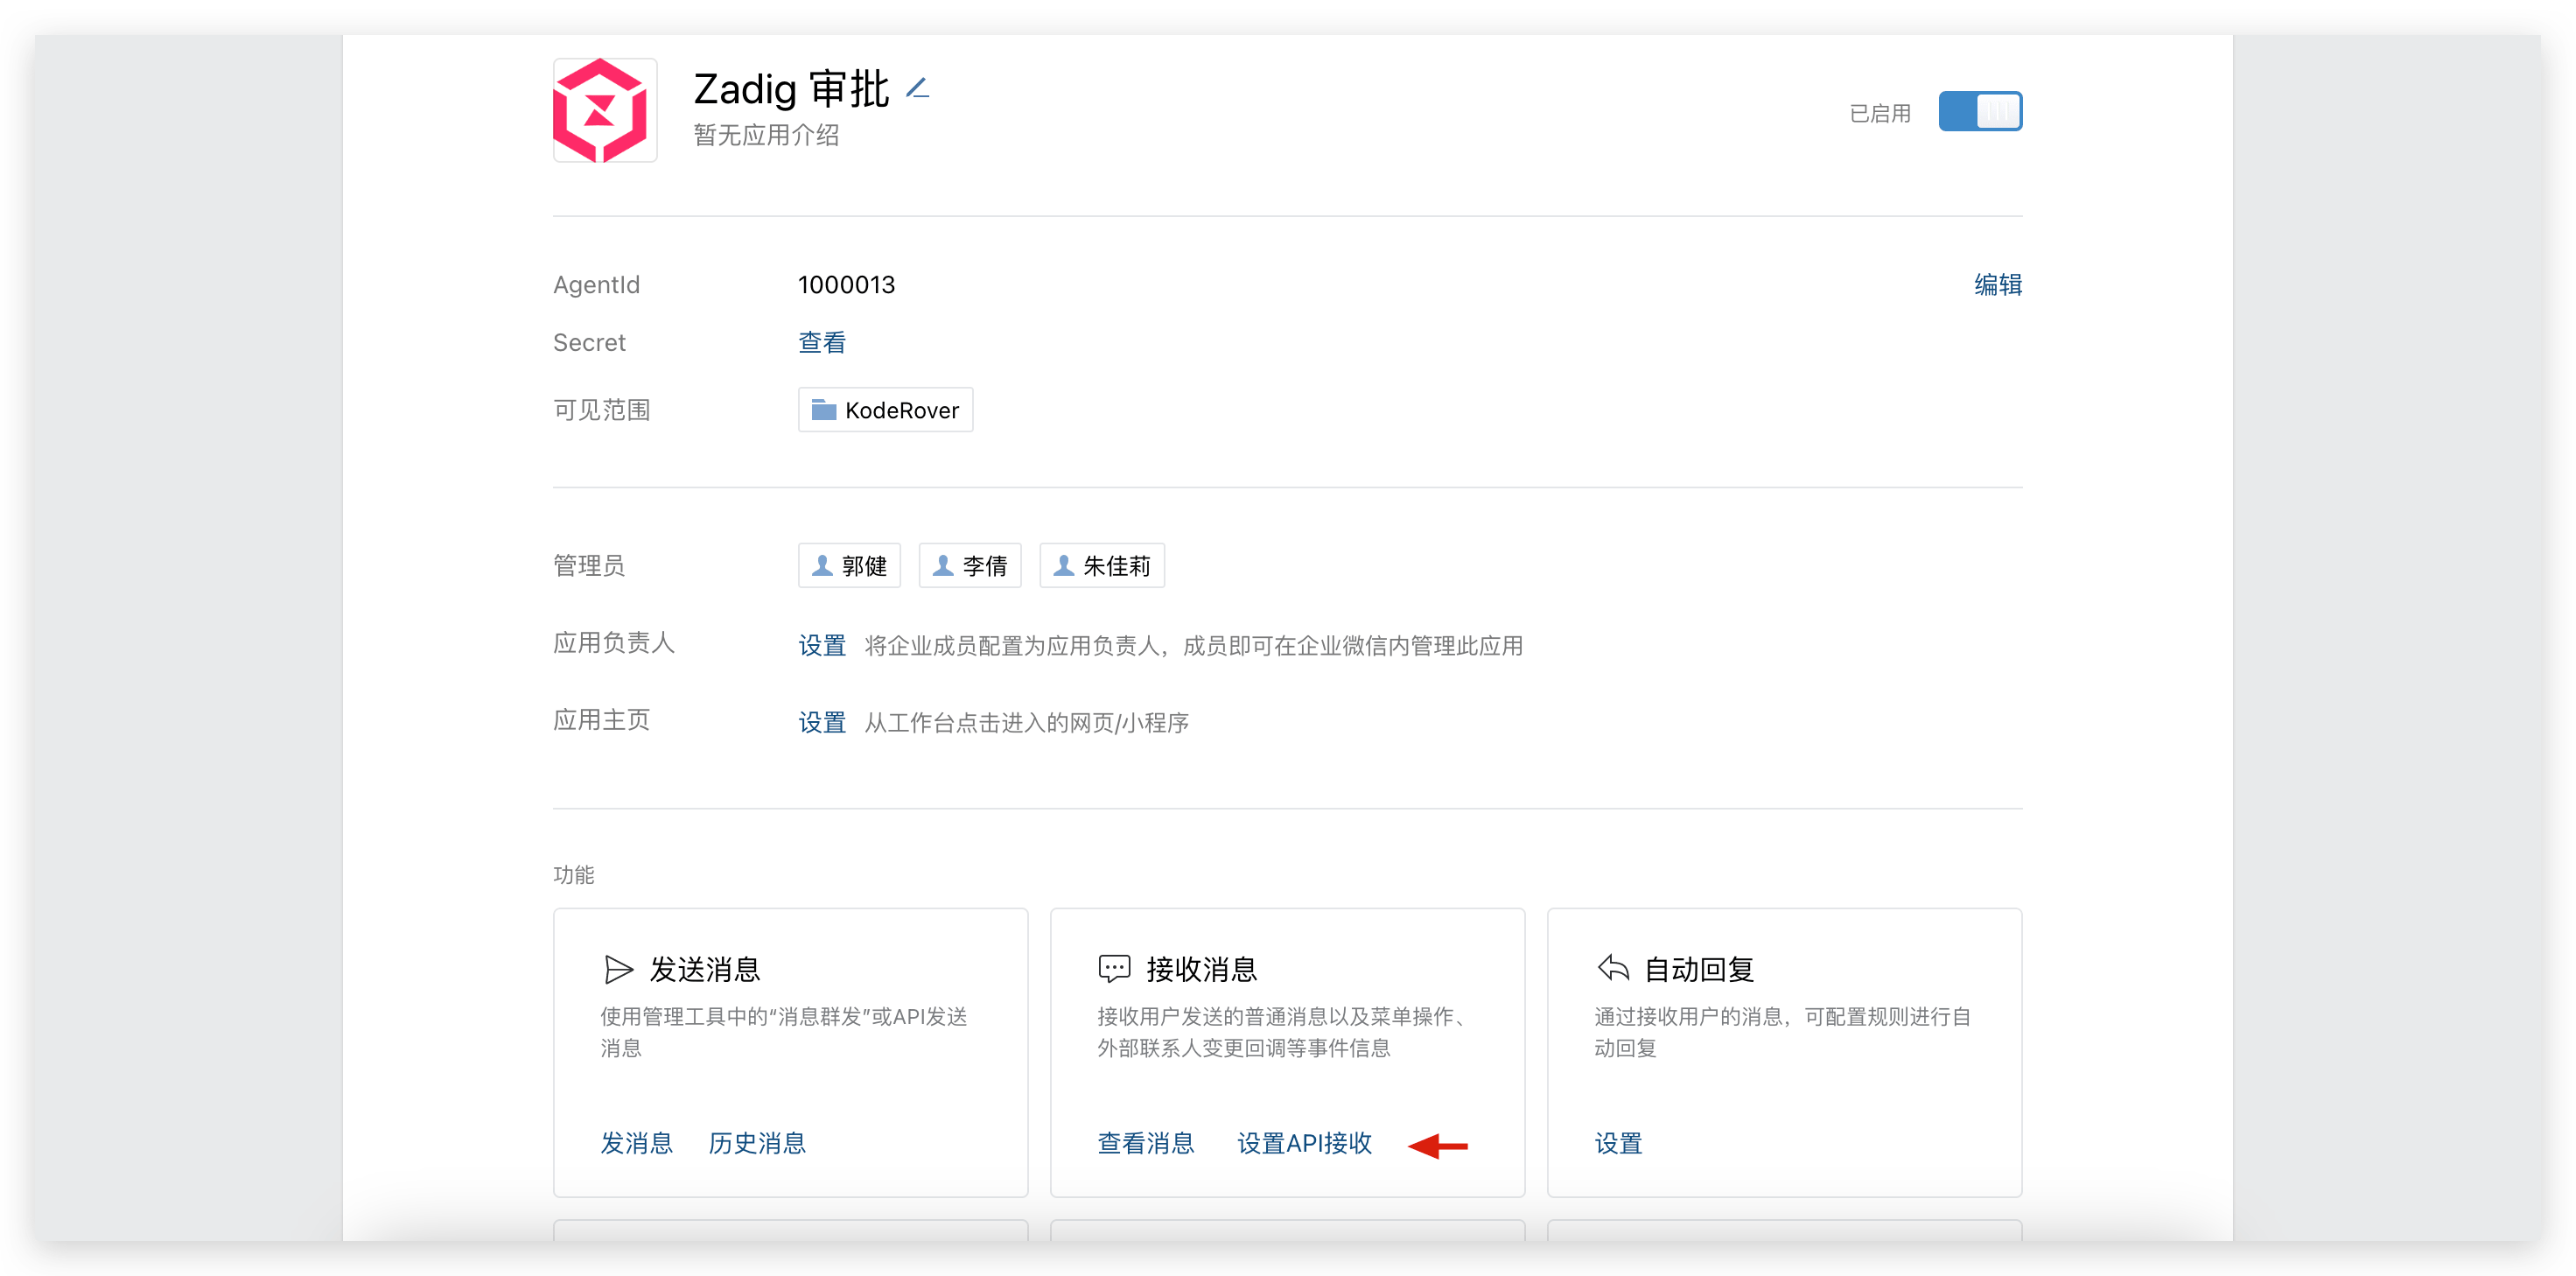
System Settings->Integrations->IM, and add the WeChat Work approval application, filling in theCorp ID,AgentID, andSecret, and obtain the callback address as shown below.

- Go to the WeChat Work backend, configure the "Receive Information" URL callback address in the created application, and obtain the
TokenandEncodingAESKey.
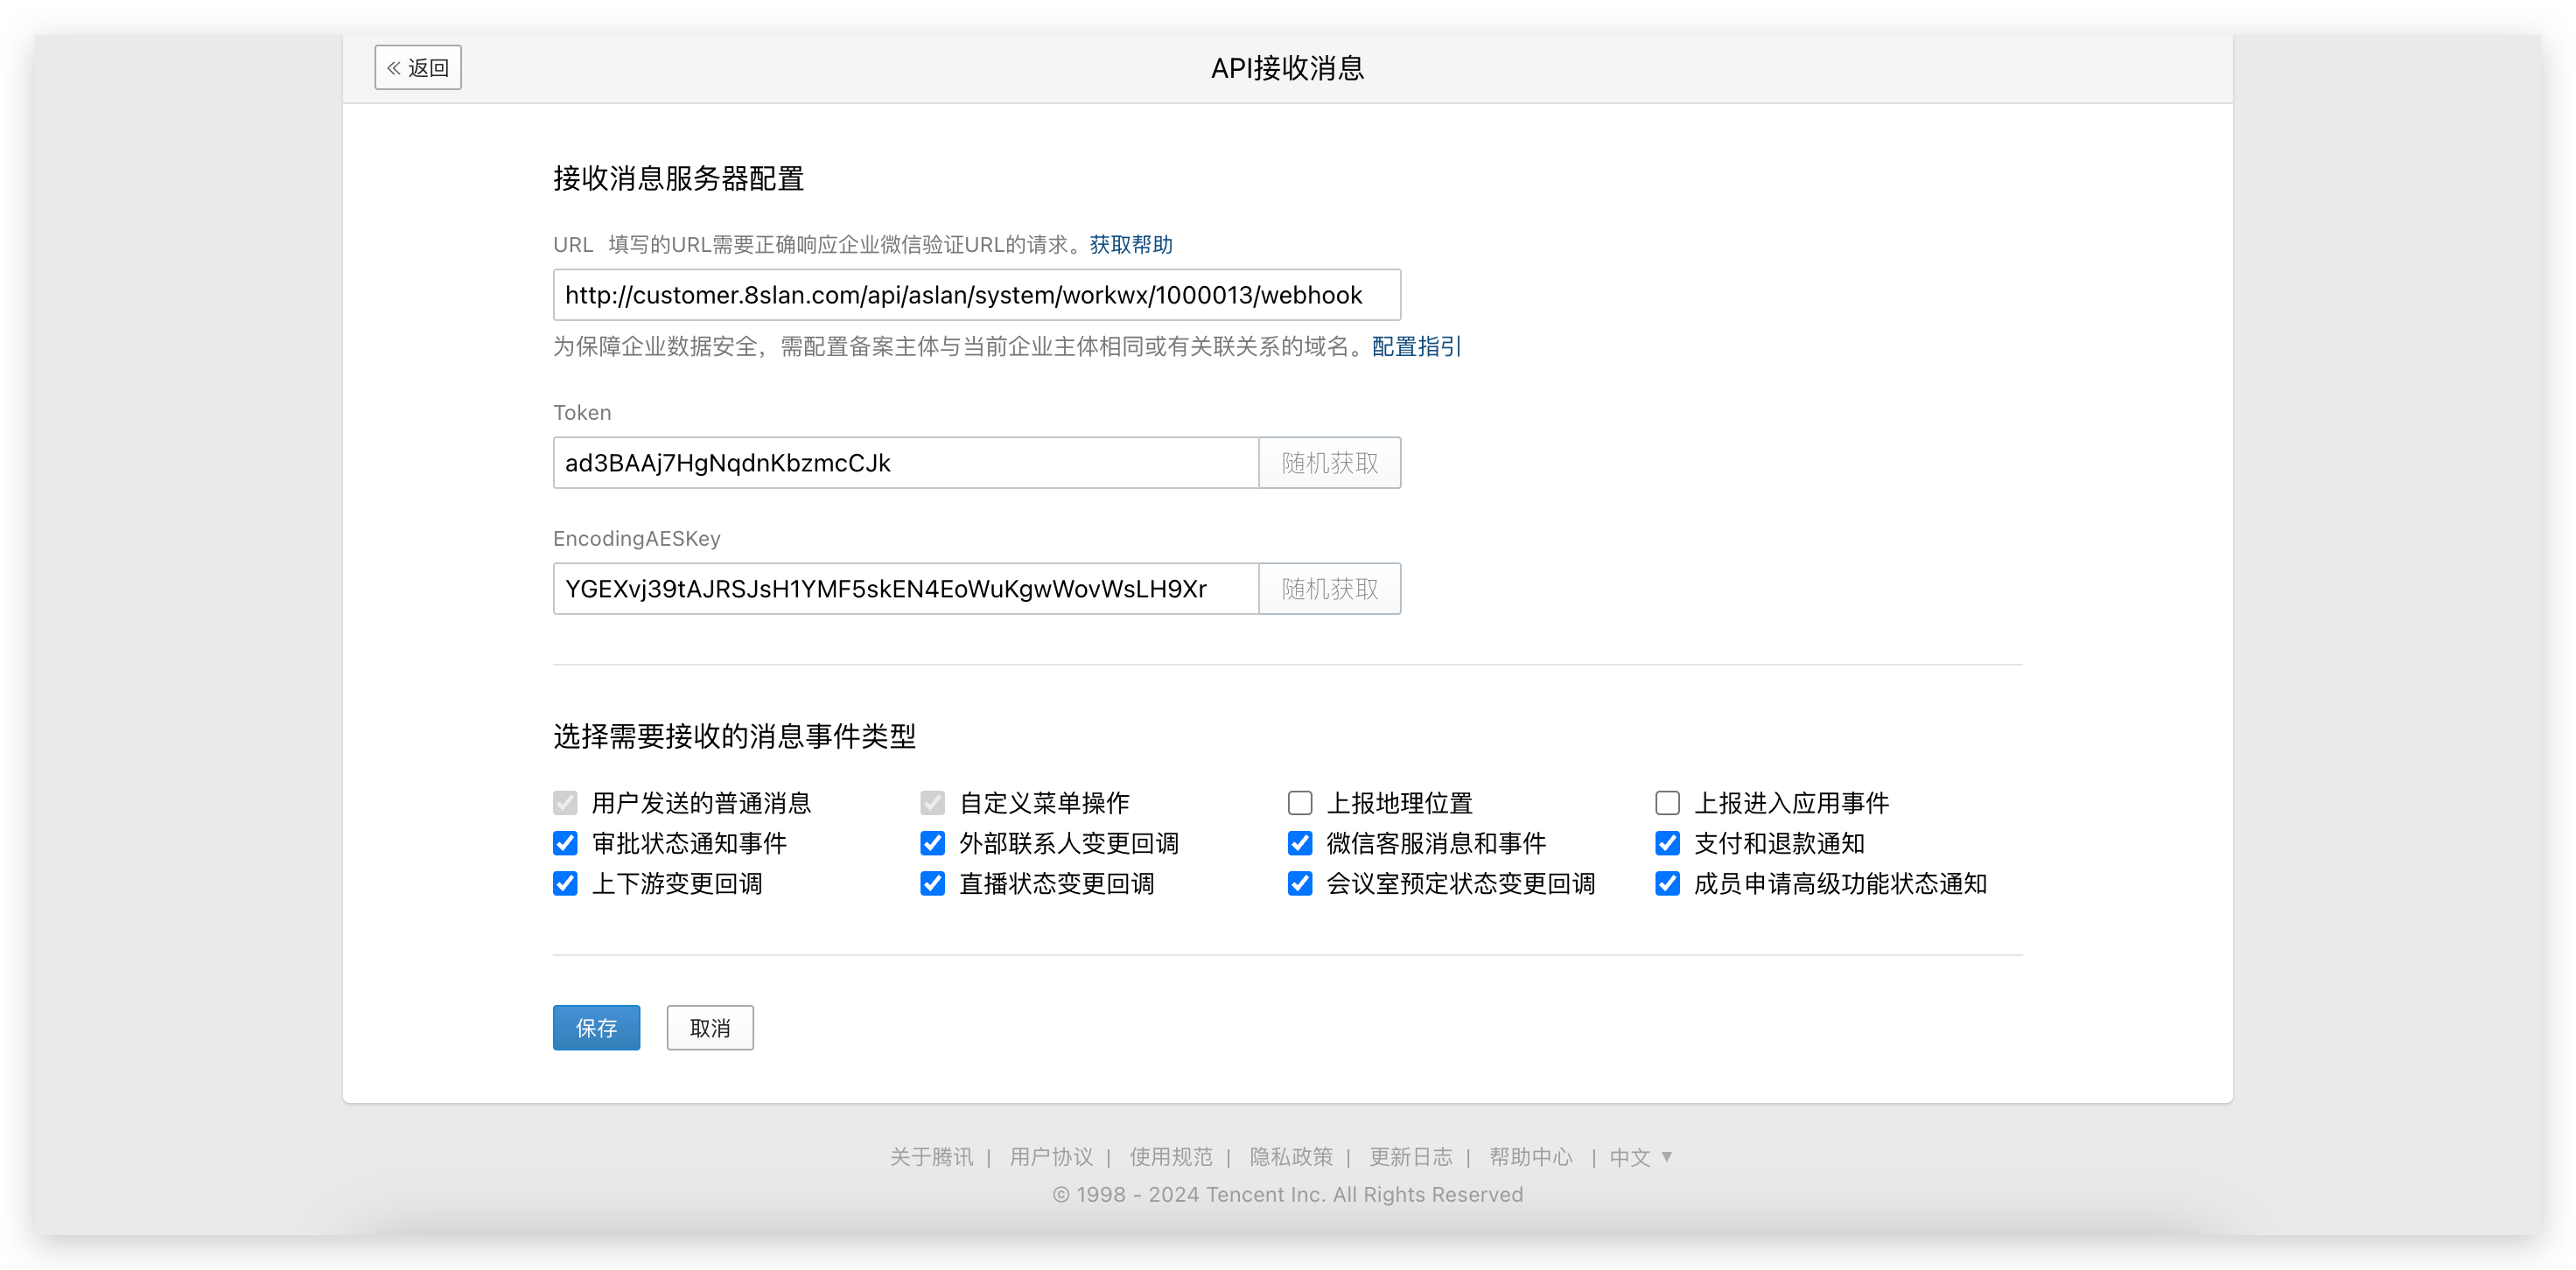
- In the Zadig approval integration, fill in the
TokenandEncodingAESKeyand save.
- In the WeChat Work backend, save the "Receive Information."
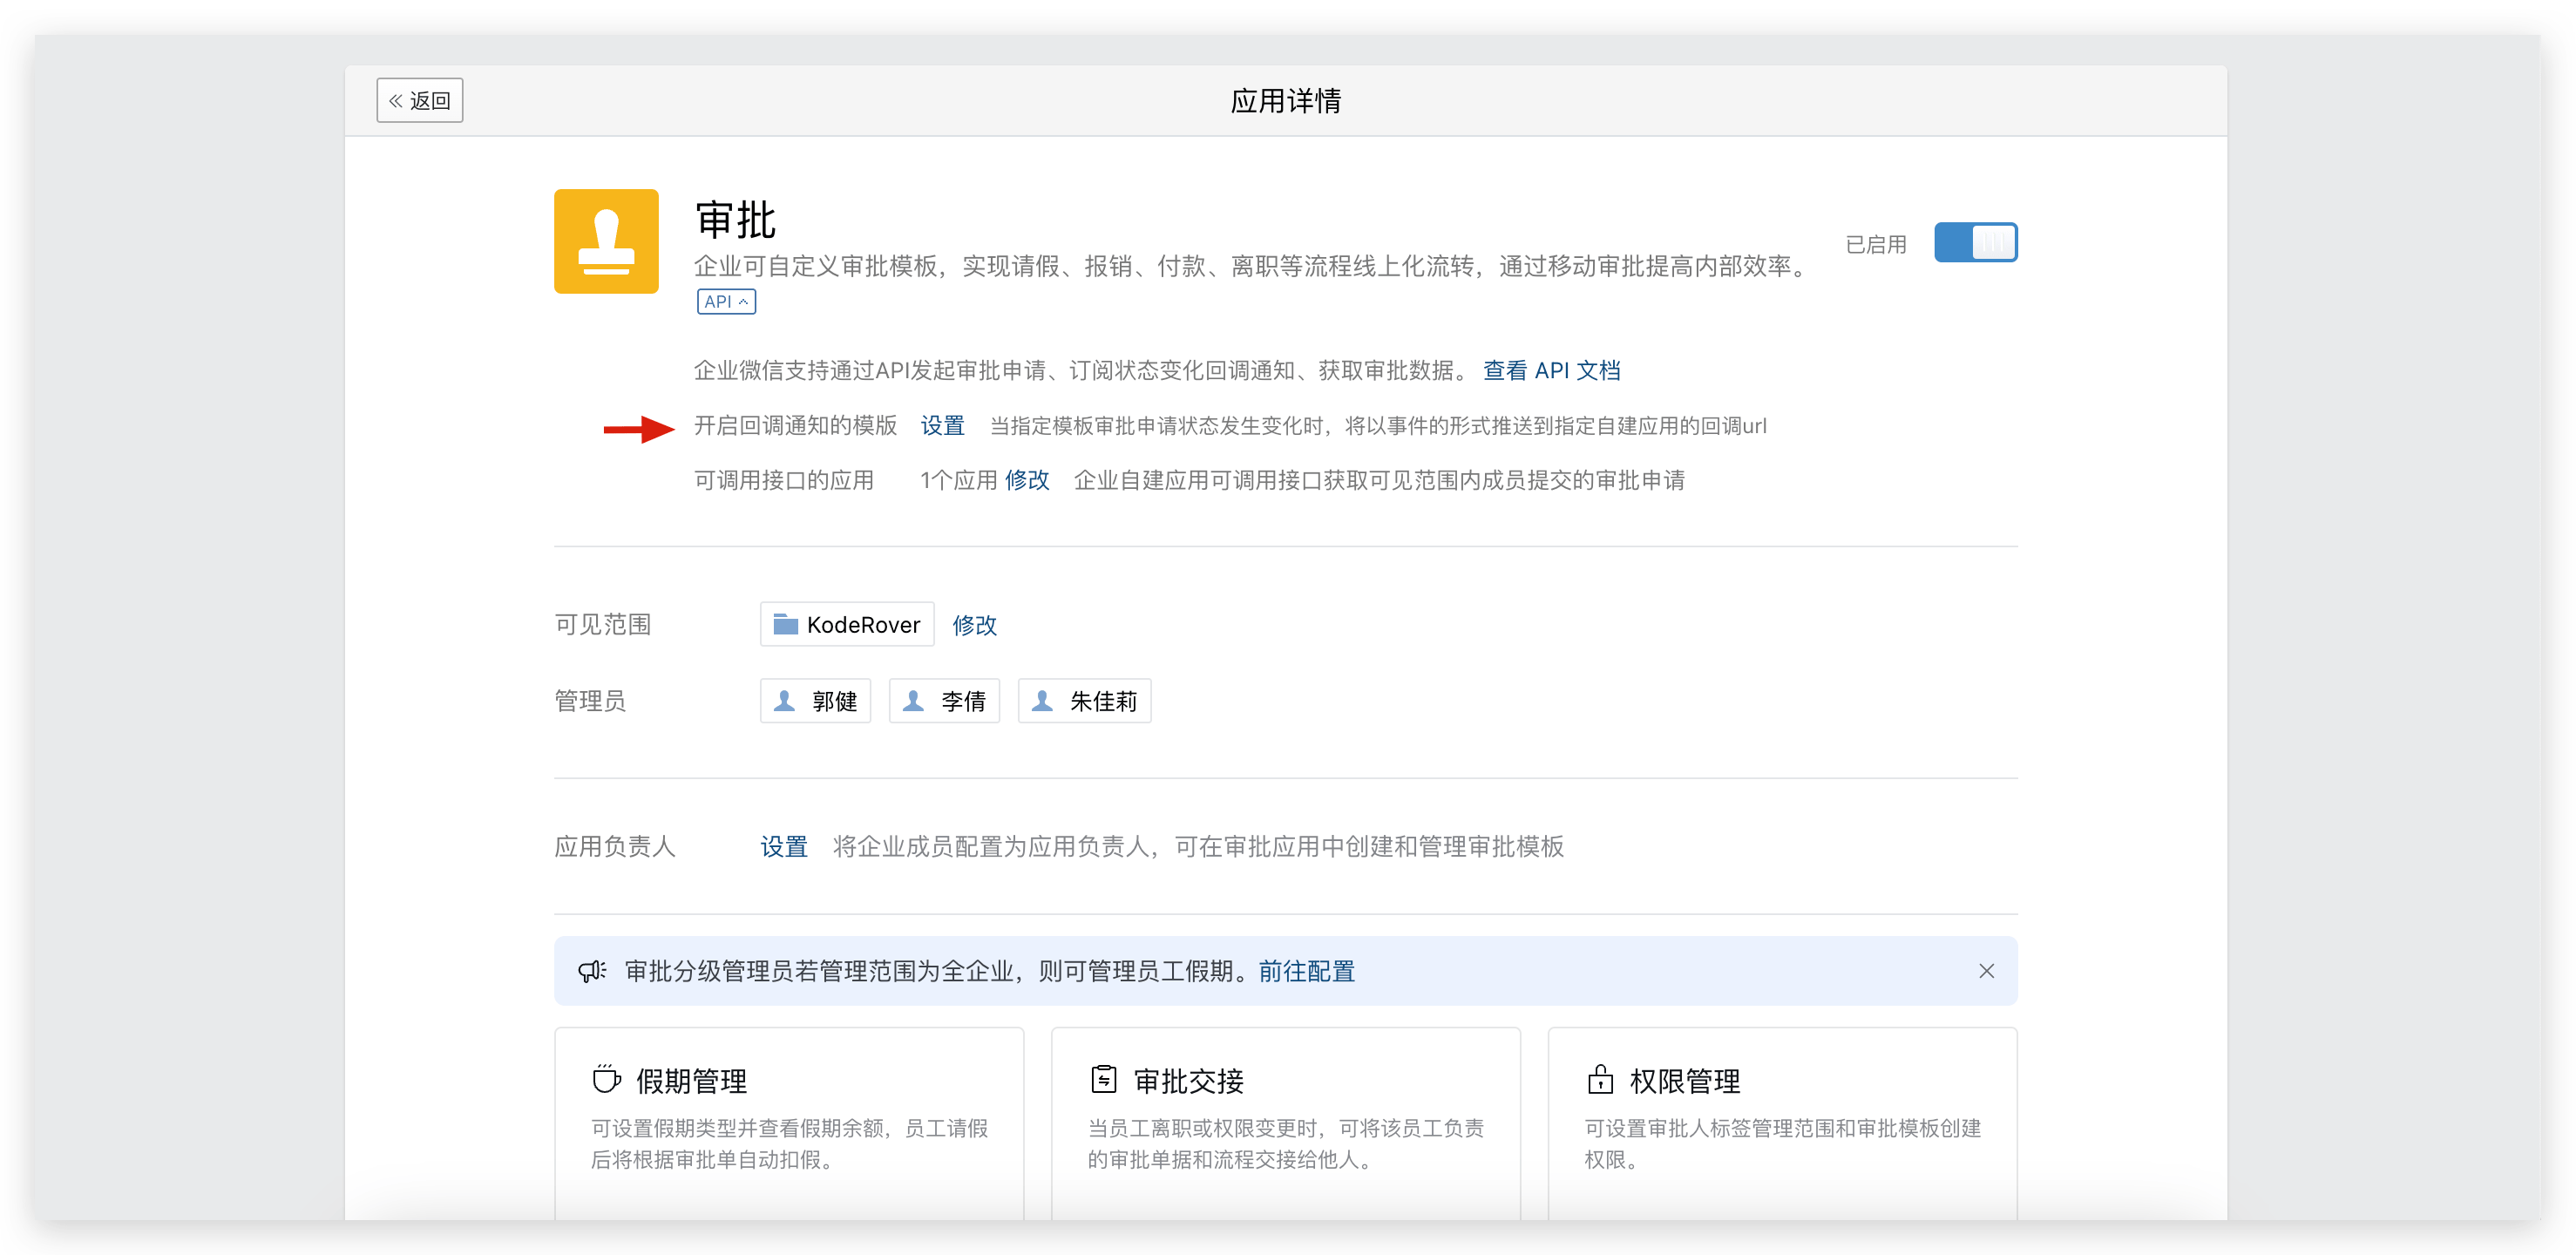
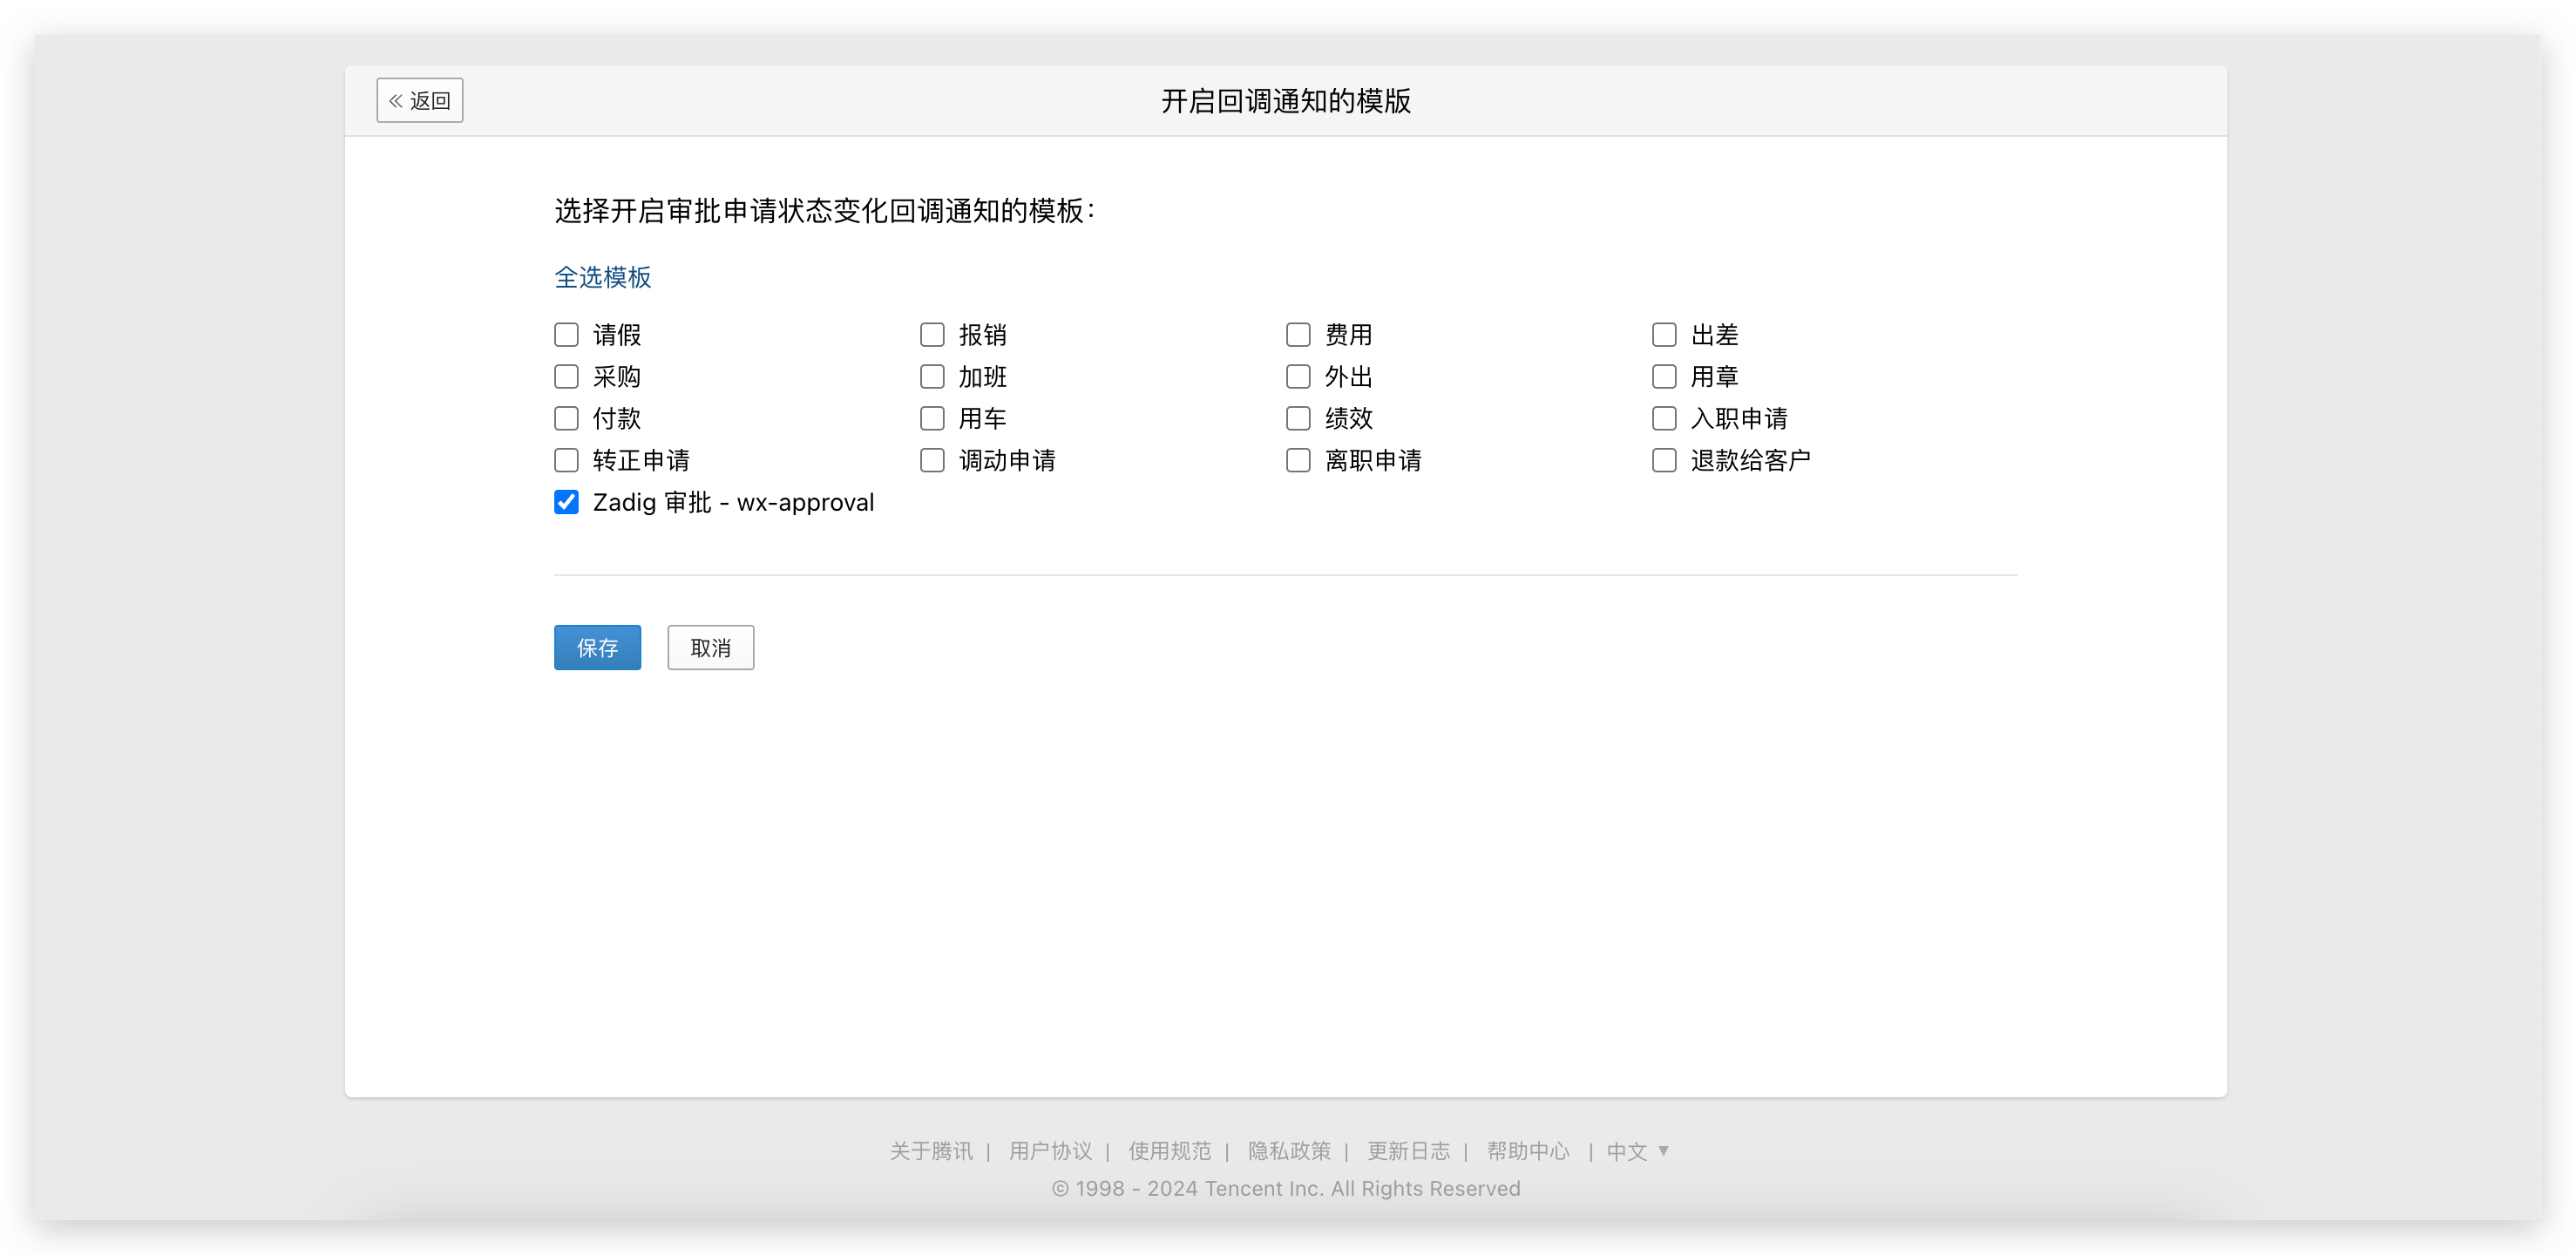
# Step 3: Enable the Callback Notification Template
Go to the WeChat Work backend, "Approval" application, and enable the callback address template.
# Extended Reading
# Using Feishu Approval in Zadig
Refer to Feishu approval
# Using Lark Approval in Zadig
Refer to Lark approval
# Using DingTalk Approval in Zadig
Refer to DingTalk Approval
# Using WeChat Work Approval in Zadig
Refer to WeChat Work Approval
