Jira
Jira
This article introduces how to integrate the project management system Jira on the Zadig system to achieve the two-way interconnection of Zadig + Jira.
# How to Configure
Click System Settings -> Integration -> Project Management -> Click Add.
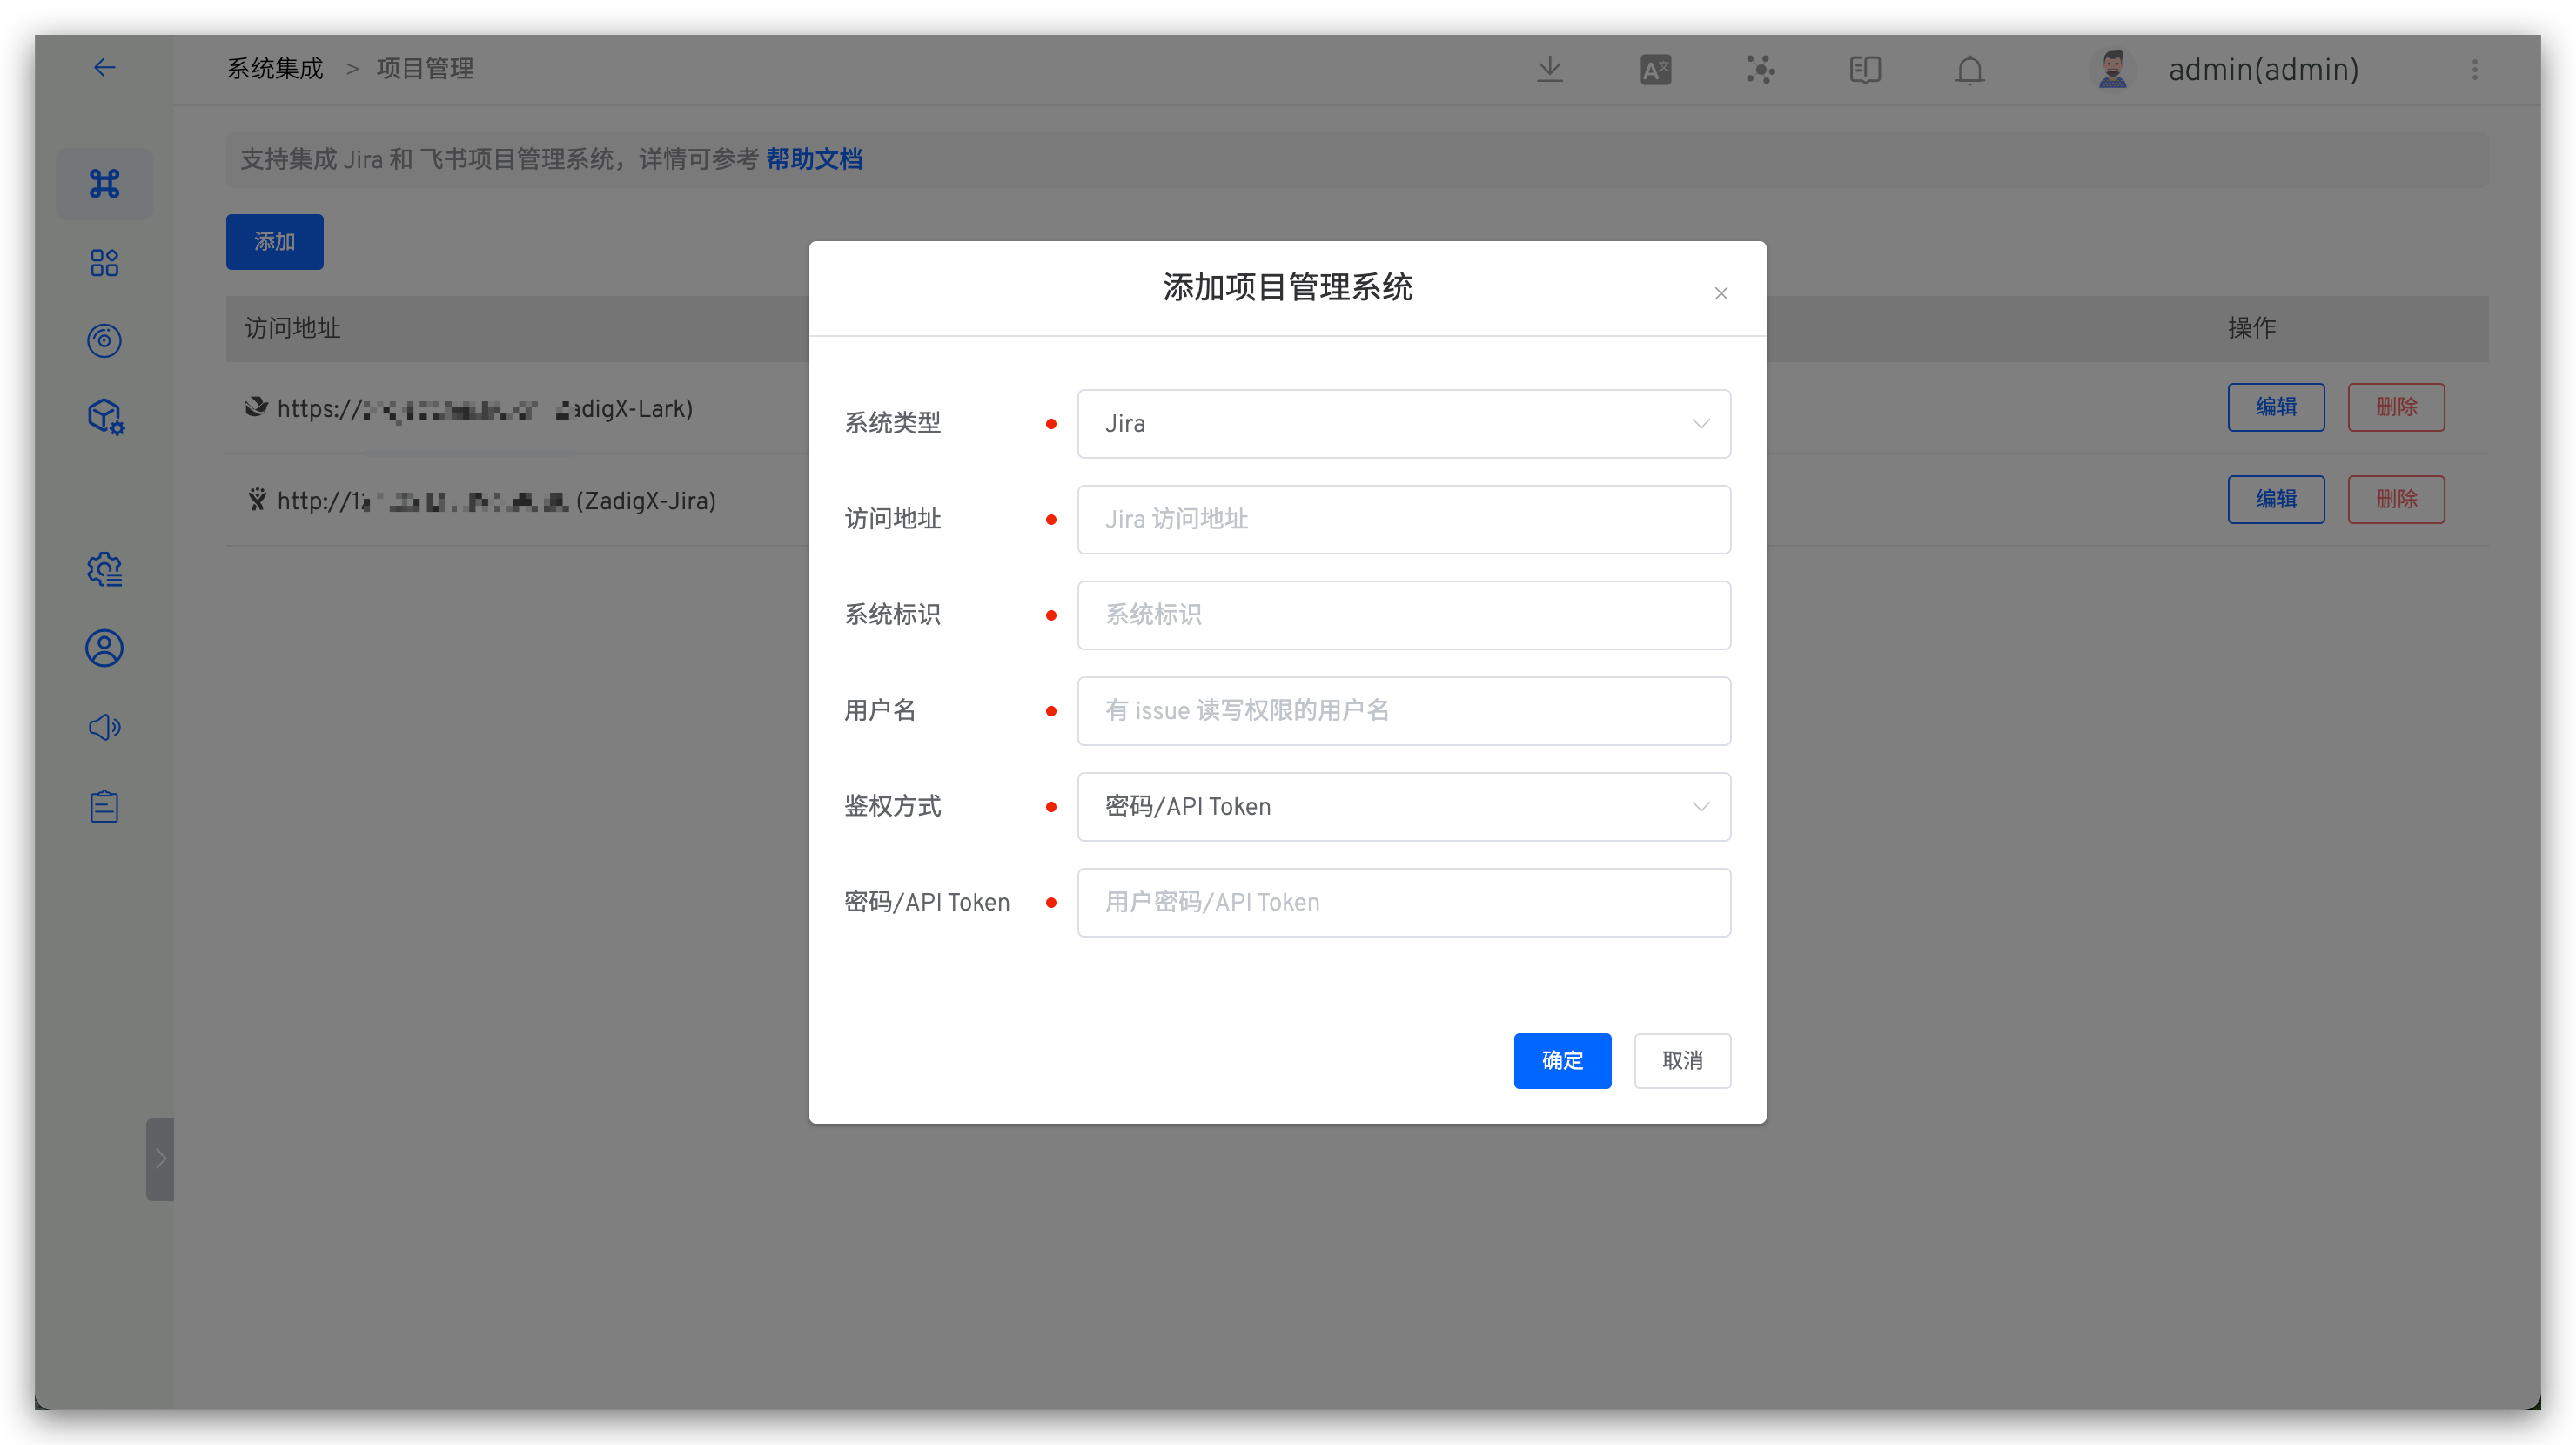
Parameter Description:
Type: Choose JiraAccess Address: Jira addressIdentity: Customized, to facilitate quick identification in the Zadig system; the system identifier must be uniqueUsername: A user with read permissions for IssuesAuthentication Method: Choose eitherPassword/API TokenorAccess TokenPassword/Token: The password or corresponding Token for the username (fill in when using thePassword/API Tokenauthentication method)Access Token: The Access Token used for authentication (fill in when using theAccess Tokenauthentication method)
Tip
The SaaS version can use the API Token from your Atlassian account for authentication, while the private deployment can use a password or Access Token for authentication.
After confirming that the information is correct, save it.
# Usage Scenarios
# Automatically Change Issues Through Workflows
Supports Jira project management tasks in the workflow, and automatically modify the specified Issue status through the workflow of Zadig with one click. For specific configuration, reference: JIRA Issue status changes.

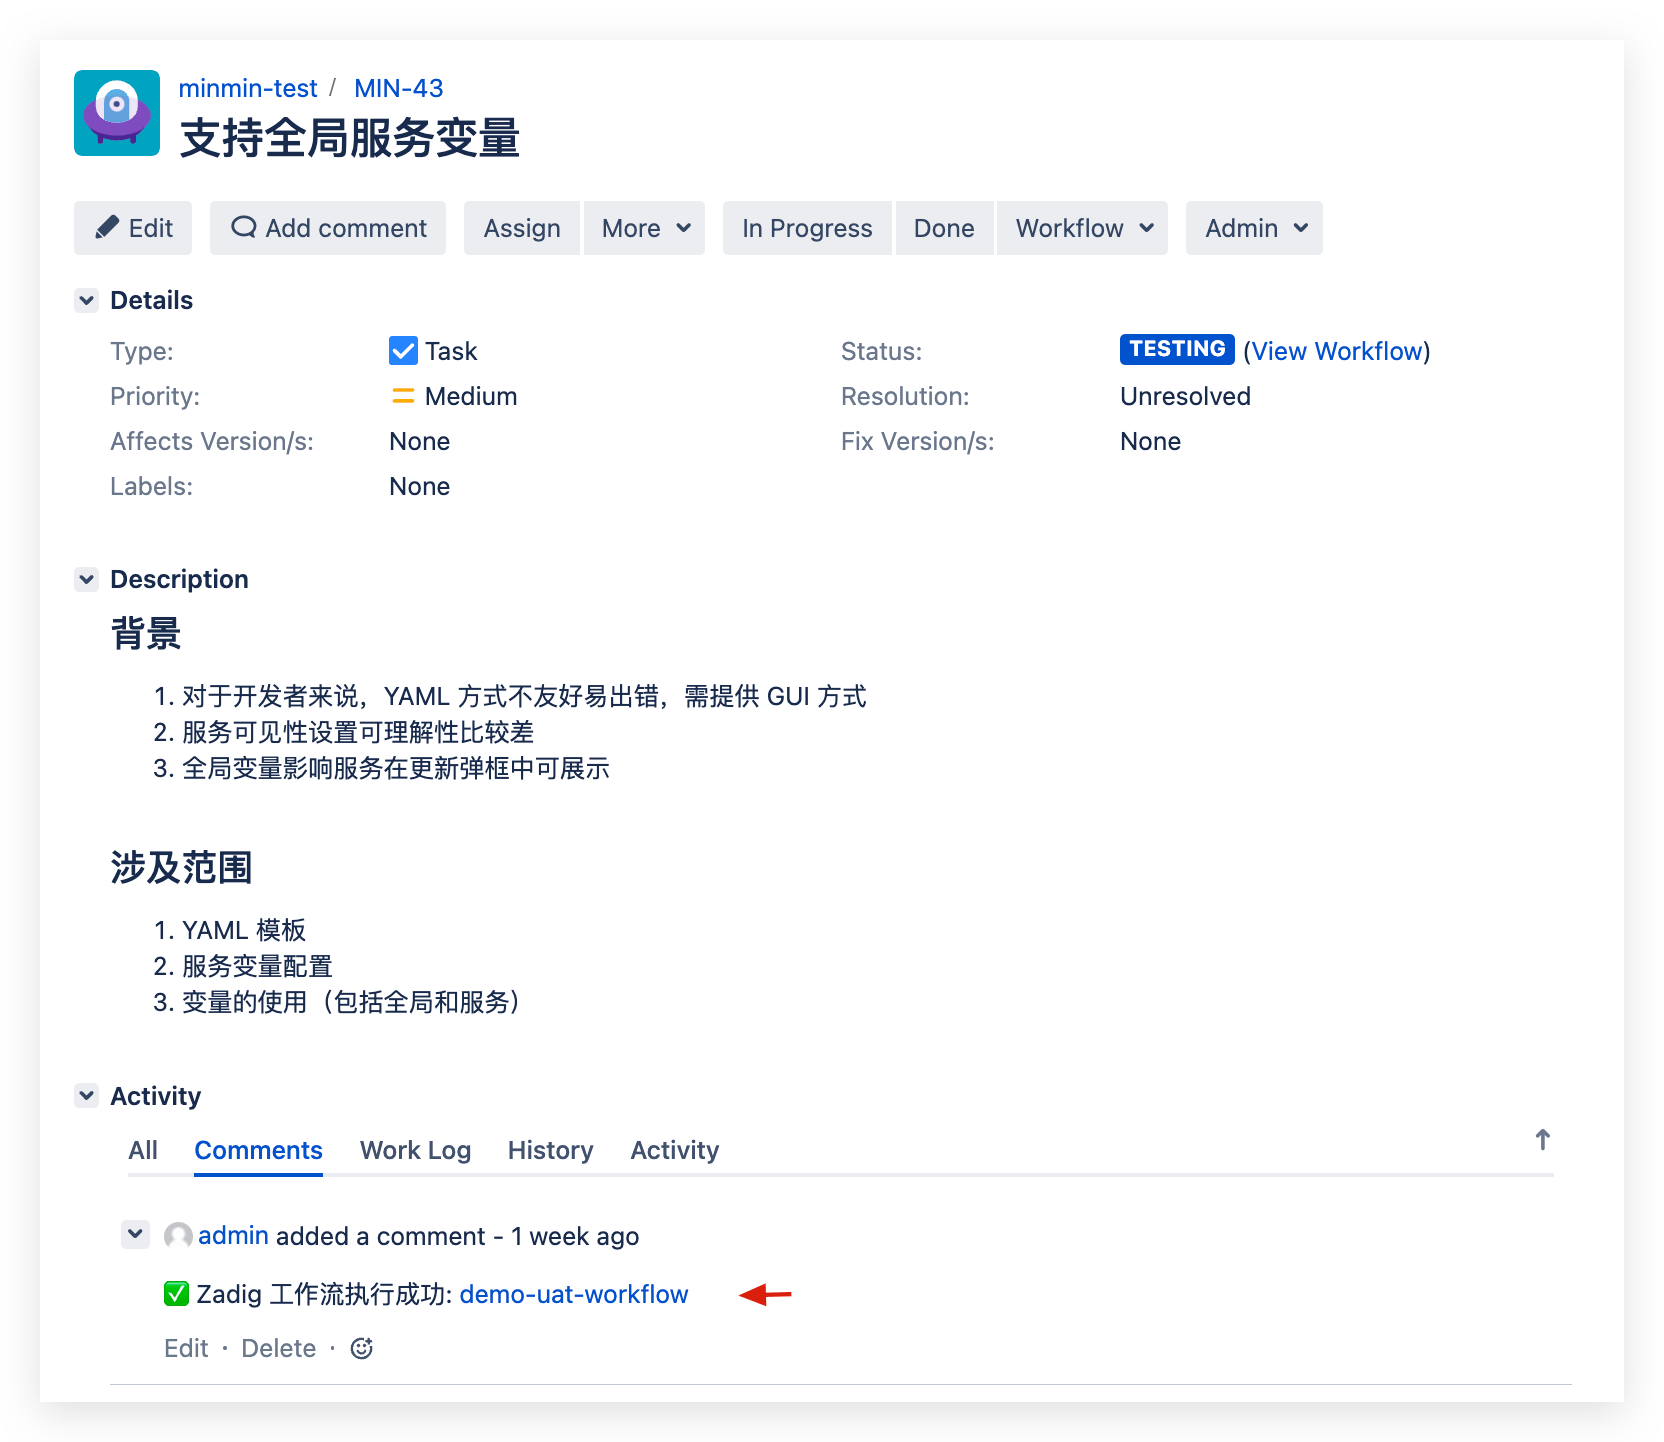
# Automatically Trigger Workflows with Jira Events
After configuring the Jira trigger in the workflow, the Zadig workflow can be automatically triggered when a Jira Issue changes. After the workflow execution is complete, the execution information will be commented on the corresponding Issue, enabling two-way tracking between Zadig and Jira. For specific configuration, reference: Jira Trigger.